Make An Easy Embroidery Hoop Wall Art For Spring
THIS POST MAY CONTAIN AFFILIATE LINKS. PLEASE SEE OUR FULL DISCLOSURE POLICY FOR DETAILS.
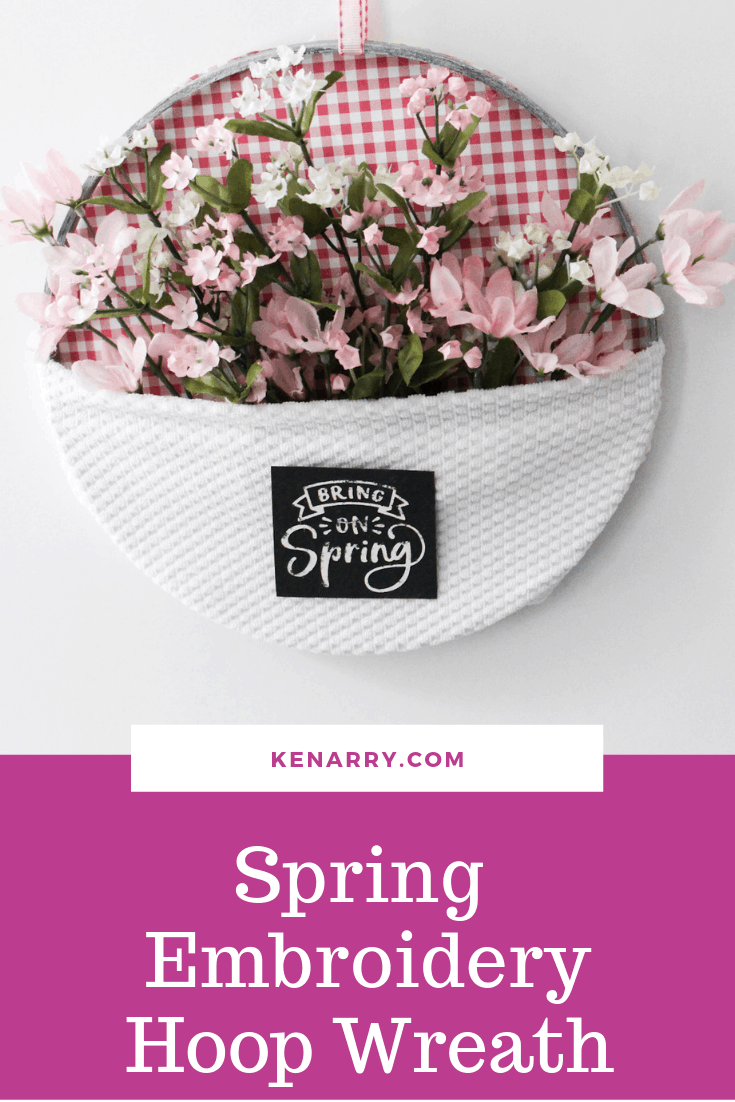
Bring on Spring with quick and easy embroidery hoop wall art. These sweet hoops can be made for under $10 and in less than 30 minutes!
Hello! Michelle from Our Crafty Mom here and I’m happy to be back to share a fun Spring craft today! I don’t know about you, but I am so ready for Spring! We have had some really tough snow storms, but that just makes Spring all the more enjoyable right? I think you appreciate it more after leaving behind freezing temps. So let’s get to the fun embroidery hoop wall art!
How to Make Embroidery Hoop Wall Art For Spring
Keep an eye out at thrift stores or yard sales for embroidery hoops. You can usually find a few for just a couple of dollars. One thing I love about embroidery hoop crafts is how versatile they are. You can completely change the look by adding fabric, or paper as I will show you today. Use what you have on hand and most of all, have fun with it!
What you need:
Want more ideas like this? Subscribe today to get our weekly Ideas in Your Inbox newsletter plus other exclusive gifts and offers — all for FREE!
Craft/DIY Tools Needed:
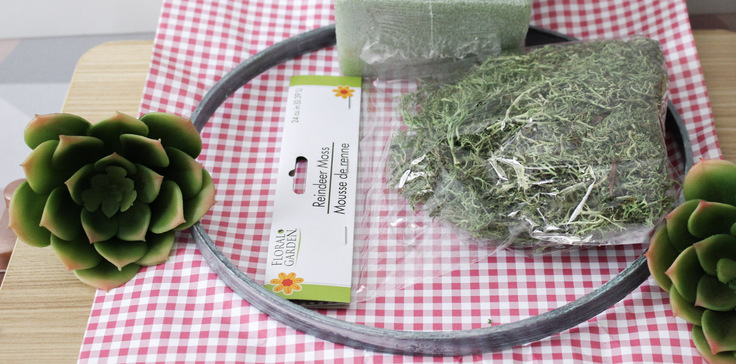
Supplies Needed:
- Embroidery Hoops
- Silk Stems – I used cherry blossoms
- Faux Succulents
- Pompom Trim
- Decorative Paper
- Fabric Scraps (for pocket)
- Ribbon for hanging
Instructions:
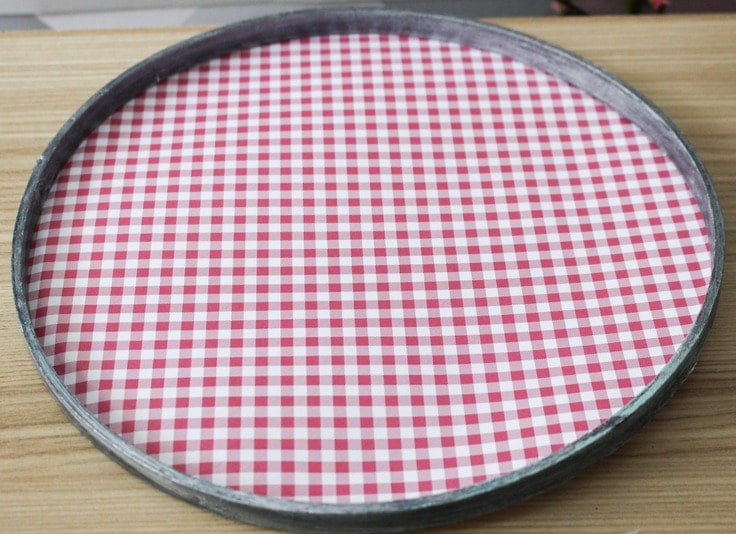
1. Trace embroidery hoop on paper
Lay the embroidery hoop on the decorative paper and trace it with a pencil. Cut the decorative paper to fit the hoop.
2. Cut fabric scrap for a pocket
Next, cut a piece of fabric to fit the lower half of the embroidery hoop and secure it with hot glue.

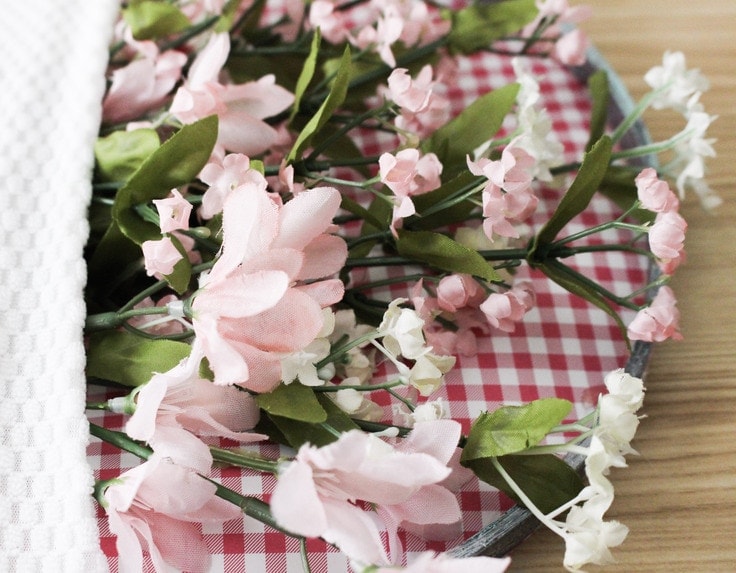
3. Add flowers
Trim the flowers that you choose to add and place them in the pocket. I originally thought I would need foam to hold the flowers, but it was not needed. I like how the pocket is flat without the foam. Add as many or as few flowers as you like.
4. Add ribbon for hanging
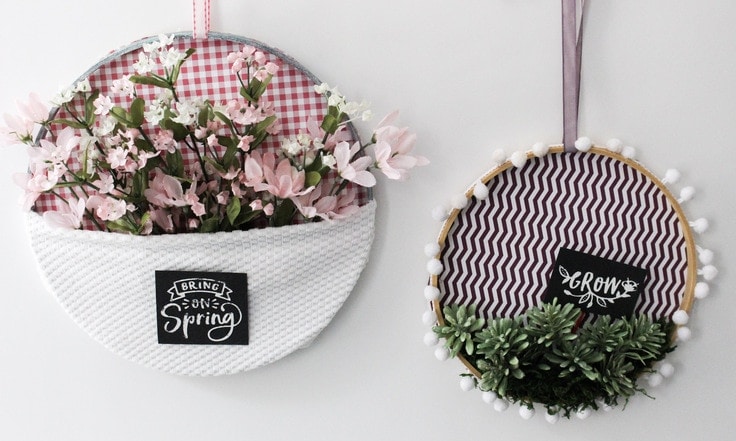
Finally, add a ribbon for hanging and you are done! You can add extra embellishments if you like. I had a few chalkboard tags that I made, so I added a Bring on Spring to the front of the pocket, but that is totally optional.
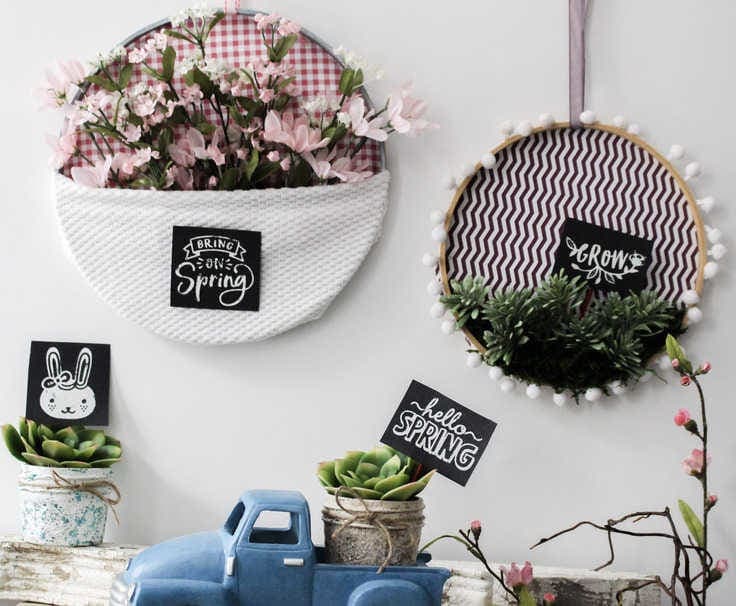
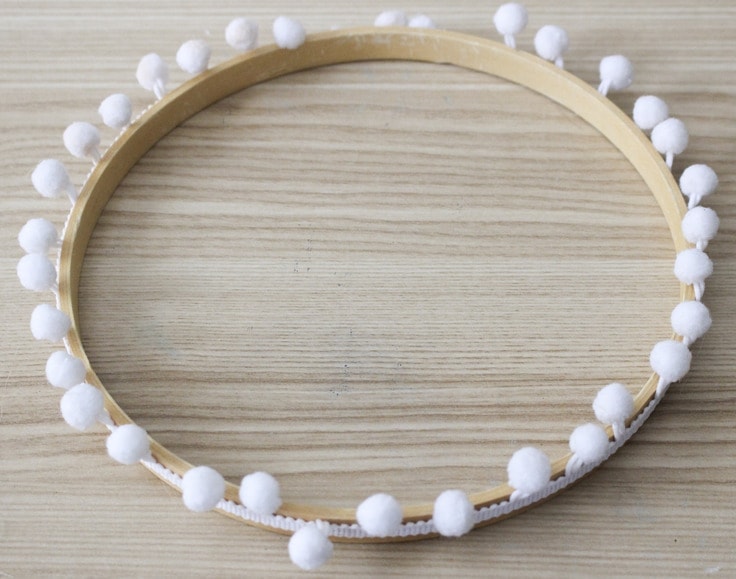
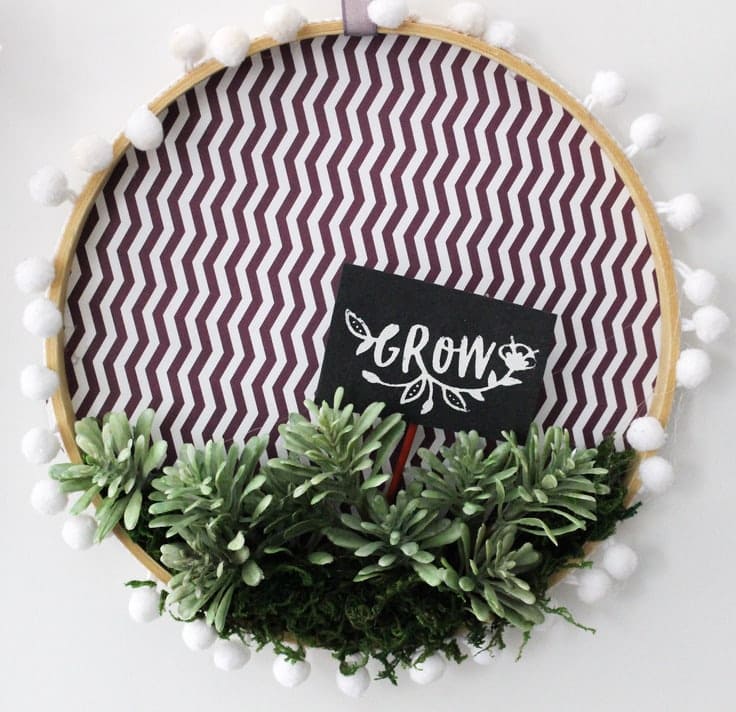
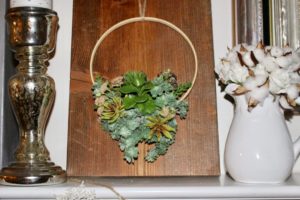
For the smaller embroidery hoop, I chose to add pompom trim around the hoop with hot glue as shown here:
Rather than add a pocket, I simply hot glued moss and small succulents. I try to use what I have on hand to keep costs down and love to mix things up. The pompoms are such a cute addition. Everything is better with pompoms!
I hope you enjoyed these quick and easy Spring embroidery hoops. I sure had fun making them!
Love the ideas you see here on Ideas for the Home by Kenarry®? Subscribe today to get our FREE DIY & Craft Planning Calendar, plus our weekly Ideas in Your Inbox newsletter filled with creative tips and exclusive offers!
What’s Next?
Embroidery Hoop Wagon Wheel Wreath – Our Crafty Mom

Embroidery Hoop Succulent Planter – Our Crafty Mom

DIY Faux Succulent Embroidery Hoop Wreath – Our Crafty Mom
You may also enjoy these wreath ideas on Ideas for the Home by Kenarry® –