Front Door Wreath From An Embroidery Hoop
THIS POST MAY CONTAIN AFFILIATE LINKS. PLEASE SEE OUR FULL DISCLOSURE POLICY FOR DETAILS.
Make a super simple front door wreath out of an embroidery hoop. It’s an elegant way to dress up your front door, and a perfect craft for beginner DIYers.
Hi Kenarry friends! I’m Rita Joy and I’ve been busy over at Harbour Breeze Home working on some door projects. I’ve cleaned them up, painted the insides a new color, and added sparkly new hardware. Now it’s time for the finishing touch ~ a wreath.
I don’t have much experience with wreaths hanging on doors, but thought this embroidery hoop wreath would be the perfect finishing touch for our front door.

How to Make a front door wreath out of an embroidery hoop
This wreath will decorate your front door. It doesn’t take much effort or time. And the best part is it timeless, so it is the perfect wreath to hang up between seasons.
Disclosure: This blog post contains affiliate links for products or services we think you’ll like. This means if you make a purchase from one of these links, Ideas for the Home by Kenarry® will make a small commission at no additional cost to you so we can keep the great ideas for the home coming your way. All opinions expressed are derived from personal experience.
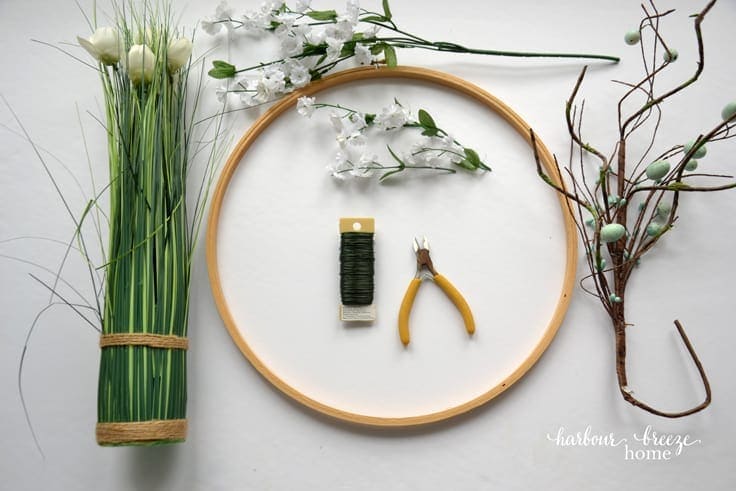
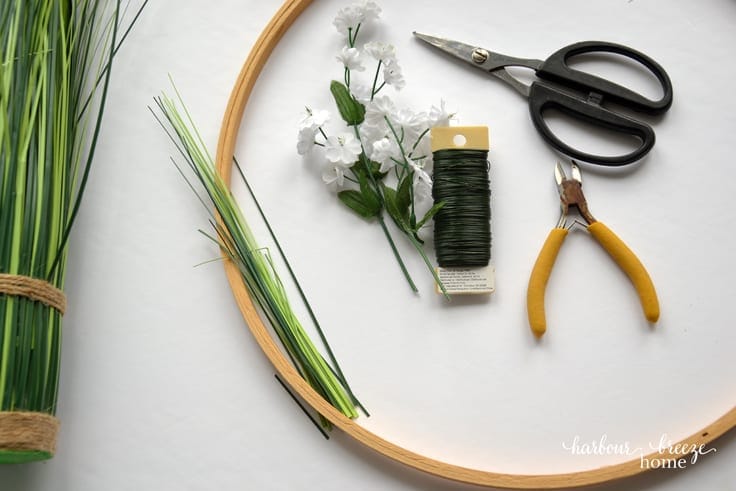
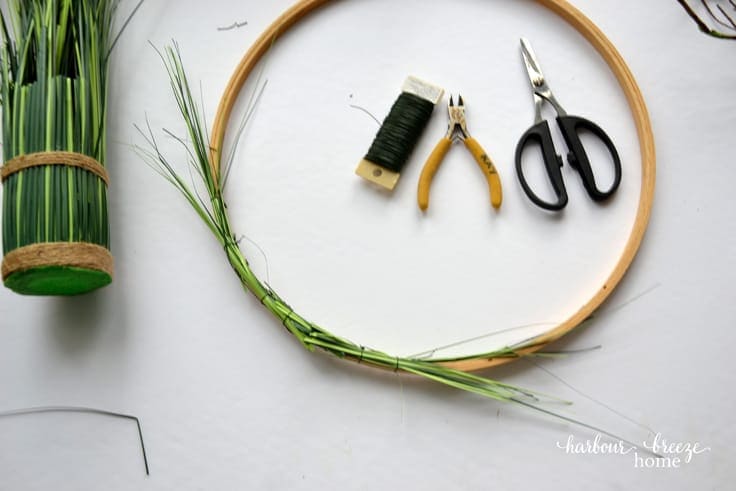
Supplies Needed:
- 14-inch embroidery hoop
- Faux flowers of your choice
- Thin floral wire
- Wire cutters
- Jute twine or ribbon for hanging (not pictured)
- Scissors
Instructions
I broke down this tutorial into easy steps with pictures. Follow along and make your own. It’s so easy!
1. Arrange the greenery
Loosely lay out the arrangement of flowers until you get a look you like, starting with the background greenery first.
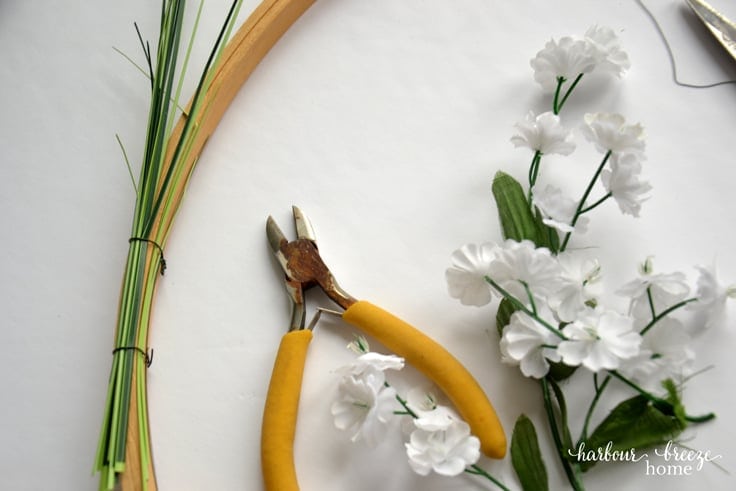
2. Attach the greenery to the hoop
Using the floral wire, attach the greenery in small bunches.
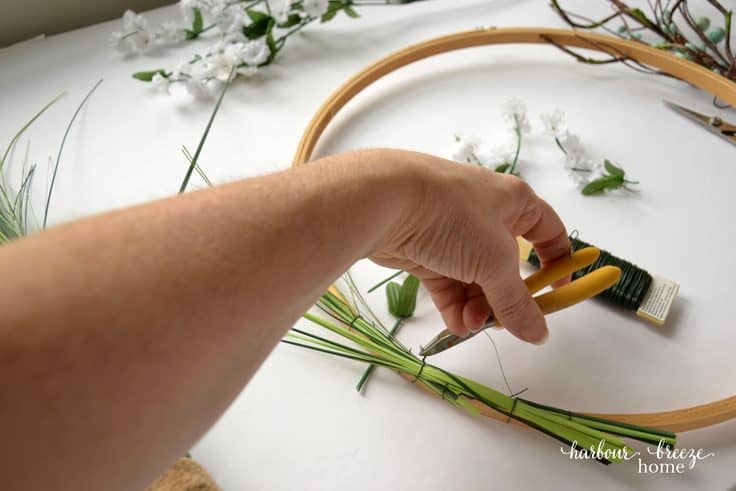
Use the tip of the wire cutters (or needle-nosed pliers) to grab the wire and twist it to make it tight against the hoop. Lay the twisted ends up against the side so they don’t rub and scratch against the door when hung.
3. Wire on additional greenery going the opposite direction
However, if you choose to do an arrangement going the entire circumference of the hoop, have the greenery always pointing in the same direction.
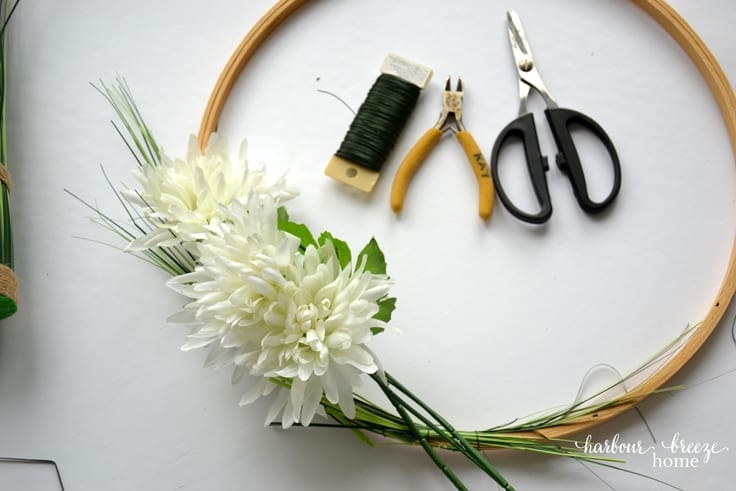
4. Layer on some flowers
This is where the project gets interesting. As you lay on flowers, stand back and look at the wreath from a distance. As I began this process, I totally changed directions from my original plan. Rather than use only small flowers, I decided to make these 3 larger ones the focal point of the arrangement.
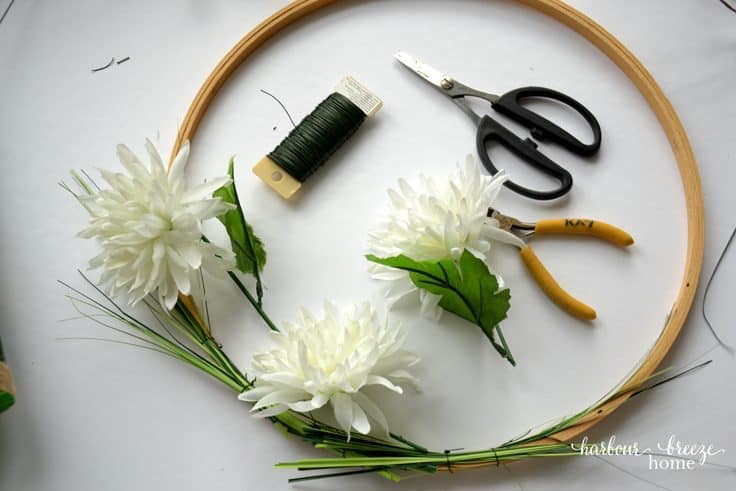
5. Attach the flowers one at a time, or in 1 small bunch at a time
Just like when you are making a flower arrangement in a vase, it is best to work with one bloom or a small bunch at a time. This allows for much more precise positioning of each flower.
6. Fill in the arrangement with small buds and green leaves
Once the large buds are in place, fill out the arrangement by adding in small buds and green leaves. Again, stop and look at the arrangement from a distance as you are working on it to see what needs to be added.
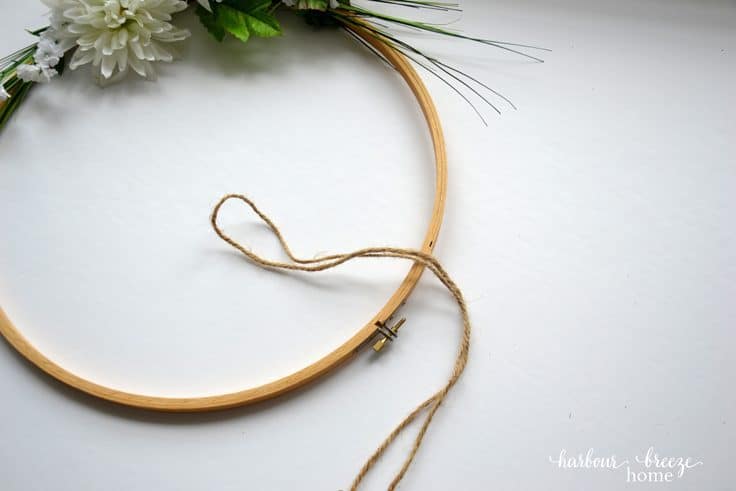
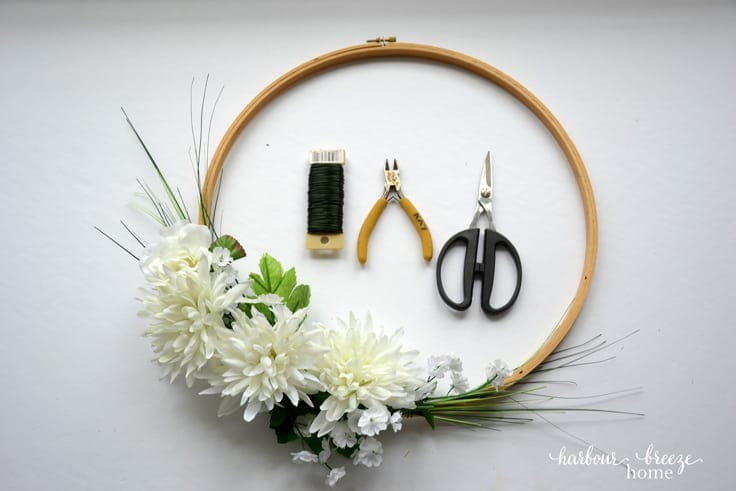
7. Attach a ribbon or string to the top and hang it up!
The ribbon can be a major design element to a wreath. I chose to use jute for this one, but a wide burlap ribbon would also look really nice. The wreath would also look fantastic with this Leather Wreath Hanger!
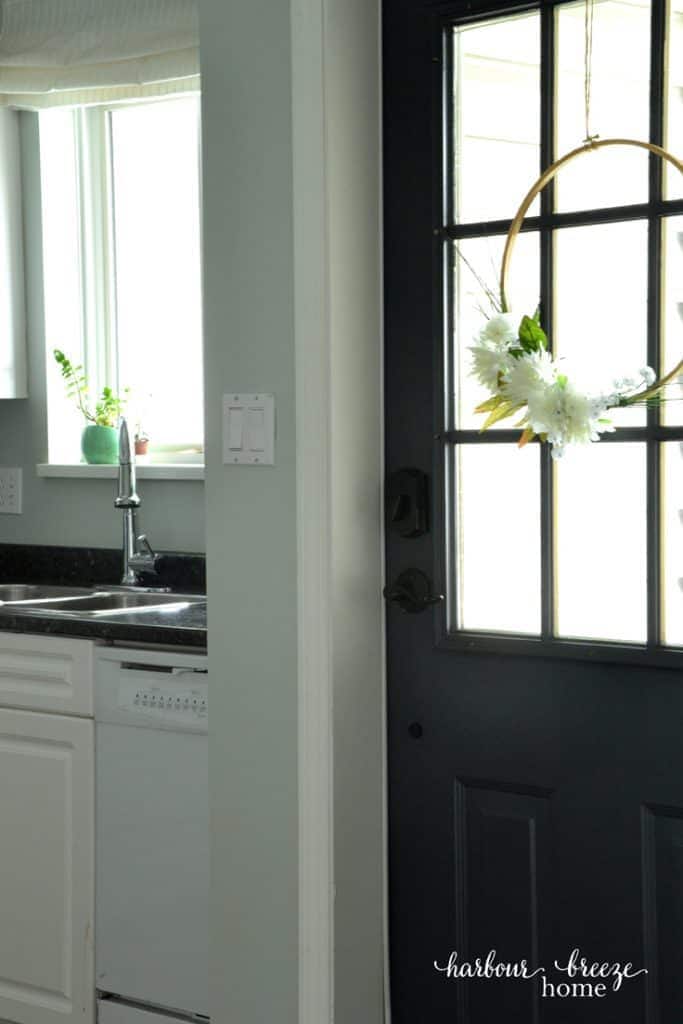
This embroidery hoop wreath has a special place of honor on the inside of our door. I wanted it to be a pop of pretty, as it is seen from the living room, dining room, and kitchen!
Love the ideas you see here on Ideas for the Home by Kenarry®? Subscribe today to get our FREE DIY & Craft Planning Calendar, plus our weekly Ideas in Your Inbox newsletter filled with creative tips and exclusive offers!
What’s Next?
For more crafty projects for your home, you may want to check these out:
You may also be inspired by these wreath ideas on Ideas for the Home by Kenarry®: