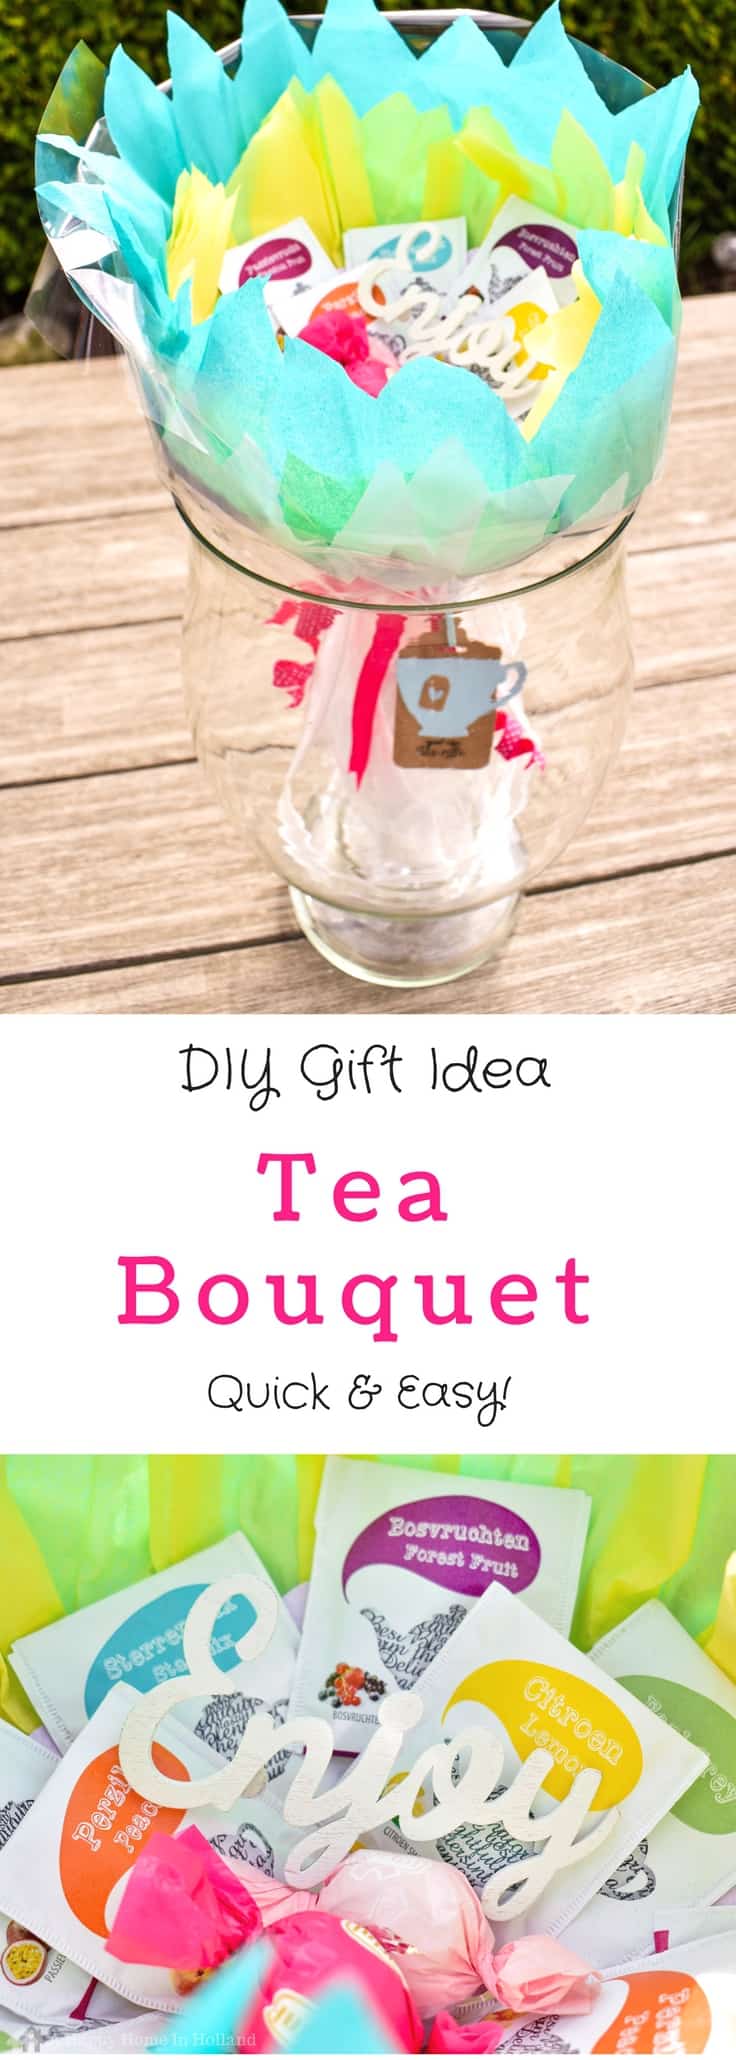
DIY Tea Bouquet Gift Idea
THIS POST MAY CONTAIN AFFILIATE LINKS. PLEASE SEE OUR FULL DISCLOSURE POLICY FOR DETAILS.
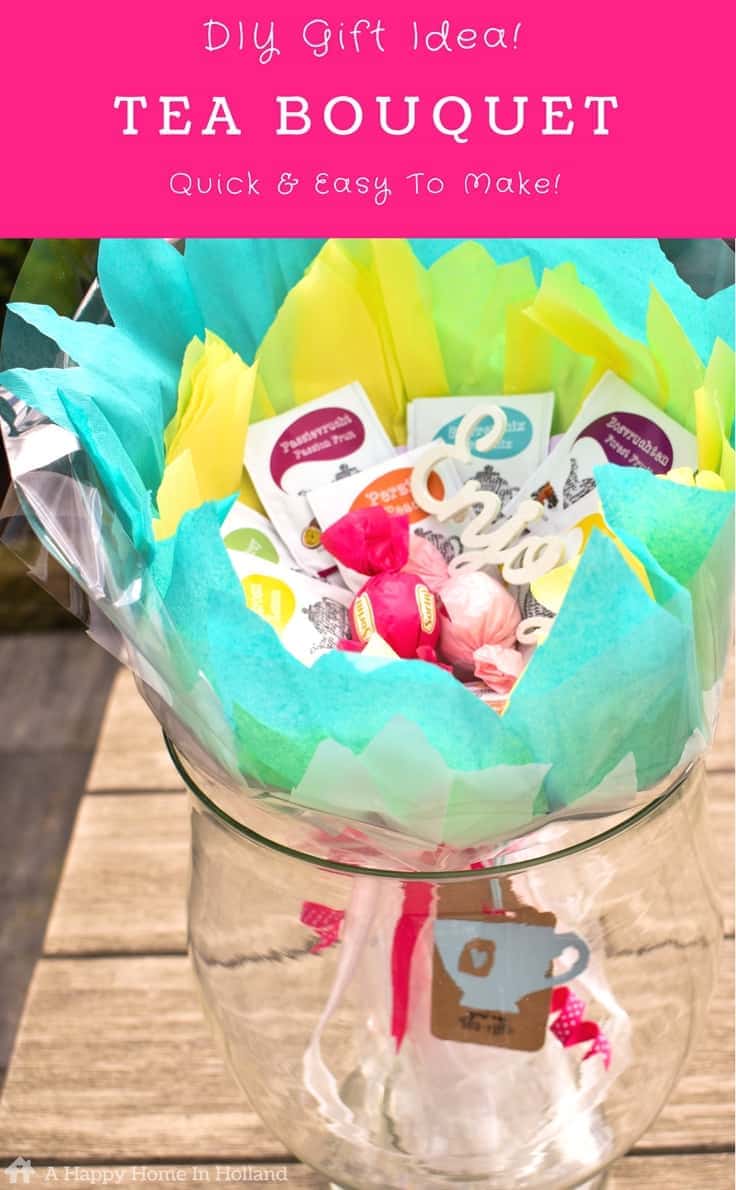
This simple and sweet DIY Tea Bouquet Gift Idea is suitable for many occasions. In addition to making a great gift for Mother’s Day, it is also perfect as a small token gift to show someone that you are grateful for something and that you care about them.
Learn how to create a beautiful DIY tea bouquet. You only need a few supplies to make it, and because it is so pretty, this budget gift idea really makes an impact and is usually always warmly received.
A Craft Inspired by the Netherlands
Hi, it’s Sam here from A Happy Home In Holland back again with another simple DIY craft idea to share with all you lovely Kenarry readers.
If you have read some of my other posts that I have shared in the past here on Kenarry, you will know that I often share ideas that are inspired by the life I lead and the things I see living here in the Netherlands.
This month’s idea is no exception.
The Dutch are very social souls and LOVE their tea and coffee. Nearly every social engagement revolves around drinking tea or coffee.
Because of this, these little Tea Bouquets are often a popular choice when it comes to Mother’s Day, Birthday, Get Well and Teacher Appreciation gifts.
How to Make a DIY Tea Bouquet
Disclosure: This blog post contains affiliate links for products or services we think you’ll like. This means if you make a purchase from one of these links, Ideas for the Home by Kenarry® will make a small commission at no additional cost to you so we can keep the great ideas for the home coming your way. All opinions expressed are derived from personal experience.
What You Need
- Selection of individually packaged tea sachets (these teas are similar)
- Foil wrapped chocolates or candy
- Crepe paper (assorted colors) or tissue paper
- 12″ x 12″ thin coloured/patterned card stock
- Sticky tape
- Double sided sticky tape
- Florists wire (or pipe cleaner)
- Clear cellophane
- Assorted ribbon
- Gift tag or note card
Instructions
1. Make The Wrapper For The Tea Bouquet
Cut of 3 x 20″x 45″ lengths of crepe paper in contrasting colors.
Fold each piece back and forth to create a concertina or accordion effect (I made my folds about 1 inch wide).
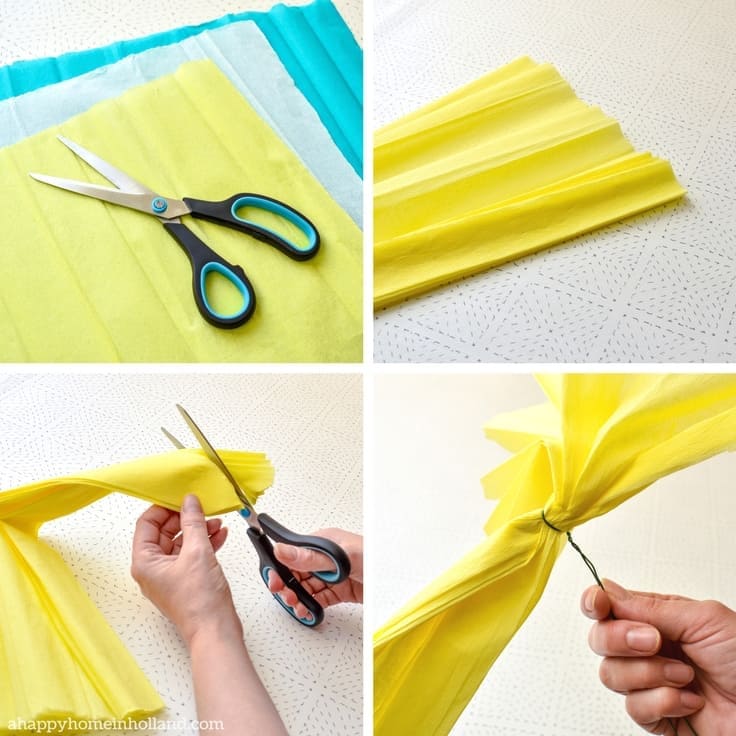
On the piece you are going to use on the inside (the yellow one), cut the ends into points, then use your florist wire (or pipe cleaner) to bind the crepe paper in the middle. Fold the ends out to make a fan shape and secure with double sided sticky tape.
Now take the other two pieces (turquoise and white) cut just one of the ends into a point.
Open out the two pieces of crepe paper and lay them on top of each other with the top one lying about 1/2″ higher than the other one.
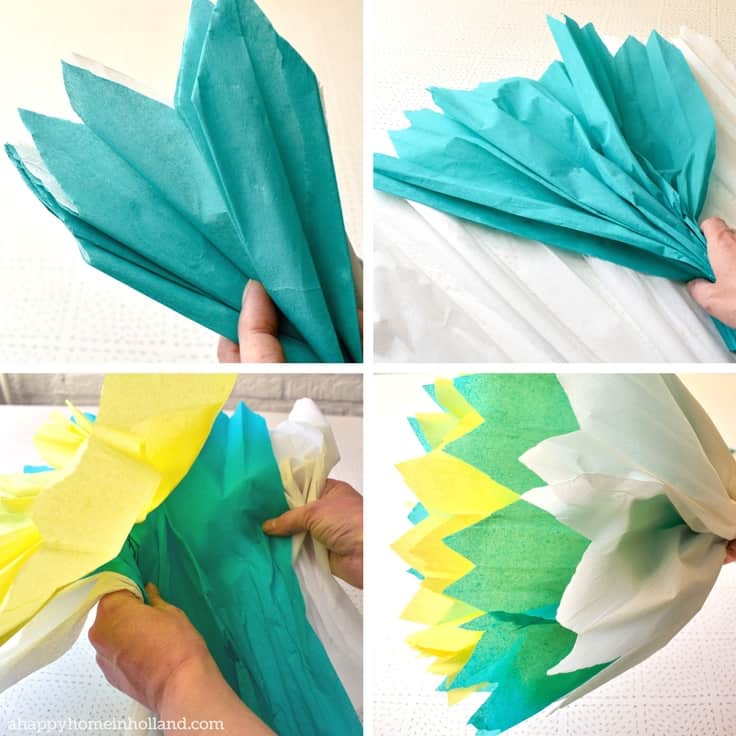
Now wrap these around the outside of the yellow fan and secure the edges with double sided sticky tape. Gently twist the paper at the bottom around the florists’ wire to make a stem and bind with tape.
2. How To Attach The Sachets Of Tea
Take your piece of thin card and fold into 4 to make a smaller square, then fold it half diagonally to create a triangle. Use the handle of your scissors to press down on the creases.
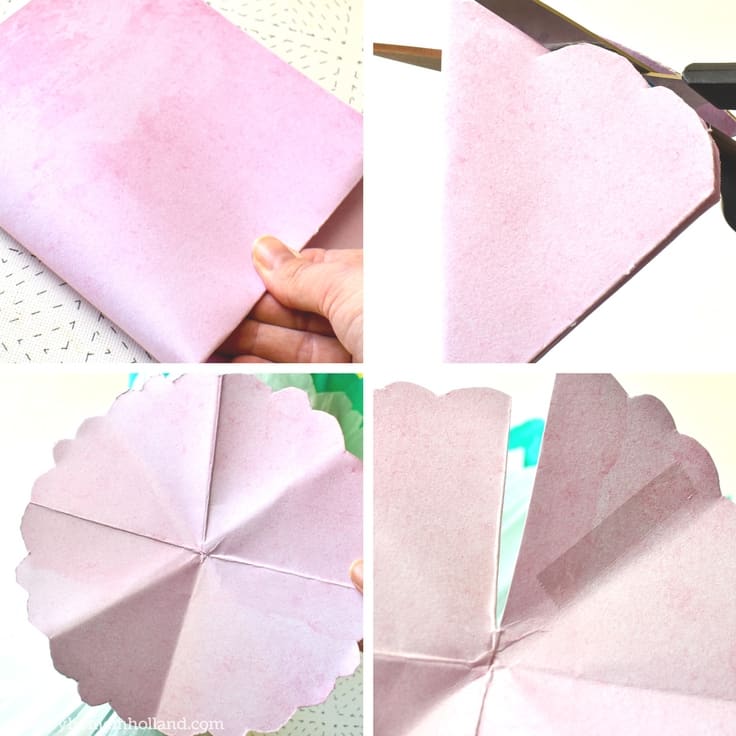
Now trim the end into an arc shape which will turn it into a circle when folded out, once you are satisfied that you have a reasonable circle shape fold it back up and cut a scalloped edge. It should measure roughly 7″ in diameter when you have finished trimming it down.
Cut down one of the folds, lap over one section and stick down with double-sided tape.
If it looks a bit uneven where you have overlapped it just trim the edges to neaten.
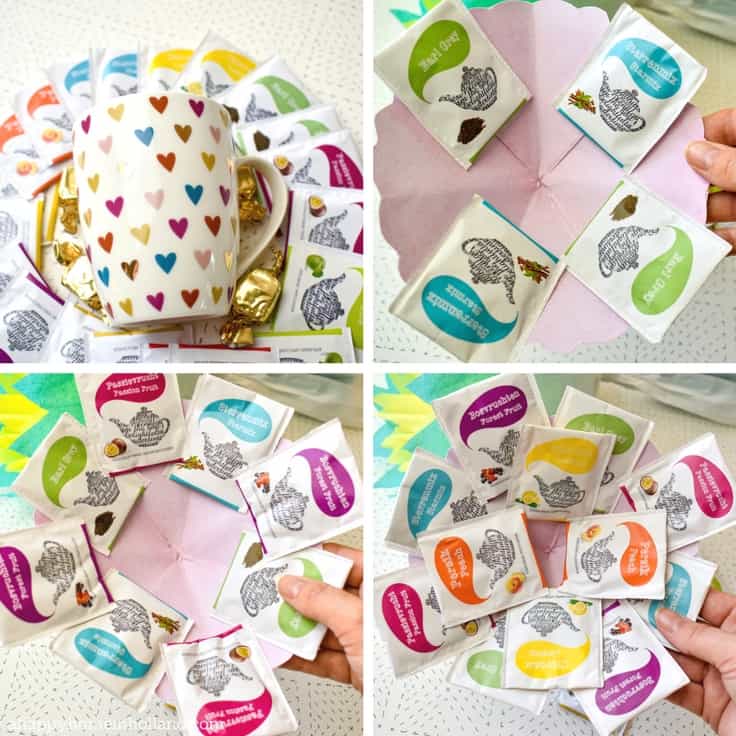
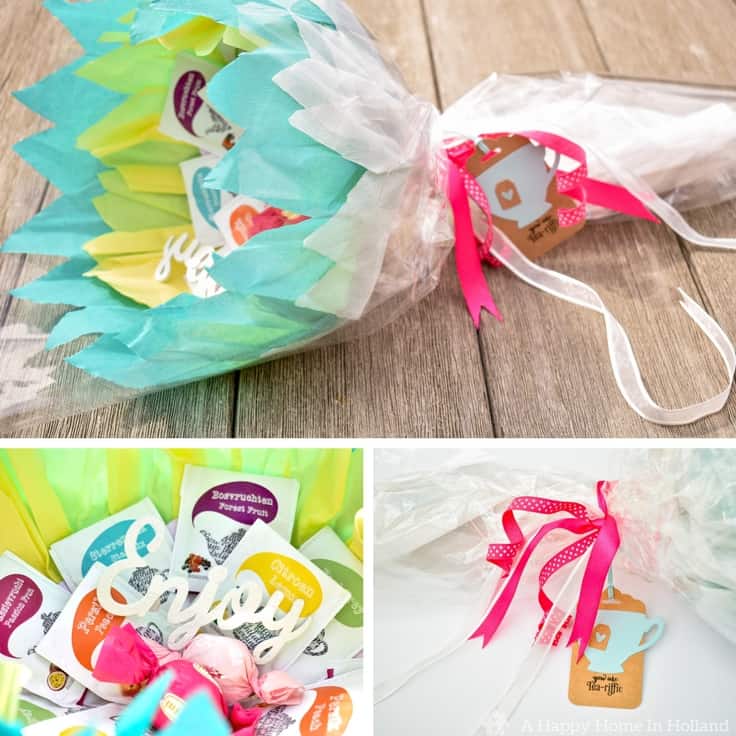
Now start to stick the teas to the card using the double-sided tape. I find it easier to layer them if I work in the order that is shown in the photos above.
* If you want to add an additional layer of cellophane over the tea (I didn’t), you can do it now (make sure you don’t forget the chocolates!)*
Now stick the card with the tea sachets attached into the crepe paper wrapper – make sure you use plenty of the double-sided tape and that it is securely fixed.
3. How To Stabilize Your Tea Bouquet
At this point, you may find that it feels a bit floppy. To strengthen it bind the stem further with tape. Take the tape up as high as you need to stabilize it then use an additional piece of crepe paper to cover the tape.
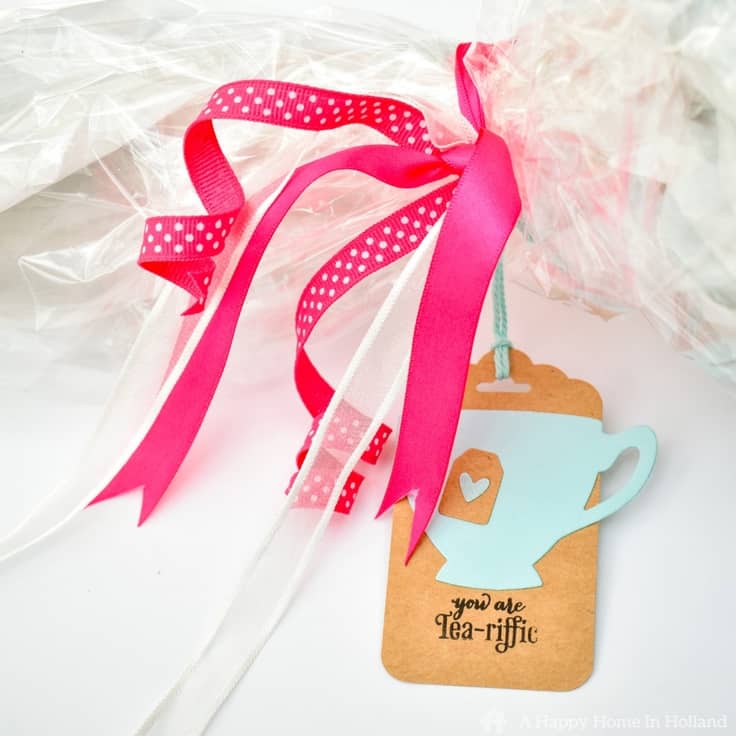
Now it is time to add the outer layer of cellophane. Cut a large square and simply wrap it around the tea bouquet. Use a few lengths of ribbon to secure it and add your gift tag.
You will find that once you have added the cellophane it will stabilize the bouquet and stop it being floppy.
There are many different ways you can make these Tea Bouquets, this is just the way that I did it this time.
I will probably tweak this idea and do it different again the next time I make one. Just have a play around and see what works for you.
They also work using some good quality gift wrapping paper or brown kraft paper. It can actually be easier using wrapping paper as it is a bit stiffer but I have stuck with the crepe paper this time as I already had it in my craft stash and I liked the effect it created with the pretty colors and the paper texture.
And last but not least the chocolates! I always leave these until last because of the weight of them.
Just stick them securely into the center of the bouquet – again using your trusty old double sided sticky tape.
I left the tea and chocolates in the top of my bouquet unwrapped. But as I mentioned earlier, it is also possible to add an extra layer of cellophane around the card tea and chocolates in Step 2. right before you stick it into the outer wrapper.
I hope you liked this easy DIY Tea Bouquet idea.
Love the ideas you see here on Ideas for the Home by Kenarry®? Subscribe today to get our FREE DIY & Craft Planning Calendar, plus our weekly Ideas in Your Inbox newsletter filled with creative tips and exclusive offers!
More Craft and DIY Projects
Here are a few more of my Craft & DIY projects that you may like.

DIY Wooden Tray Makeover With Mod Podge & Free Printable

Free Printable Dog Kennel Party Favor Boxes

How to Make DIY Painted Glitter Feathers
While you’re here, be sure to check out other gift ideas on Ideas for the Home by Kenarry®: