How To Create Beautiful Waterproof Painted Glass
THIS POST MAY CONTAIN AFFILIATE LINKS. PLEASE SEE OUR FULL DISCLOSURE POLICY FOR DETAILS.
Learn how easy it is to create beautiful waterproof painted glass, glassware, vases, mason jars and bottles to compliment your home decor.
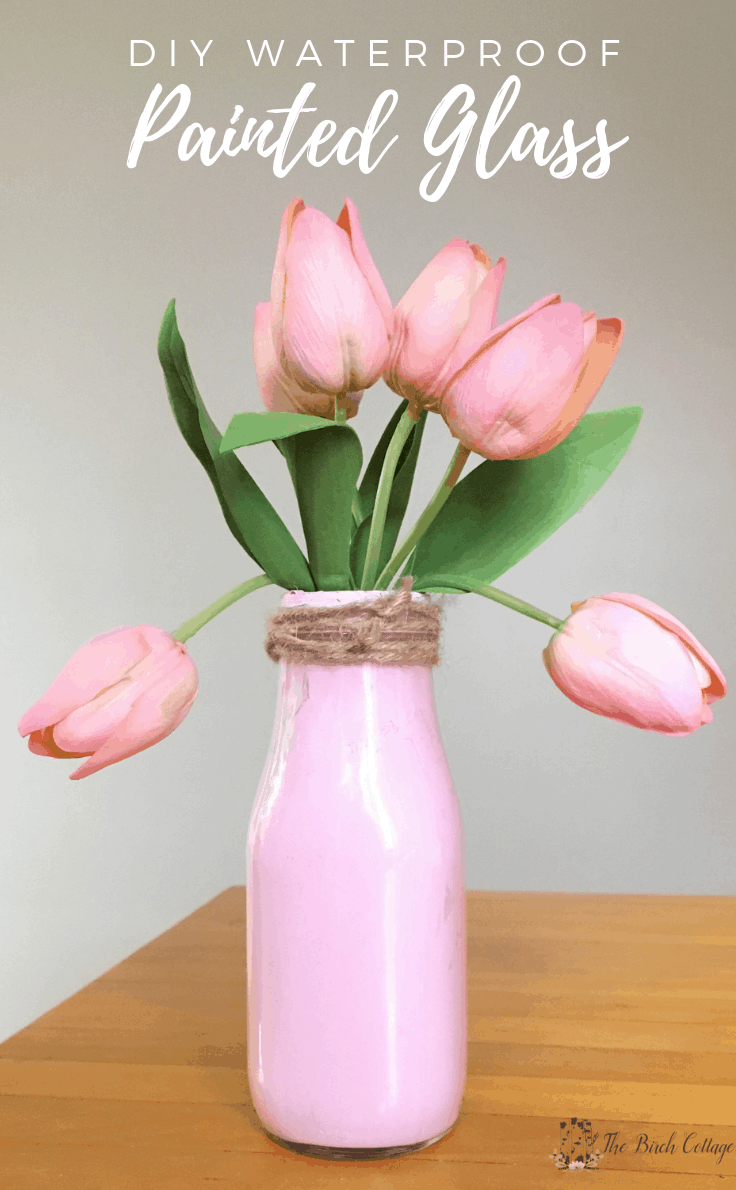
Hello, Kenarry readers! I’m Pam from The Birch Cottage, and I’m back again this month sharing with you another easy DIY project. This time, I’m not talking about how to spray paint glass vases or even how to paint terra cotta pots, but rather how to create beautiful, custom colored and WATERPROOF painted glass, glassware, mason jars and bottles. Did you catch the waterproof part? Because that’s the key to today’s tutorial.
Speaking of painting glass, I can’t believe it’s been three years since I shared how to spray paint glass vases right here on Kenarry. Believe it or not, ever since then, I’ve really wanted to figure out how to paint the glass on the inside of the vase so that the paint is waterproof. I just really like that look, don’t you? You know where you see the beautiful color on the inside of the glass but the outside is crystal clear – just like glass? So, today, dear reader, that’s exactly what we’re going to do!
I gotta tell you though, I have tried other methods of painting waterproof glass – all without success. Today’s technique is one that I’ve tried and have just literally been amazed and beyond pleased with the results.
How to Create Waterproof Custom Painted Glass
Although this project takes a little time because you have to let the paint dry overnight, it really couldn’t be easier! There are just a few supplies you’ll need to create waterproof custom painted glass. Let’s take a look…
Want more ideas like this? Subscribe today to get our weekly Ideas in Your Inbox newsletter plus other exclusive gifts and offers — all for FREE!
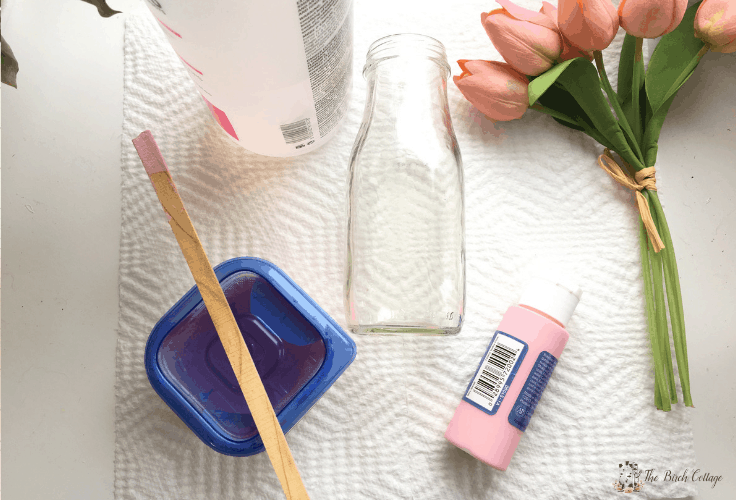
Supplies
The entire tutorial is in a printable card at the bottom of this post. But first, here is a little bit of info about the tools and supplies you’ll need.
- Glassware: Use any type of container you have laying around, such as jars, mason jars, vases, etc.
- Acrylic craft paint: Pick out the color of your choice
- Acetone-based nail polish remover: This is what keeps the paint waterproof, so don’t skip this ingredient.
- Plastic cup: I prefer to use a plastic cup I can throw away since this is where you’ll be mixing the paint with the nail polish remover. If you have a reusable cup that you save for crafts, use that instead.
- Wood or plastic stirrer: Use any type of item that you want to stir your paint with. It can even be an old butter knife.
- Paper towels: You’ll dry the jar on the paper towel, but you can also use a brown paper bag or even old newspapers for this step.
- Parchment paper or aluminum foil: You just need something to protect your cookie sheet when you store your jar in the cold oven.
- Cookie sheet: Any size will work.
Waterproof painted glass tips
Before we get to the tutorial, here are a few tips I wanted to share, along with some helpful in-process photos too!
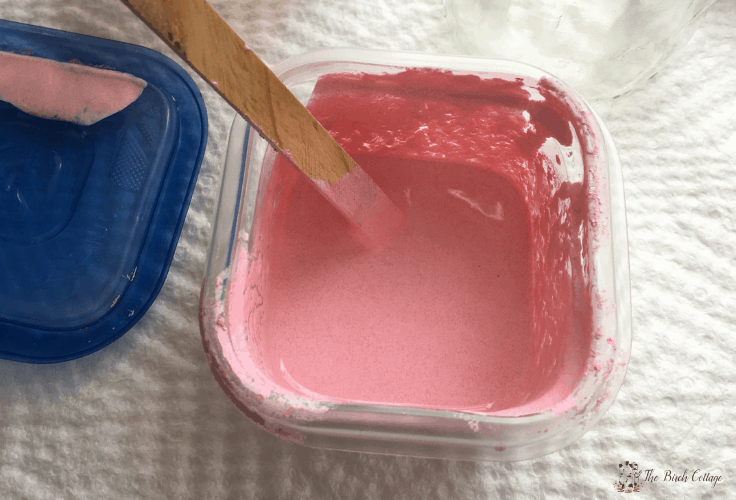
Use Any type of container you want to mix the paint
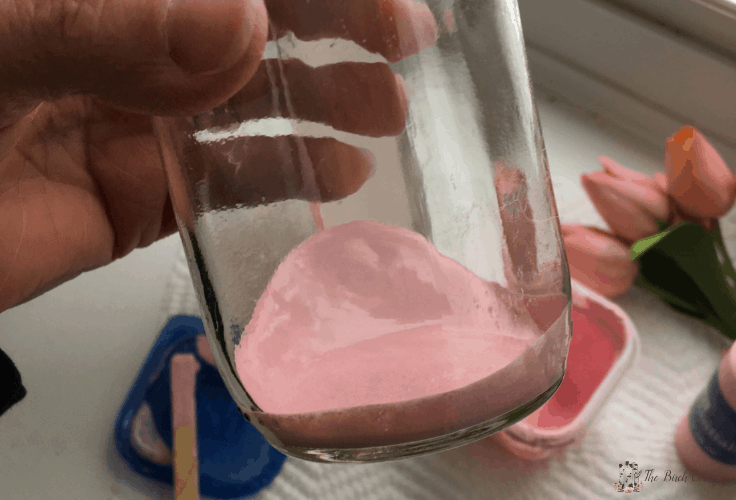
When you are mixing the acetone nail polish remover with the acrylic craft paint, you can use a plastic cup, plastic tub, or even mix it right in your jar. If you choose to mix it in your jar, just make sure your stirring stick can reach the bottom.
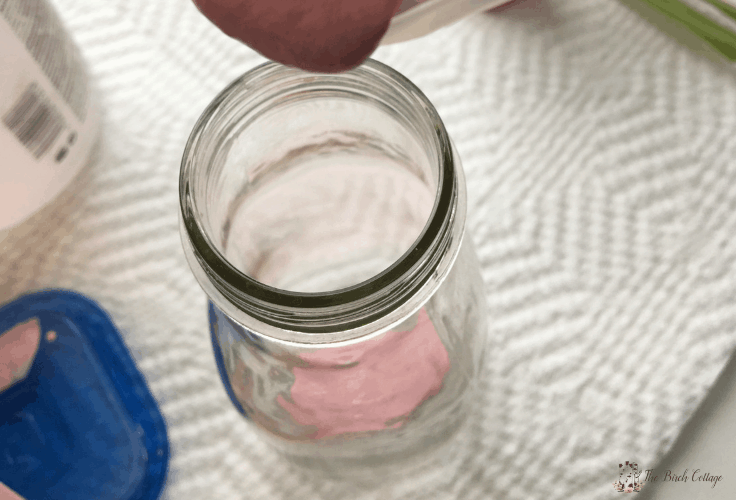
Swirl the paint around in your jar
This is the fun part!
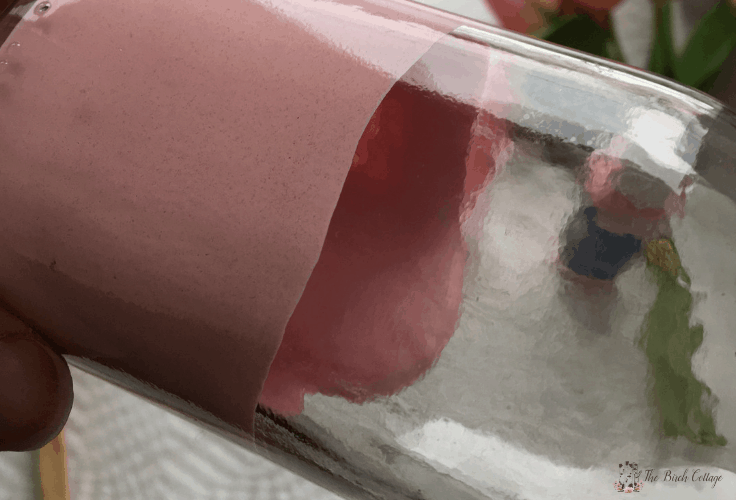
Pour mixture into the glassware and swirl it around to coat the inside of the glass. (Make sure you protect your work space.) Tilt and roll the glass around with your hands until you have the entire inside coated with paint.
Dry it upside-down
Let your painted glassware dry upside down on a paper towel. This will allow the excess paint to drain out. Then place upright and allow to dry overnight or for at least 24 hours to be sure the paint has completely dried.

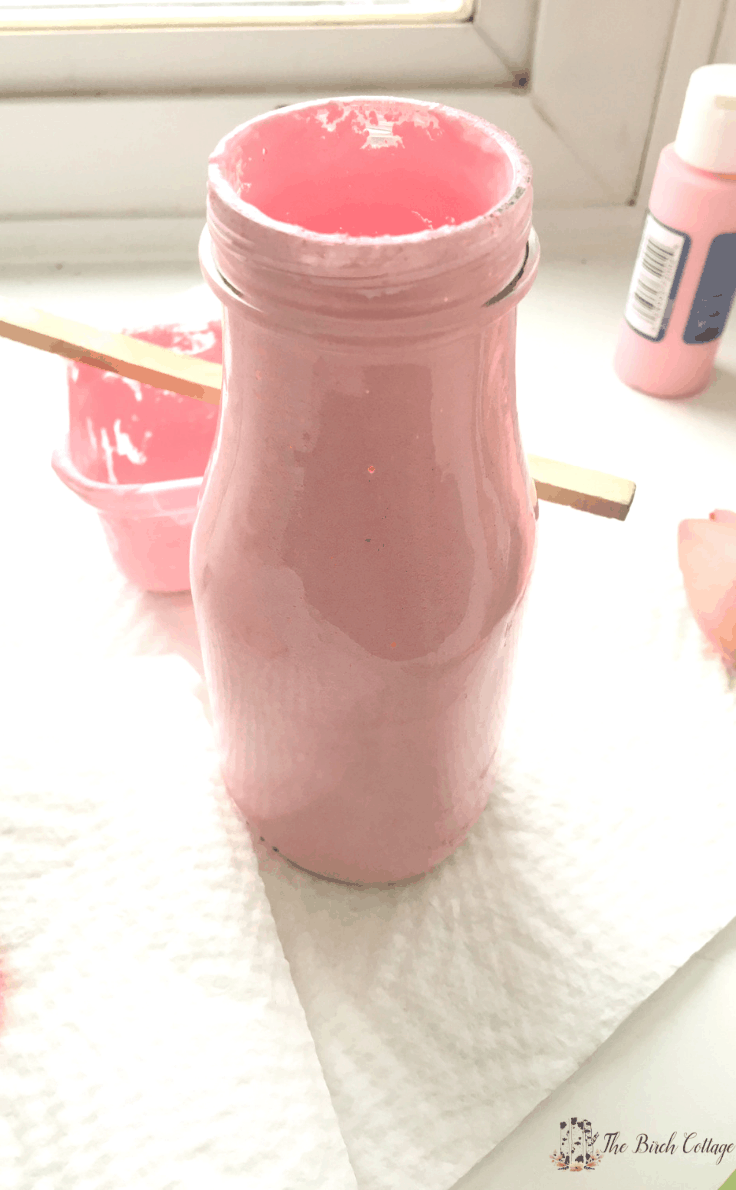
Cure the Paint in a cold oven
This is where the magic happens and turns your ordinary painted glassware into waterproof painted glass.
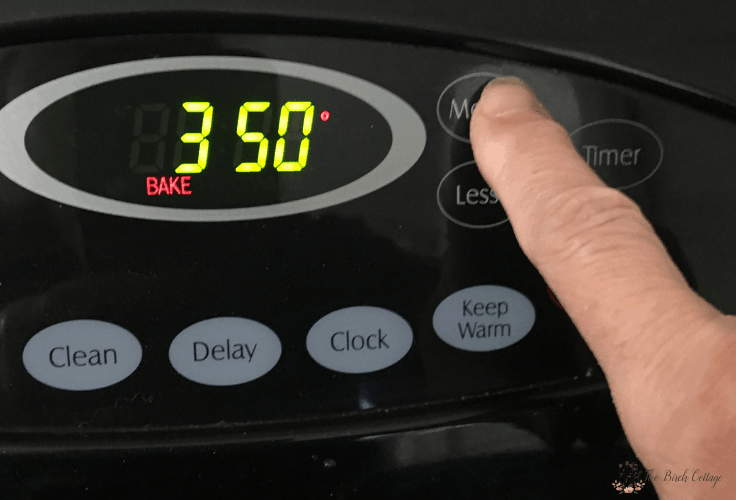
Simply place your painted glassware on a parchment paper or aluminum foil lined cookie sheet and place in a COLD oven. TO AVOID BREAKAGE, DO NOT PLACE GLASS IN A PREHEATED OR HOT OVEN! Set oven temp to 350⁰F. Once the temperature reaches 350, allow the glassware to bake for 30 minutes.

And there you have your beautiful, expensive looking, custom, gorgeous waterproof painted glassware!
Tips
Here are a few tips to keep in mind for your waterproof painted glass projects:
- For best results, wait 72 hours before washing or adding water to the painted glassware.
- Painted glassware can be safely washed in the dishwasher, but washing by hand in warm soapy water is recommended in order to extend the life of your project.
- Do not use painted glassware in a microwave.
- You can use pure acetone, but I found I had better results with acetone based nail polish remover than the pure acetone.
- You can also use the air-dry method to cure painted glass. The paint is naturally cured after 21 days; however, air-dried painted glass is not dishwasher safe.
Waterproof Painted glass tutorial
Here’s the printable card with everything you need to know about how to create stunning painted jars that are also waterproof.
How To Create Waterproof Painted Glass
Equipment
- Jars
- Plastic cup
- Wood or plastic stirrer
- Paper towels
- Parchment Paper
- Cookie Sheet
Supplies
- 1 tbsp Acrylic craft paint
- 1 tbsp acetone nail polish remover
Instructions
- Combine 1 tbsp of acetone nail polish remover with 1 tbsp acrylic craft paint in a plastic cup. Use a wood or plastic stirrer to mix well. You can also pour the acetone and paint directly into the glassware, assuming your stirrer can reach the bottom of your vessel.
- Let your painted glassware dry upside down on a paper towel for about 20 minutes. This will allow the excess paint to drain out. Then place upright and allow to dry overnight or for at least 24 hours to be sure the paint has completely dried.
- Place your painted glassware on a parchment paper or aluminum foil-lined cookie sheet and place in a cold oven. To avoid breakage, do not place glass in a preheated or hot oven! Set oven temp to 350⁰F. Once the temperature reaches 350, allow the glassware to bake for 30 minutes.
- After 30 minutes, turn the oven off and let the glass cool completely before removing from the oven.
I was really pleased with how this paint technique turned out. I think there’s just something almost glamorous and expensive about the look of the glass when it’s painted on the inside. Plus, having the glassware be waterproof is definitely worth the extra steps!
Love the ideas you see here on Ideas for the Home by Kenarry®? Subscribe today to get our FREE DIY & Craft Planning Calendar, plus our weekly Ideas in Your Inbox newsletter filled with creative tips and exclusive offers!
What’s Next?
Learn to Sew a Microwave Safe Bowl Cozy
Keto Strawberry Pecan Cheesecake for the Instant Pot
3 Printable Irish Blessing Prints
You may also enjoy these flower pot ideas on Ideas for the Home by Kenarry® –
- How to Paint Terra Cotta Pots
- An Easy Flower Pot Makeover with Two-Tone Paint
- DIY Terra Cotta Pot Luminaries

I can’t wait to try the painted glass. I love the way it looks in the picture. I’m sure it will even be more beautiful in person. Thanks for all your ideas. I love them all.
You so sweet! Thank you so for stopping by to comment and encourage us, Lisa. We’d love to see photos of how your painted glass turns out!
Best wishes – and happy crafting!
Carrie from Ideas for the Home by Kenarry®
Should it matter if you use Matte, Glossy or Satin acrylic craft paint? I just did 3 jars, immediately I noticed the Matte seems to cover better. They are in the drying stage, just trying it out before I use the jars I want painted.
Hi, Carla! What a great question and one I hadn’t even thought much about. When I tested this idea, I made sure to use acrylic paint that was specifically for glass. I wonder if the coverage appears better with the matte because matte paint in general appears to cover better or show less of the imperfections than what would be visible with sayin or gloss paints? Looking forward to finding out more about your test results! Please be sure to let us know!
Thanks, again!
Pam Baker
The Birch Cottage
I just used paint I had on hand, I’m not real familiar with acrylic paints. I will get some specifically for glass before I try the jars I want painted. I’m still going to bake them tonight after the 24 hr drying time, I’m sure I can find a use for them. The glossy and satin both seemed to mix smoothly in the cups but after I turned them up I could see very tiny lumps in the paint. Thanks for your idea. I’ll let you know how they turn out.
I tried this and it turned out all lumpy and bumpy, I used satin.
I love this idea for Mother’s Day! Can I make a handprint on the outside of the mason jar? If so, do you have any suggestions of when I should do this? After the inside has dried both ways but before it bakes in the oven?
Hi Leah,
This is such a precious and fun idea for Mother’s Day! I especially love Mother’s Day gifts that involve hand prints. You could definitely make a hand print on the outside of the jar after you’ve painted the inside. Baking the jar in the oven is what cures the paint to the glass. So I would recommend adding the hand print and letting that paint dry BEFORE you put it in the oven. You could add the hand print at any time in the process, but I would probably do it this way – put the paint inside and turn upside down per the instructions, then add the hand print during the time period while you’re letting the paint on the inside finish drying. By the time the paint on the inside of the jar is dry, the new hand print will be dry too.
Good luck with your project! We’d love to see photos of how it turns out for you!
Best wishes,
Carrie
Ideas for the Home by Kenarry
Oh my goodness, rushing to try this out!!
I just have a question, is it safe to use the same oven where I cook food to cure the painted glass?
I can’t believe I found this method, thank you so much for sharing! I lost count on how long I have been looking for it! Sorry glass colours, you are not the same gorgeous luxurious look 🙂
Hi Guya,
Great question! Yes it’s safe to use the same oven that you use for cooking – just don’t cook food in the oven at the same time you’re curing your paint on the glassware. Also you MUST put the glassware in the oven before you turn it on so the glass heats up with the oven. Allow it to cool down with the oven as well. This should prevent your glassware from breaking, but I would also recommend putting the glassware on a baking sheet – just in case.
Good luck with your project and happy crafting!
Best wishes,
Carrie
Ideas for the Home by Kenarry
Hi I just found this site and I’m so excited to try this method! My mom gave me champagne flutes and asked me to paint them for her as her Xmas gift and I’ve never painted on glass before let alone on the inside. Just want to check, it’s safe to drink out of the glasses still without any additional sealants or resin, right? Thank you for your help!
Hi Nicole,
Great question! You could reach out to the manufacturer of your craft paint to see what they’d advise, but I personally would not use this method on drink ware. Instead for drinking glasses, I would paint the outside and avoid painting on or near the rim of the glass. Here are some champagne flutes that I’ve painted, but I also think these painted coffee mugs and hand painted wine glasses might spark some crafty design ideas for you,
Best wishes,
Carrie
Ideas for the Home by Kenarry
Can’t wait to try this. Question, though, is it food safe? Like can I do this on jars for candy?
Hi Amanda,
Great question! With the paint on the inside of the jar like this, I would not consider it food safe. Do not store unwrapped candy in jar painted this way. You could try hand painting the outside of your candy jars instead. Here is a tutorial.
Happy crafting!
Best wishes,
Carrie
Ideas for the Home by Kenarry
Silly question…if you don’t use pure acetone, how do you find clear polish remover? Seems as though all the others are tinted blues, pink, yellow, etc. Woukd that affect your final color?
I just painted a glass jar and it is in the drying process. double checking: Its safe to put in oven with the acetone mixed in the paint? Thanks for the great idea. The jar looks really good!
Hi Patty, for the minimal amount of time – you’ll be fine with the glass jar in the oven. Hope your project turns out great! We’d love to see photos!
I just used craft acrylic paint with the acetone polish remover and everything seemed great at the start but while the glass vase was drying upside down, the paint slid off in spots leaving patches of glass uncovered. Do you think I need to try craft paint made for glass? Have you ever encountered this problem?
Hi Kathy,
Thank you so much for reaching out. I have not encountered that problem before. Definitely check your paint and verify whether it says it’s for use on glass.
Best wishes,
Carrie
Ideas for the Home by Kenarry
The mixture was so thick, I had to use 3 recipes. It just finished the 20 minutes on paper towel, and there are spots opening.
Hi Cathy!
Thank you for your comment and reaching out to us. We are more than happy to help you with your inquiry, so that you can complete this craft with ease and success!
Did you end up using acetone for your project? Also, what kind of paint were you using when you were completing the project?
Thank you,
Lisa, Ideas for the Home by Kenarry Customer Care