Pom Pom Trimmed Valance
THIS POST MAY CONTAIN AFFILIATE LINKS. PLEASE SEE OUR FULL DISCLOSURE POLICY FOR DETAILS.
Creating your own pom pom trimmed valance is an easy sewing project. This DIY window treatment or curtain adds a fun flair to any kids’ room.
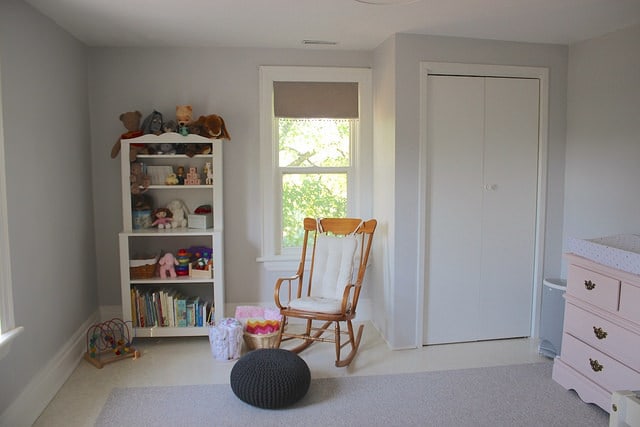
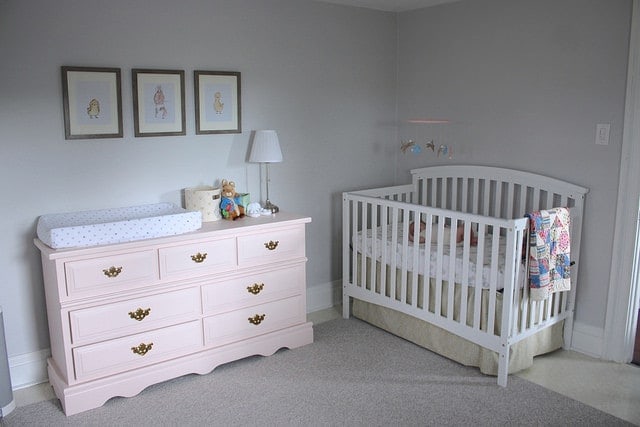
Hi there! It’s Amanda from Life at Cloverhill here with a fun project I did for my daughter’s soft and sweet farmhouse nursery. Our little darlin’ just turned a year old this past weekend, and just as everyone told me, the time has flown by.
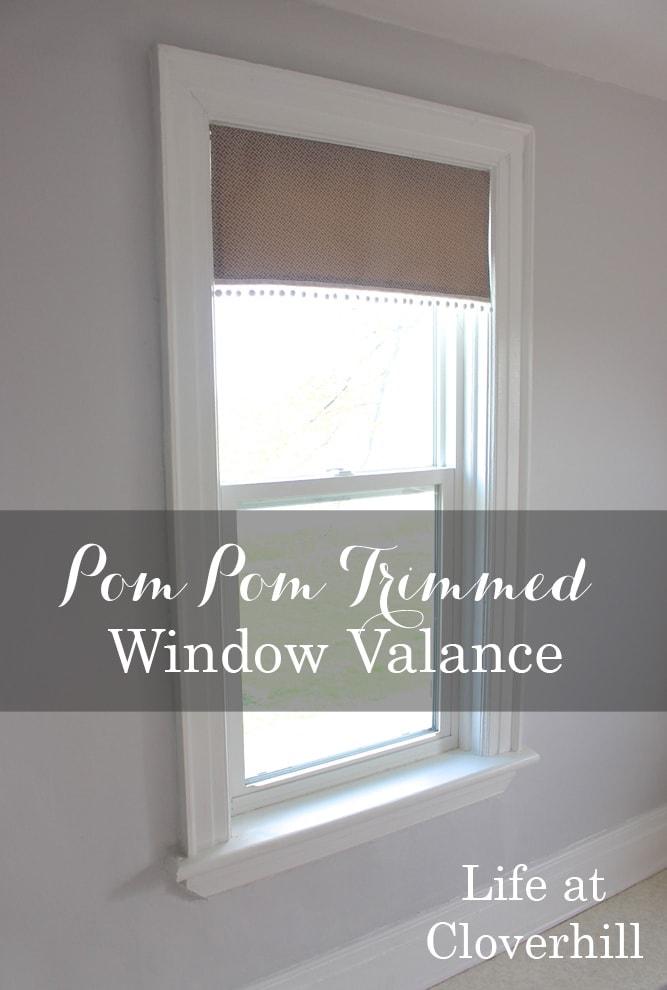
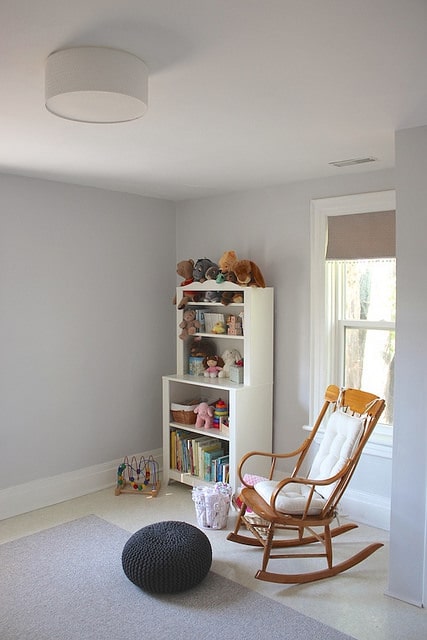
The idea of a window valance came after I realized the room we were going to use as a nursery did not have enough space around the window frame to have a curtain rod. We had installed simple blackout roller blinds for her and I needed some way of covering them when they were rolled up.
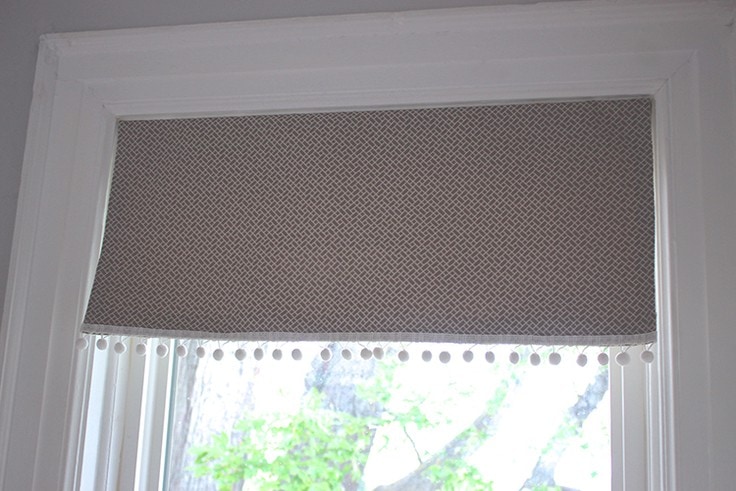
I started looking at valances in the stores and even the most simple pom pom trimmed one was about $90 a panel and I had two windows. I was able to make these ones myself for under $12 a window! I decided to make a simple valance in a subtle geometric print and play it up with a fun white pom pom trim.
The Best valance for Nurseries
I love this valance in our nursery. You should never use blinds that have cords in a baby’s or toddler’s bedroom. The chance of strangulation is too high.
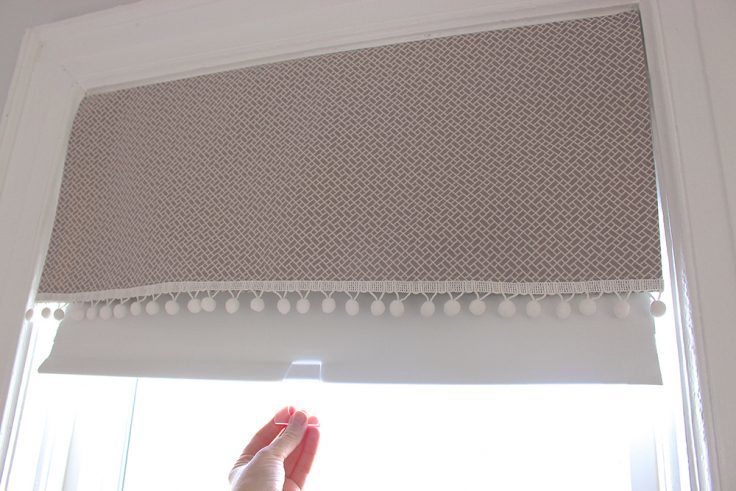
The safest choice is a roller blind. There aren’t any cords that can tempt babies. And my valance hides the roller blind perfectly.
The roller blind hides behind it perfectly and can easily be pulled down for naps and bedtime.
My husband and I had so much fun working together to make this space for her. He painted this $25 dresser a soft pink and I made a DIY Stuffed Bunny Nursery Mobile.
Disclosure: This blog post contains affiliate links for products or services we think you’ll like. This means if you make a purchase from one of these links, Ideas for the Home by Kenarry® will make a small commission at no additional cost to you so we can keep the great ideas for the home coming your way. All opinions expressed are derived from personal experience.
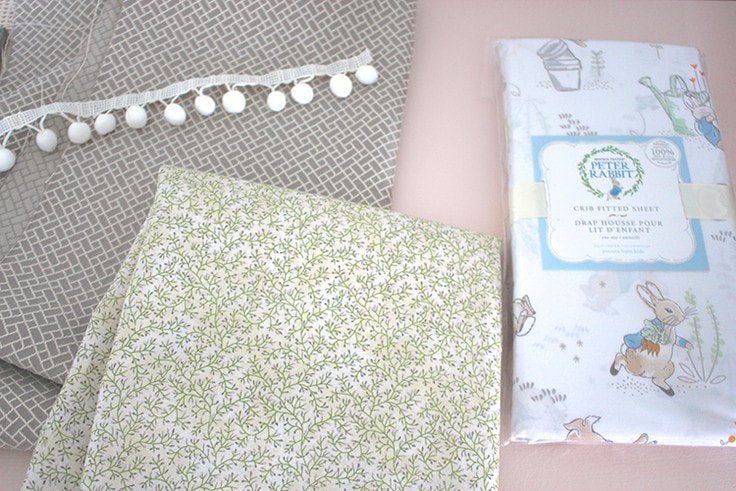
Dreamy nursery color palette
When I was putting together the color palette, I was trying to stick with fairly soft and neutral colors. I used the grey upholstery fabric and pom pom trim for the valance (top left) and a green and lavender cotton print for the crib skirt (bottom). Both complimented my favorite nursery decor find – these organic cotton Peter Rabbit crib sheets from Pottery Barn.
How To Make a DIY Pom Pom Trimmed Valance
Here’s how to make your own pom pom trimmed valance. Even if you don’t know how to sew very well, this is easy to make.
Supplies:
You’ll need:
- upholstery fabric
- plain canvas fabric for liner
- coordinating thread
- sewing machine and needle
- pom pom trim
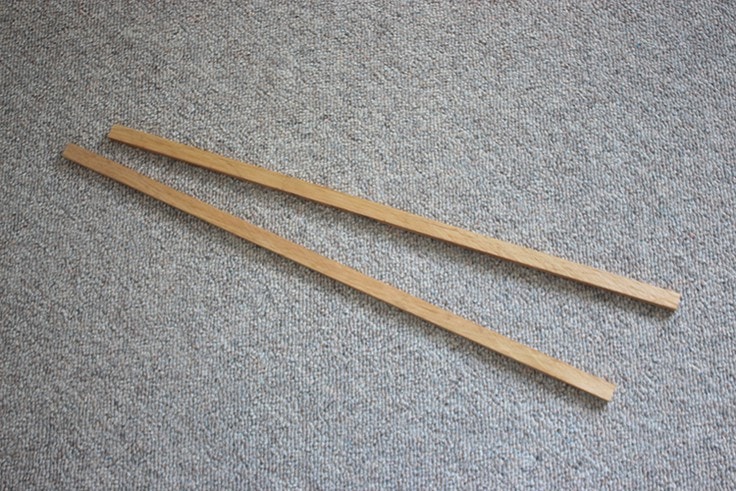
- 3/4″ thick strip of wood
- staples and staple gun
DIY Window valance instructions
Here are the step-by-step directions so you can make your own valance.
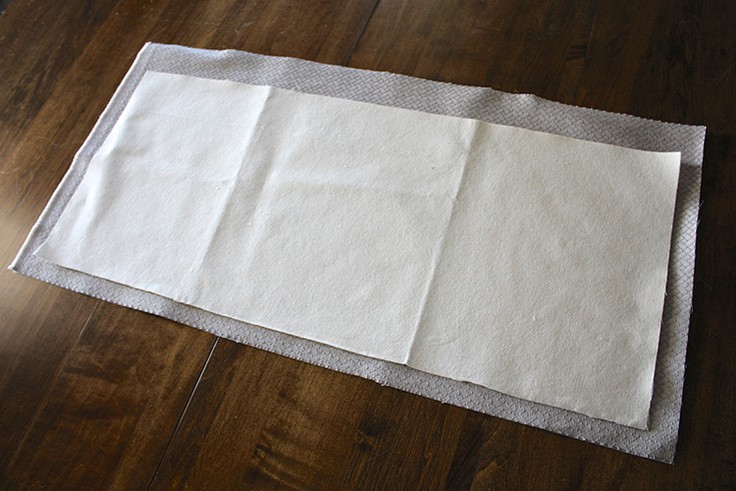
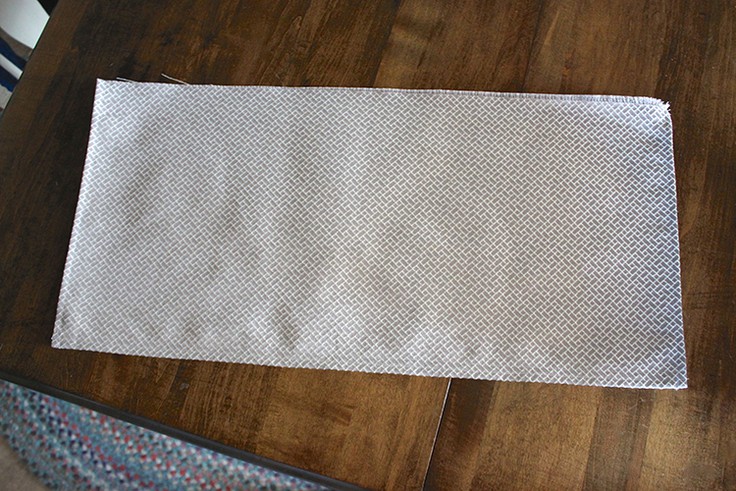
1. Measure and cut the fabric
I started with measuring the window frame at the top. The inside of the window frame was 28 inches wide. I cut a piece of plain thick canvas just slightly smaller than how big I wanted the valance to be.
In this case, I went with 27-1/2-inch wide by 12-inches high. I then cut a piece of the upholstery fabric that was 1 inch longer on all four sides.
2. Fold and pin the fabric
Next, I folded the upholstery fabric over the canvas on the two sides and bottom, ironed it and pinned it in place.
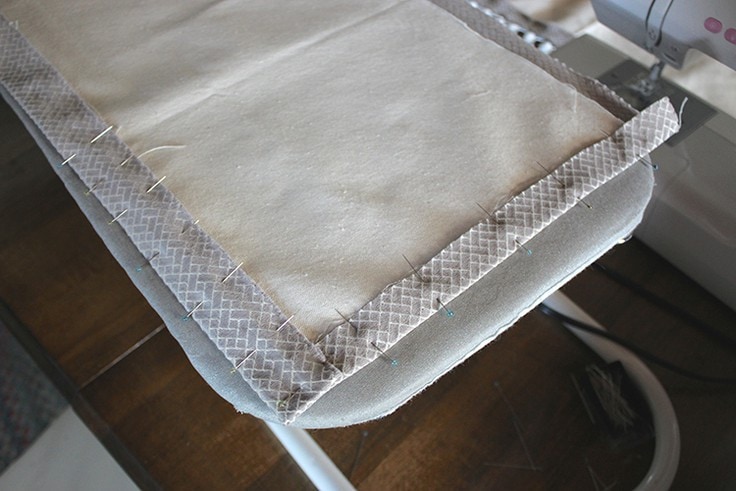
If you place the pins perpendicular to the folded hem, you can run right over them with the sewing machine.
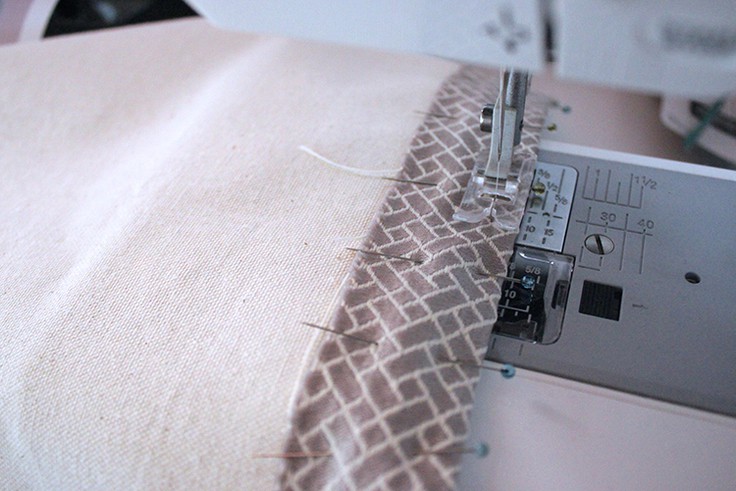
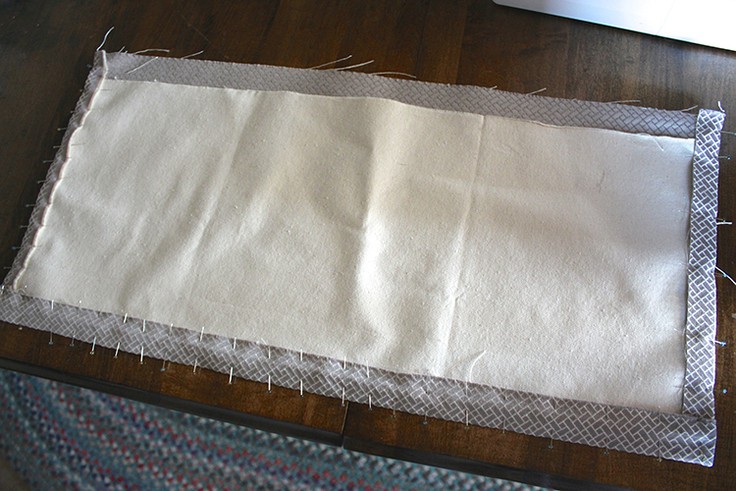
3. Sew three sides of the valance
Using coordinating thread, I ran a stitch at 1/4-inch along the three sides – left, bottom and right sides, leaving the top unstitched.
I then ran another stitch along the three sides at 1/2″ in from the edge. This double stitch seemed to help with giving the fabric some structure.
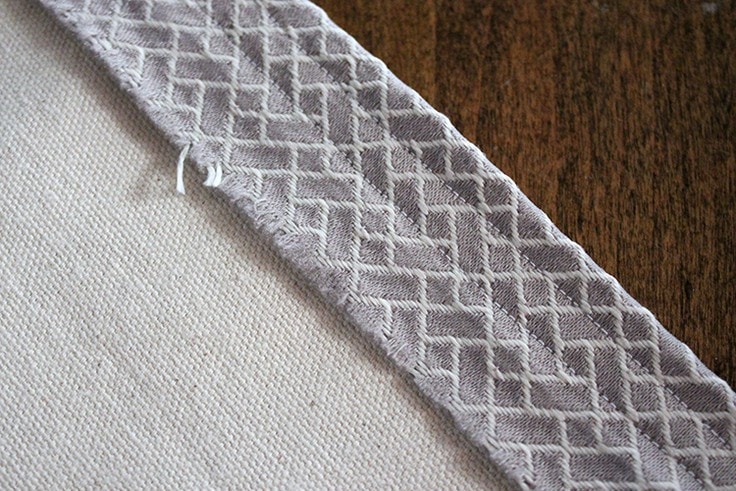
4. Remove the pins and iron it
After removing the pins, I gave it one final ironing again to keep everything crisp.

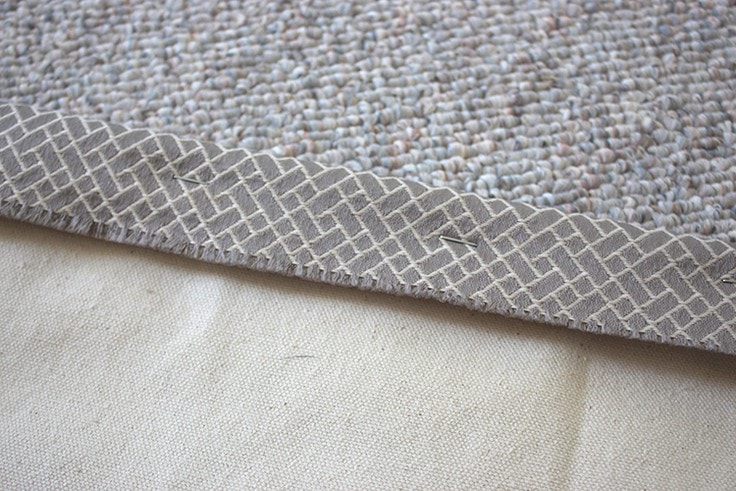
5. Sew the pom pom trims on the bottom
Next, I stitched the pom pom trim along the bottom edge.

On the ends, I folded the extra trim over and handstitched it in place.

I love the fun little edge it adds to the curtains and it’s a cute touch for a kids’ room.
6. Attach the valance to the window frames
To attach the valances to the window frames, I cut 3/4-inch thick strips of wood to 28-inch long to fit right into each window frame.
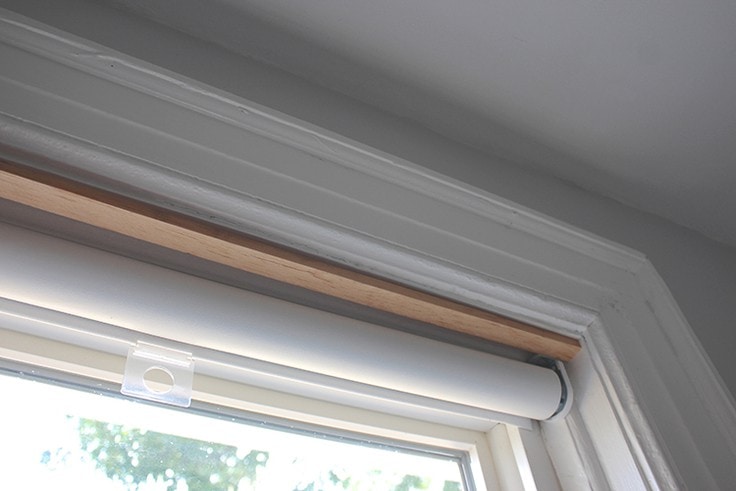
I checked to make sure that it would fit snuggly, without interfering with the roller blind.

7. paint the wood strips white
I painted the strip of wood white to help it blend into the window frame, just in case you were to look up right by the window and saw it.
8. Staple the fabric to the wood piece
I folded the top edge of the valance over the wood piece and stapled it in place with a staple gun. Then it was just a matter of screwing the strip of wood, with the fabric attached, right into the top of the window frame.
The pom pom trim is subtle but adds a fun accent to the windows and can easily work with this room as our daughter gets older too.
Stop by and say hi on my blog and check out some more projects and recipes like these!:


Peaches and Cream Baked Oatmeal

Butter Tarts – A Canadian Classic
Love the ideas you see here on Ideas for the Home by Kenarry®? Subscribe today to get our FREE DIY & Craft Planning Calendar, plus our weekly Ideas in Your Inbox newsletter filled with creative tips and exclusive offers!
While you’re here, you may also enjoy some of these favorite Ideas for the Home by Kenarry® –
- Baby Nursery Idea: A Colorful Alphabet Theme
- How to Make a Fabric Headboard on a Budget
- How to Organize Your Kid’s Closet
Updated January 2020.