How To Make A Monogram Charm Keychain
THIS POST MAY CONTAIN AFFILIATE LINKS. PLEASE SEE OUR FULL DISCLOSURE POLICY FOR DETAILS.
Make a personalized Monogram Charm Keychain to give as a gift or keep for yourself! We’ll show you how with this video tutorial!
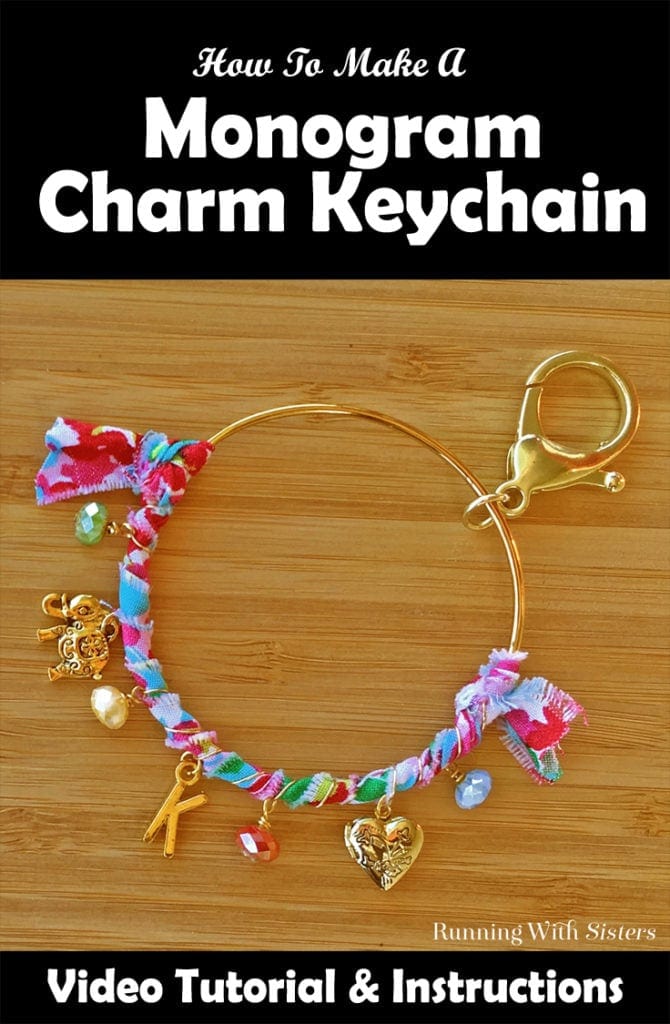
Hi Kenarry Readers! It’s Jennifer and Kitty O’Neil (the O’Neil Sisters from RunningWithSisters.com), and we have a super cute project to share – A Monogram Charm Keychain! We saw a keychain like this on Pinterest from Anthropologie, but they weren’t selling it anymore. So we decided to make our own! We loved how the Anthropologie keychain was wrapped with fabric. It added so much color! So we started with that design and then added a few twists of our own.
We made a step-by-step video that goes along with the instructions below. We’ll show you how to make bead dangles to go with the charms. Then we’ll show you how to wrap a bangle with cotton fabric and how to use wire to attach the beads and charms to the ring. Finally, we’ll attach a big lobster clasp to make it into a keychain. It’s so fun, you’ll want to make a monogram charm keychain for everybody you know!
How To Make A Monogram Charm Keychain
What you need:
Want more ideas like this? Subscribe today to get our weekly Ideas in Your Inbox newsletter plus other exclusive gifts and offers — all for FREE!
- Cotton fabric, multi color, 3/4″x36″ strip
- Bangle bracelet, gold, 70mm
- Monogram charm, gold, 7mmx16mm
- Heart locket charm, gold, 14mm
- Elephant charm, gold, 16mm
- 24-Gauge wire, gold
- 4 Glass millefiori flower beads, 5mmx8mm
- 4 Headpins, gold
- 1 Lobster-clasp keychain
Tools Needed:
- Round-nose pliers
- Chain-nose pliers
- Wire cutters
- Scissors (We like these Fiskars Easy Action Scissors!)
Instructions:
1. Make bead dangles
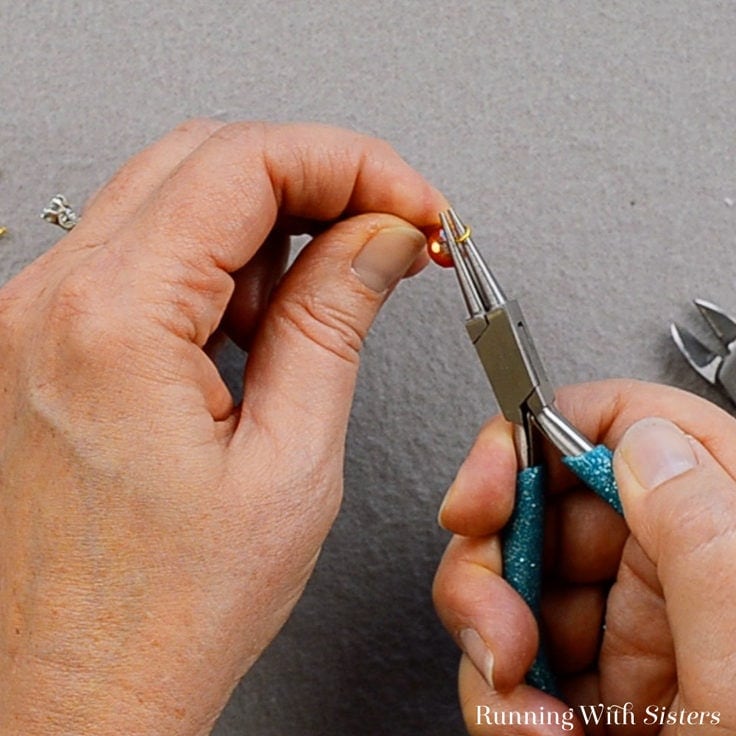
To get started making the keychain, make four bead dangles. To do this, slide a bead onto a headpin. Grasp the headpin wire above the bead and bend the tail 90 degrees. Reposition the pliers to the top of the bend and pull the wire over the pliers to make a partial loop. Reposition the bottom jaw of the pliers into the loop and finish pulling the tail around to make a complete loop.
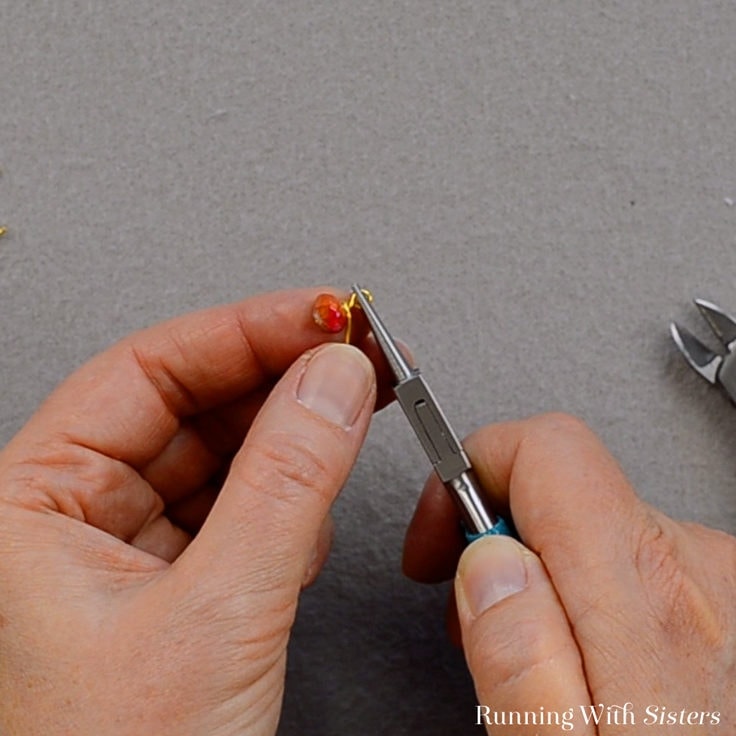
Grasp the loop across with the pliers and pull the tail around the neck two times. Then trim the wire. If you don’t feel like making bead dangles, you can buy them premade! We’ve seen them at the craft store with the jewelry materials.
2. Wrap bangle with fabric
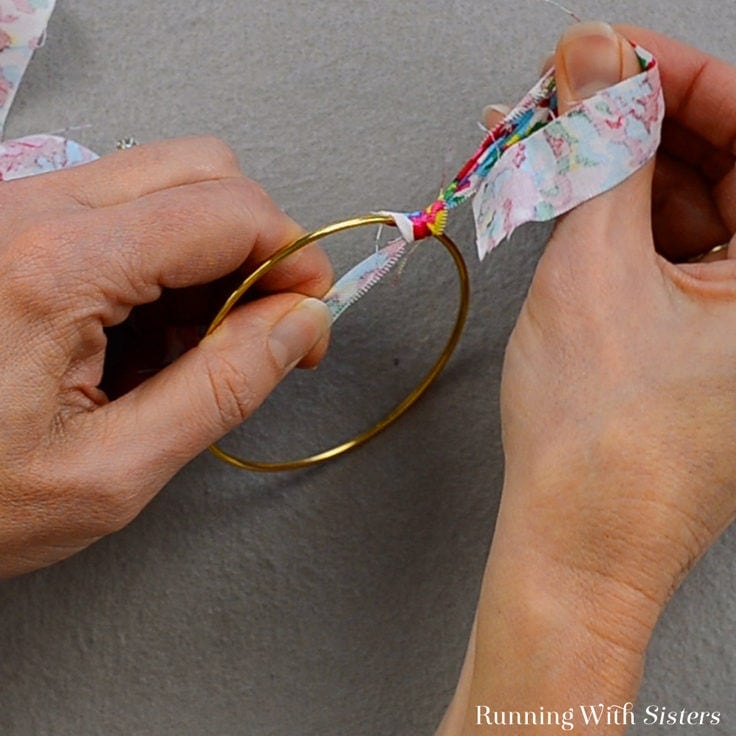
The next step to make the keychain is covering the bangle with fabric. Cut a strip of fabric about ½” to 3/4″ wide and 36″ long. Tie one end to the bangle.
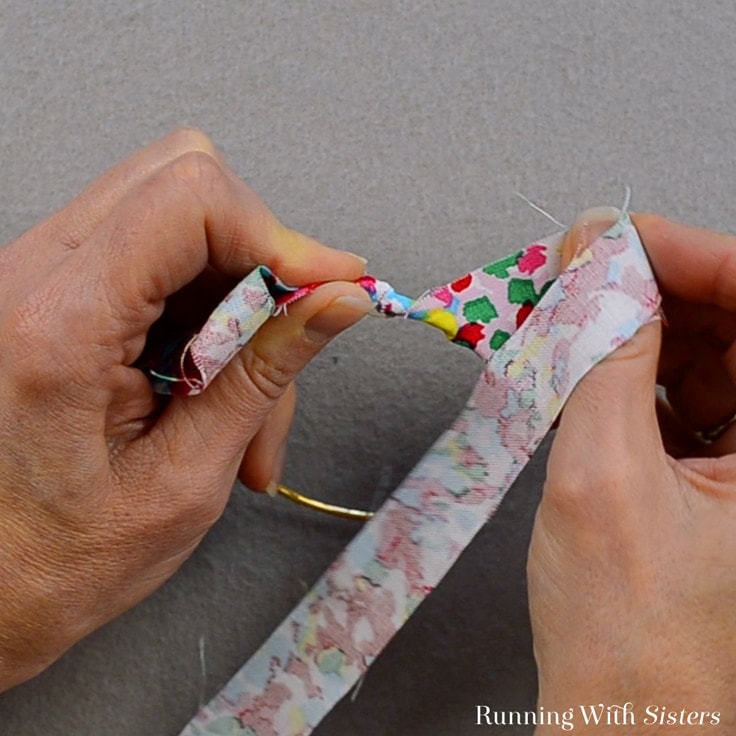
Hold the tie in place and wrap the fabric around the bangle overlapping half the previous wrap with each new wrap. When half the bangle is wrapped, tie the other end of the fabric strip to the bangle. Don’t worry if the fabric frays. That’s the look! Trim the fabric leaving about a 6″ tail.
3. Wrap fabric with wire and charms
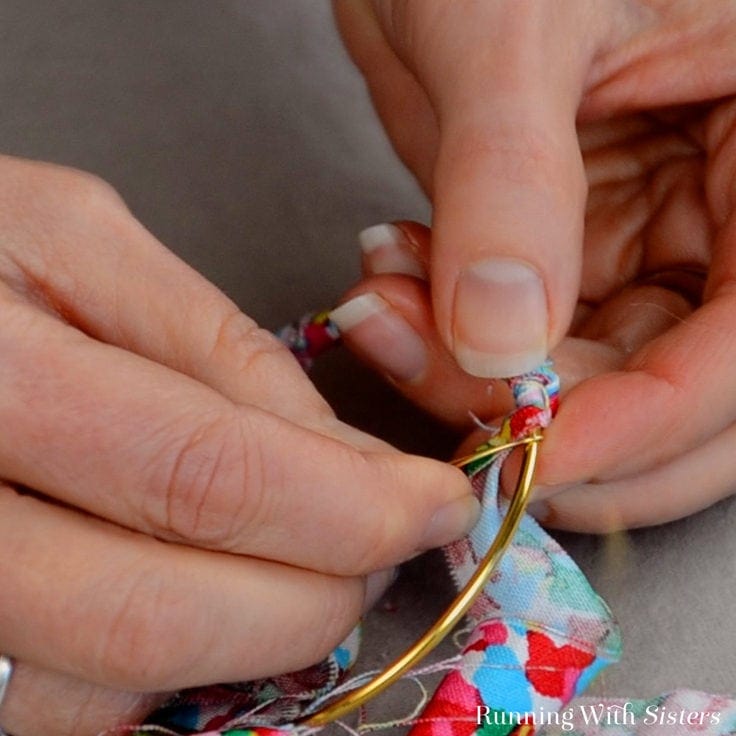
To attach the charms and bead dangles to the bangle, cut a piece of wire 12″ long. Wrap the end of the wire around the bangle next to the fabric knot four times. Tuck the wire around the knot and start wrapping the wire around the fabric.
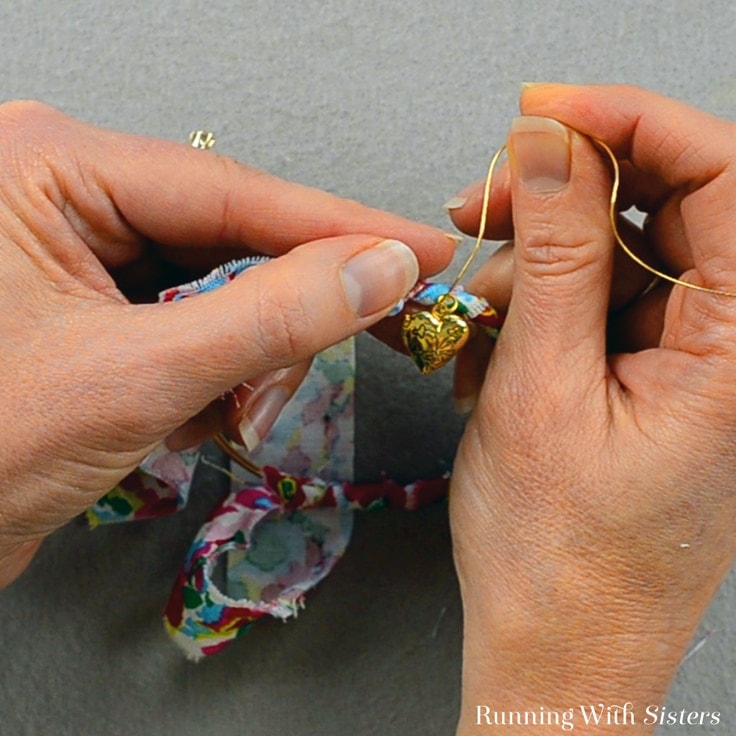
Slide on a bead dangle and wrap the wire around the fabric-covered bangle again. Add a charm to the wire and wrap again so you have one wire wrap between each bead dangle or charm.
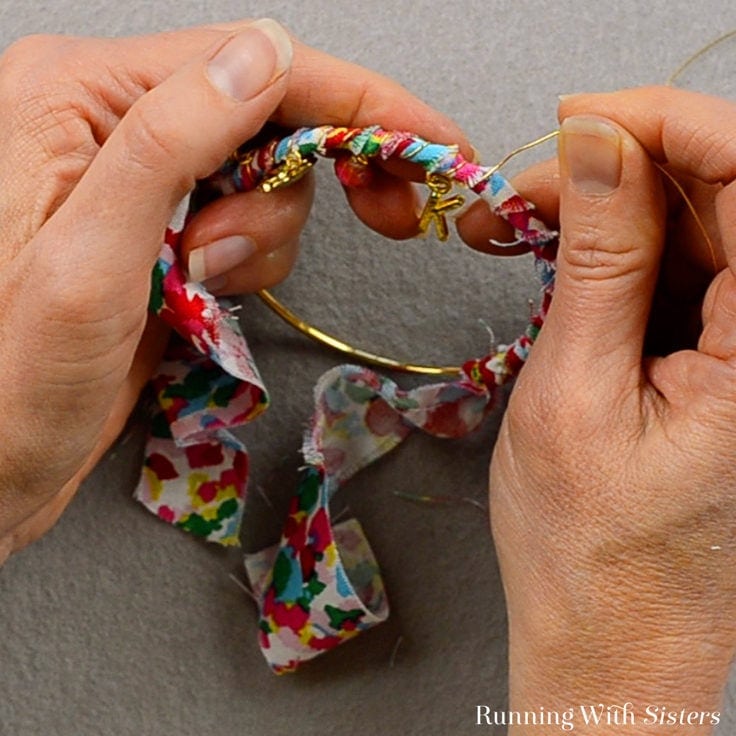
Continue wrapping and adding elements until you have all four bead dangles and the three charms wired onto the keychain bangle and all of the fabric is wrapped with wire.
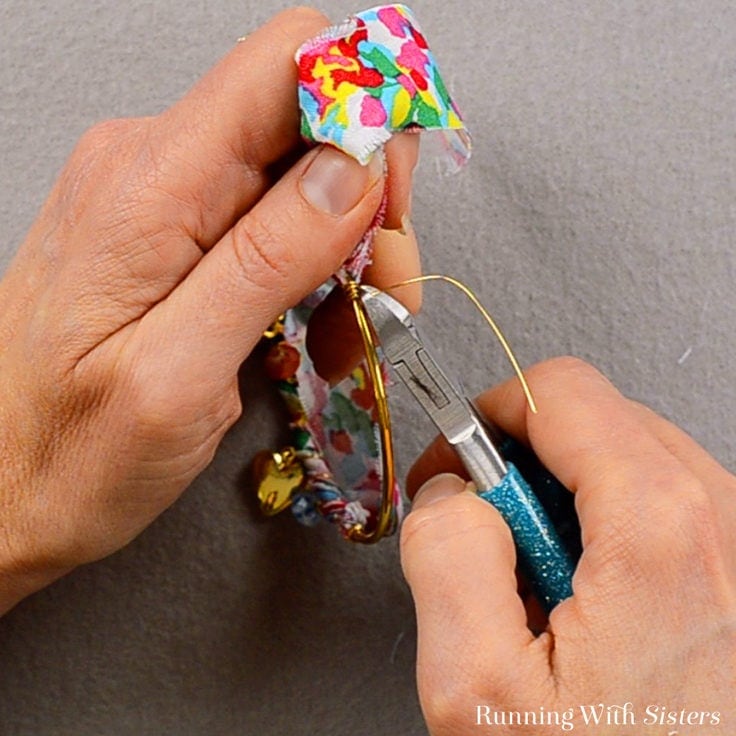
Finish the end by wrapping the wire around the metal bangle next to the other knot. Trim the wire and tuck the end into the fabric.
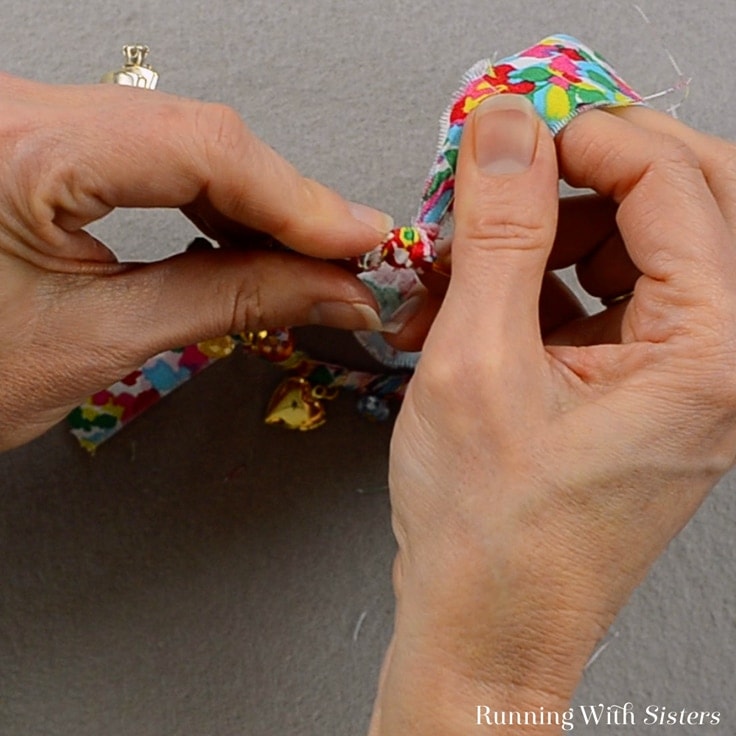
Then tie a knot with the fabric over the wire end. Do this for both sides. Then trim the fabric to about a half inch.
4. Attach lobster clasp
Open the jump ring on the lobster-clasp keychain using 2 pliers and remove the large keyring that came with it. Slide the metal part of the bangle into the jump ring alongside the big lobster clasp. Close the jump ring.
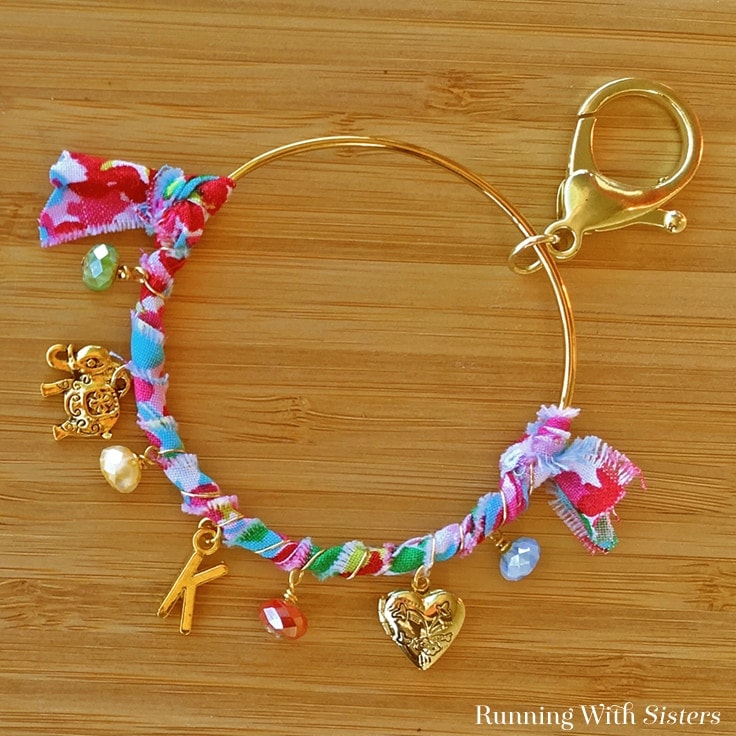
Isn’t that darling? The fabric adds so much color and the charms are so fun! We think this would make a terrific personalized gift. You could even choose charms to go with the recipient. We hope you try this easy Monogram Charm Keychain. And if you have any questions about it, leave us a comment, and we’ll reply. We love hearing from you!
Happy Crafting,
Jennifer & Kitty
Love the ideas you see here on Ideas for the Home by Kenarry®? Subscribe today to get our FREE DIY & Craft Planning Calendar, plus our weekly Ideas in Your Inbox newsletter filled with creative tips and exclusive offers!
Like this project? You might also like these crafts from the O’Neil Sisters:
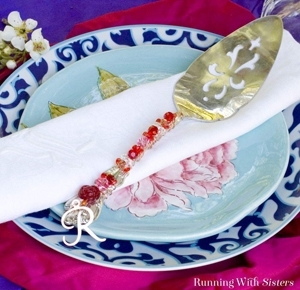
Personalized Beaded Cake Server
You may also enjoy these craft ideas on Ideas for the Home by Kenarry® –