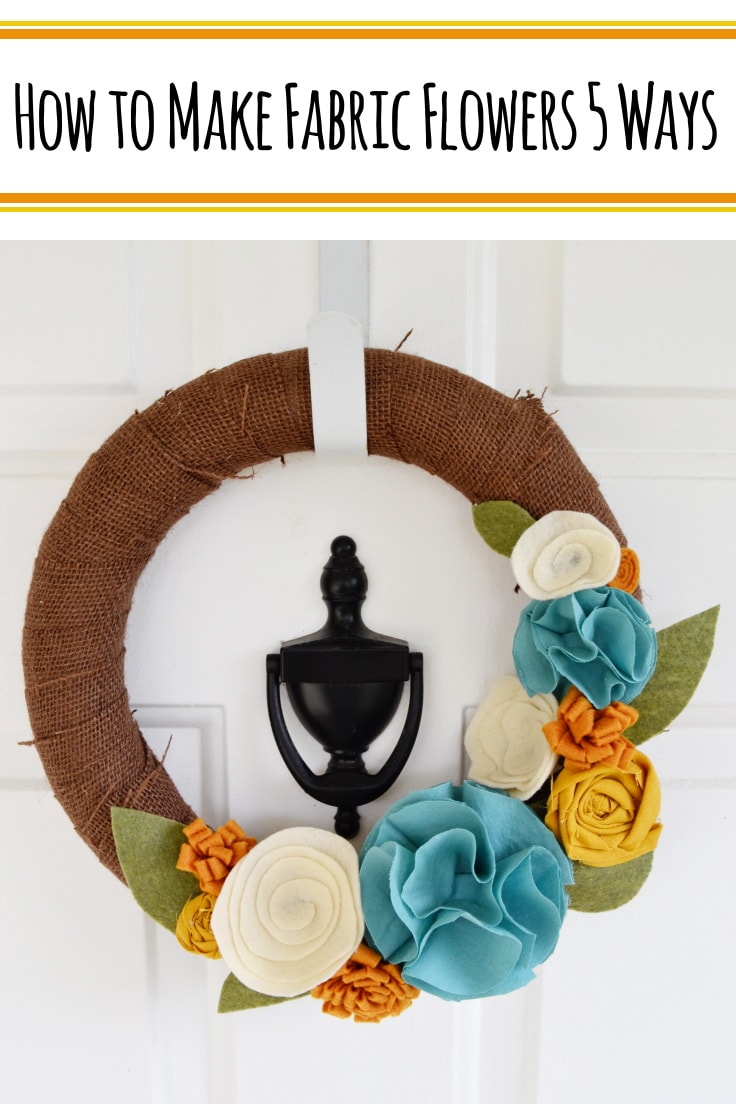
How to Make Fabric Flowers 5 Ways
THIS POST MAY CONTAIN AFFILIATE LINKS. PLEASE SEE OUR FULL DISCLOSURE POLICY FOR DETAILS.
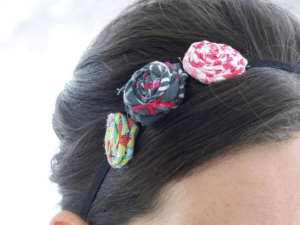
Learn how to make fabric flowers to embellish your decor items like wreaths and pillows in this simple tutorial that shows you how to do it in 5 ways.
Hey y’all, it’s Cat from Mary Martha Mama. I love to add fabric flowers to my craft projects and today I’m going to show you how to make fabric flowers 5 different ways.
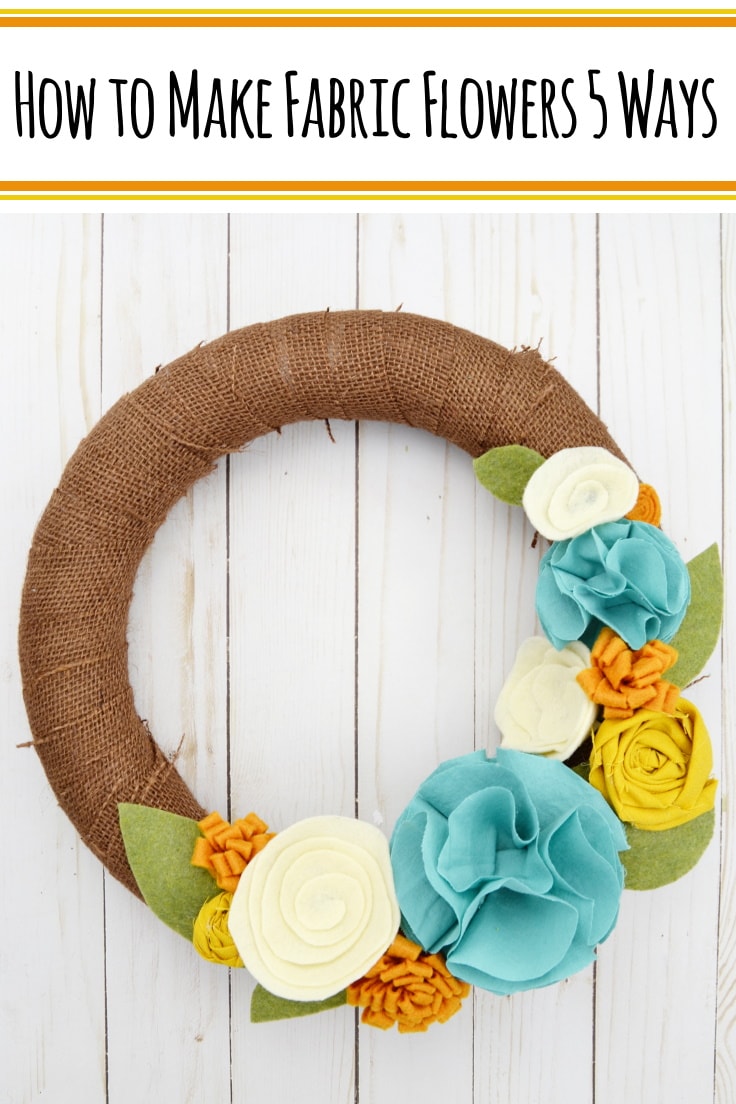
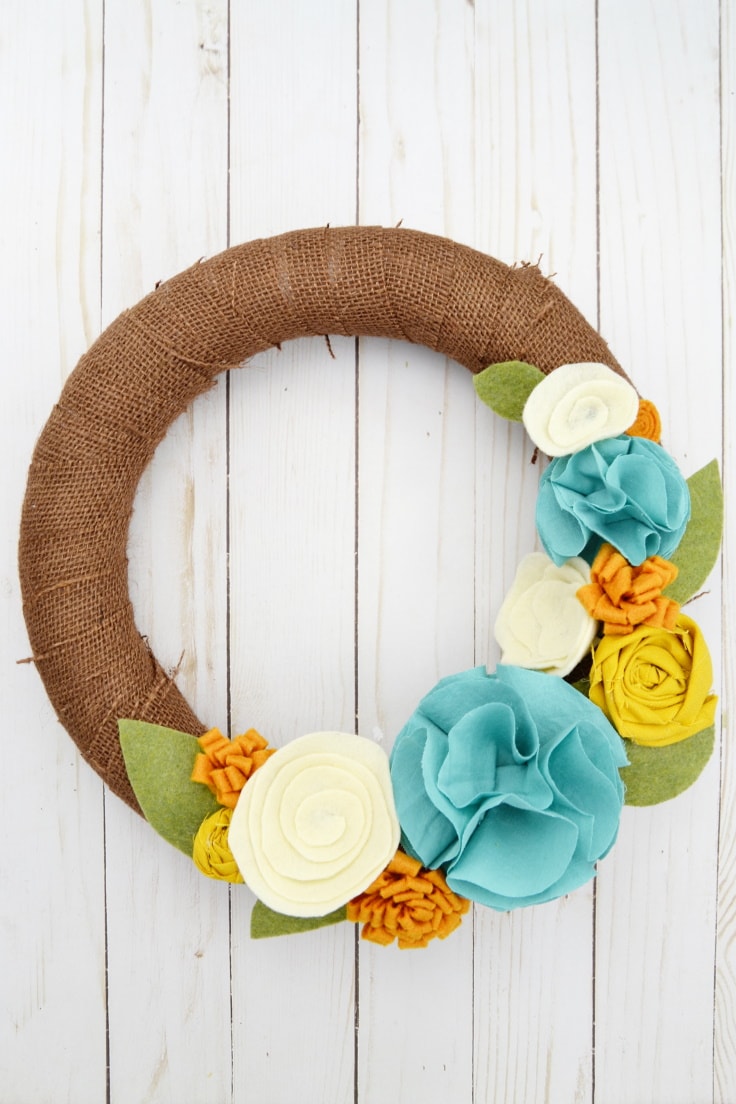
Knowing how to make an assortment of flowers can help you achieve a variety of looks in your projects. All of these fabric flowers will look amazing when you are making a homemade wreath!
How to Make fabric flowers
Each of these types of flowers is made slightly differently but I’m going to list everything you would need to make all of them.
What you need:
Want more ideas like this? Subscribe today to get our weekly Ideas in Your Inbox newsletter plus other exclusive gifts and offers — all for FREE!
Craft Tools Needed:
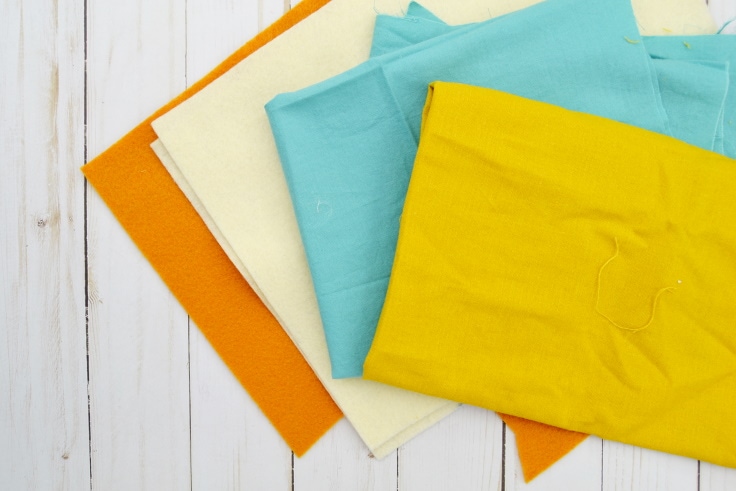
Supplies Needed:
- Fabric (this is a great way to use up scraps of fabric you love!)
- Felt
Instructions:
1. Twist and Spin.
Cut your fabric into strips. The size of your strips will determine the size of your finished flowers. I like to make my strips about 1-2 inches wide and then I vary the length to make flowers of different sizes. The longer the strips, the bigger your flower will be.
Make a knot at one end of your strip.
Then twist the fabric around and wind it around the knot. Glue the fabric down periodically with the glue gun. Occasionally put a dot of glue down on the side of the growing round area of the knot. Keep twisting the fabric as you go along. You can twist it loosely, or more tightly, depending on the look you prefer.
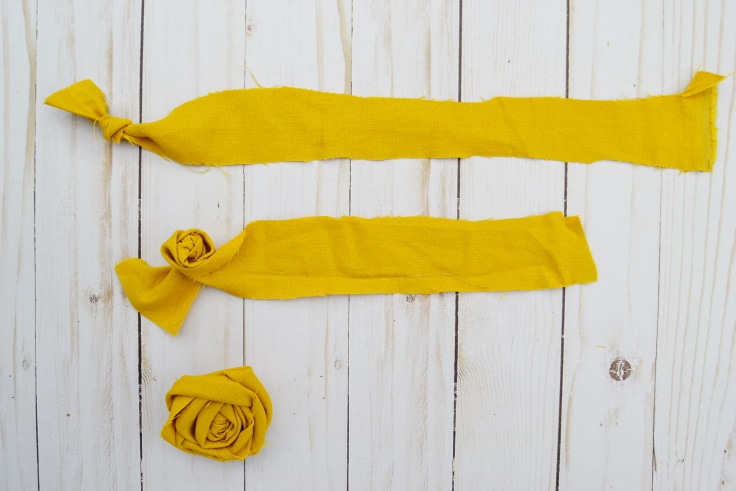
When you come to the end of the fabric strip then glue the little bit of fabric that remains to the back of the flower.
Then cut out a little round scrap of fabric and glue it to the back to secure things a little.
2. Cut a Circle into a Swirl.
This type of flower works really well with felt but you could do this with regular fabric as well. Cut out a few circles. No need for perfection here.
Cut a spiral into the circles. Picture that twirly thing they use to hypnotize people in cartoons. If you want a more organic, irregular looking flower then you can make your spiral a little wobbly.
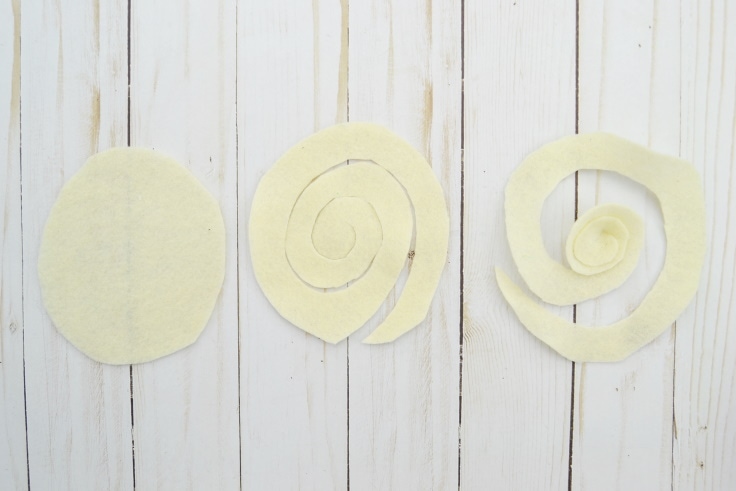
Along the inside edge of the spiral you’re going to lay down a line of hot glue. Press the edge toward the center slowly working your way around the flower.
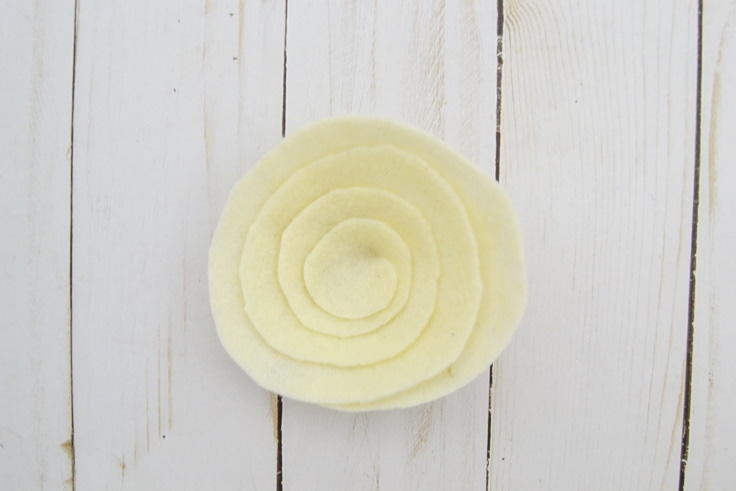
Glue the end bit of your swirl to the back of your flower.
3. Scallop Your Swirl.
Just like #2 you are going to start with cutting out circles and then cutting a swirl into them.
Then you are going to take your scissors and cut a scalloped shape into the outer edge of your swirl.
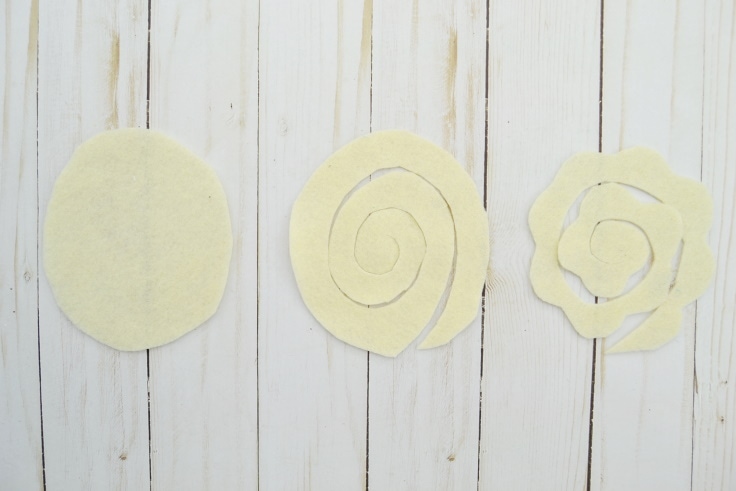
Along the inside edge of the spiral you’re going to lay down a line of hot glue. Press the edge toward the center slowly working your way around the flower.
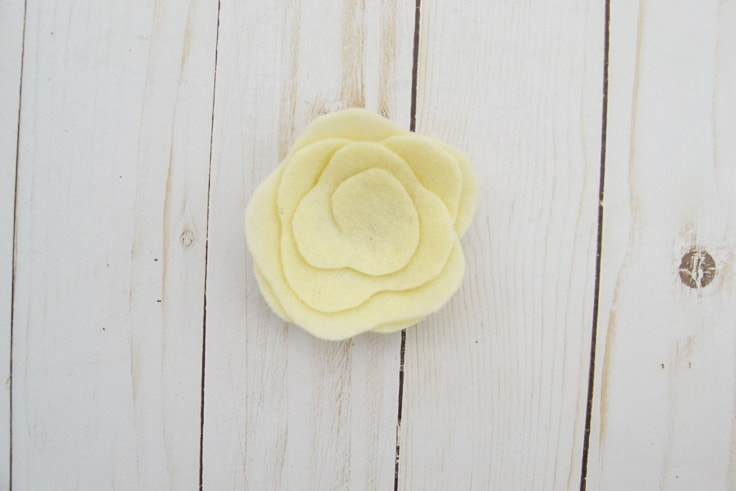
Glue the end bit of your swirl to the back of your flower.
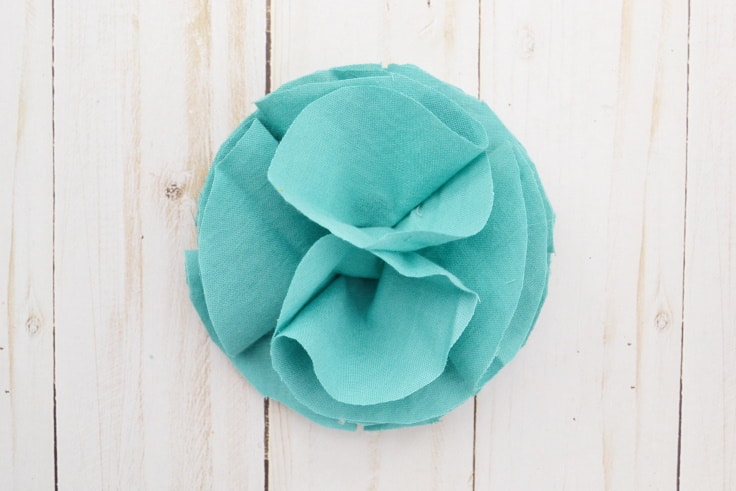
4. Fold and Glue.
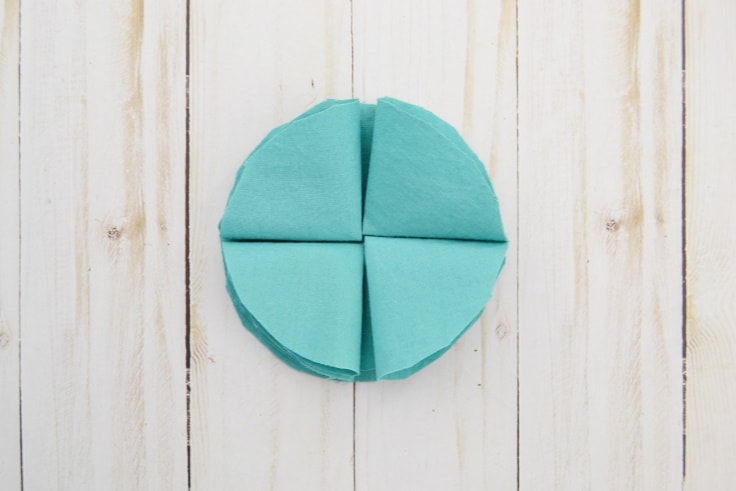
This seems like a more complicated way to make fabric flowers but trust me it sounds more complicated than it is. Cut out 9 circles. Your flower will be as big as one of your circles in diameter so whatever size you choose to make them is up to you. If you have trouble cutting a circle then use a glass or some other round object to trace a circle onto your fabric.
Fold one circle in half. Put a dab of glue along the bottom edge near the center. Then fold it in half again.
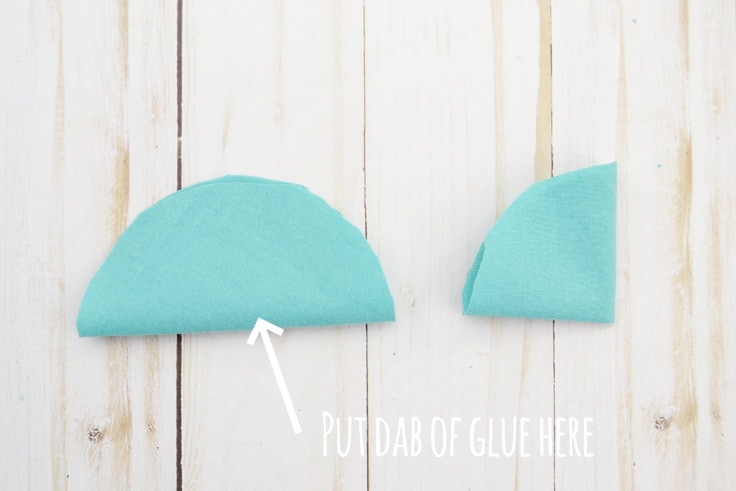
Repeat this process until you have folded and glued 8 of them like this.
Next you will lay down the one circle that you did not fold. Take 4 of the circles that you folded and glue them down on top of it. The point of each “pie piece” should be in the middle and the edges should line up with the outside of the circle that you glued them to.
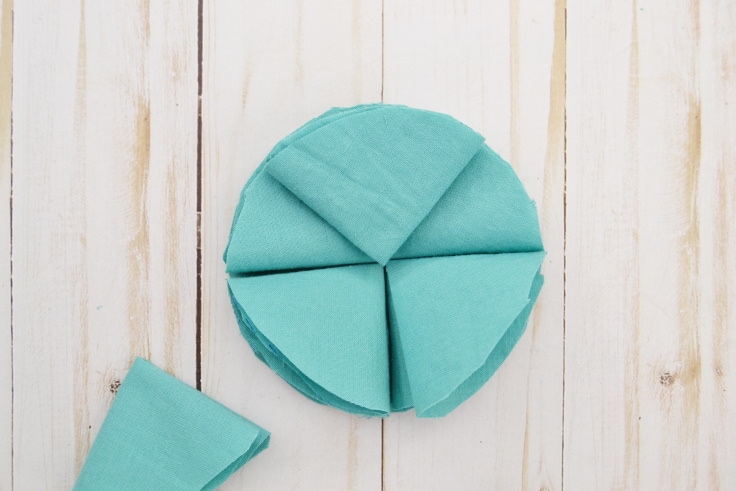
Take four more circles and repeat the folding and gluing process with them to create another layer but stagger them like a brick wall… glue them down so that the edges hit the middle of the layer below.
Then put a dab of glue on one of the pieces of fabric in the middle and pinch it together with the opposite piece of fabric in the middle.
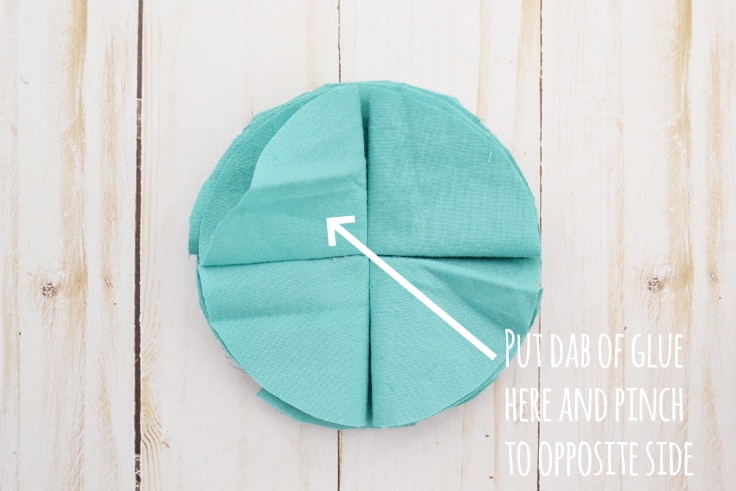
Then put a dab of glue on the other two remaining “pie pieces” and pinch them toward the middle as well. This helps avoid there being a gap in the center of the flower.

5. CUt Slits and Wrap.
Cut out a rectangle of felt. Like the other flowers in this tutorial the size of the rectangle will determine the size of your finished flower.
Fold the rectangle in half lengthwise and glue along the bottom edge so that it stays folded. Then cut slits into the fold side about every 1/4 inch.
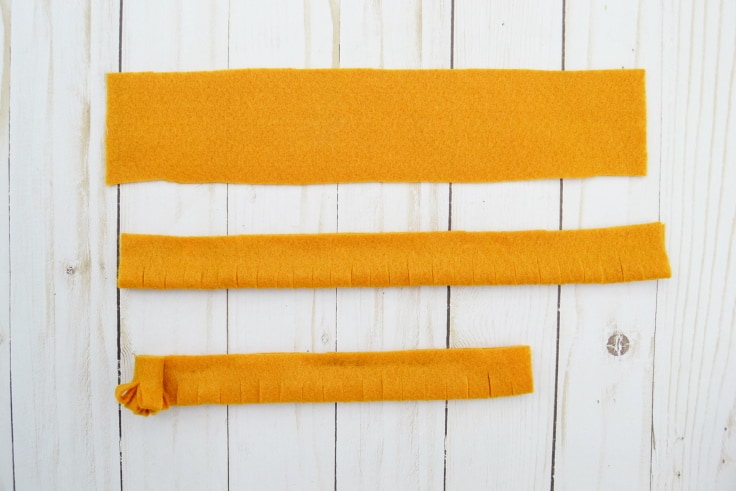
Start at one end and roll it up along the bottom edge. Drop a little glue along the bottom edge as your roll it up to keep it together.

Roll all the way up and glue the end down.
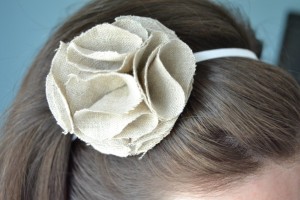
Once you know how to make fabric flowers you can take all these beautiful flowers that you made and you can use them to decorate a wreath, wall hanging, pillow, or whatever home decor item you like.
What’s Next?
If you enjoyed learning how to make fabric flowers then you’ll enjoy these tutorials too.
You may also enjoy these flower craft ideas on Ideas for the Home by Kenarry® –