How To Display Figurines With A Letterpress Drawer
THIS POST MAY CONTAIN AFFILIATE LINKS. PLEASE SEE OUR FULL DISCLOSURE POLICY FOR DETAILS.
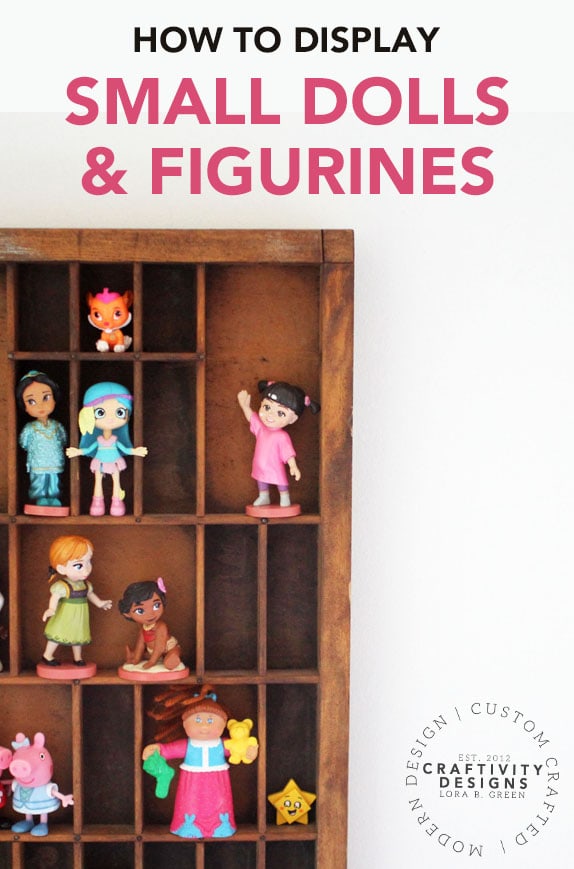
Does your child (or you!) have a collection of small figurines? A letterpress drawer is an easy way to display figurines (whether it’s a set of valuable miniatures or inexpensive tiny toys!).
My daughter loves tiny things. Shopkins, minifigs, small dolls, and figurines are just a few of the tiny things she loves to hoard collect (*wink*). As we makeover her bedroom, she needs a shelf to display figurines and small treasures.
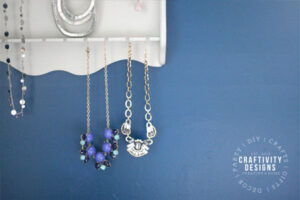
I’m Lora, of Craftivity Designs, where I share how we are Creating a Home. When decorating, I love to include clever wall decor that doubles as practical storage – just like this letterpress tray. A few of my favorite projects are my daughter’s hair bow storage and my jewelry organizer.
How to Display figurines With a Letterpress Drawer
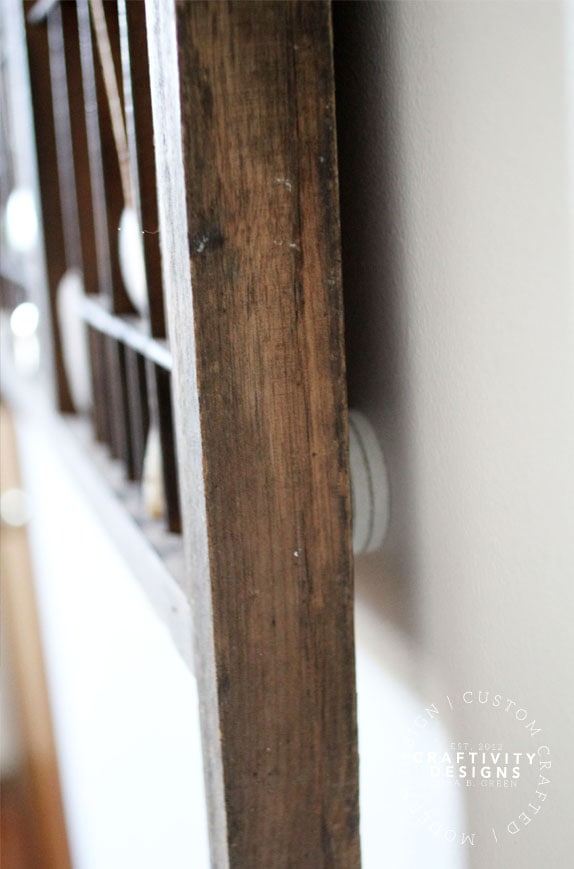
Are you familiar with letterpress drawers? These antique wooden drawers are filled with small cubbies and can be found at flea markets, on Etsy, or at consignment stores. If you’re not into thrifting, try grid-style drawer organizers.
What you need:
Want more ideas like this? Subscribe today to get our weekly Ideas in Your Inbox newsletter plus other exclusive gifts and offers — all for FREE!
Tools Needed:
- measuring tape
- screwdriver
- pliers
Supplies Needed:
- vintage letterpress drawers
- grid-style wood drawer organizer (optional, alternative to vintage letterpress drawers)
- picture frame hanging kit
- rubber grip pads
Instructions
Here’s how to turn a letterpress drawer into a way to display all your child’s tiny figurines.
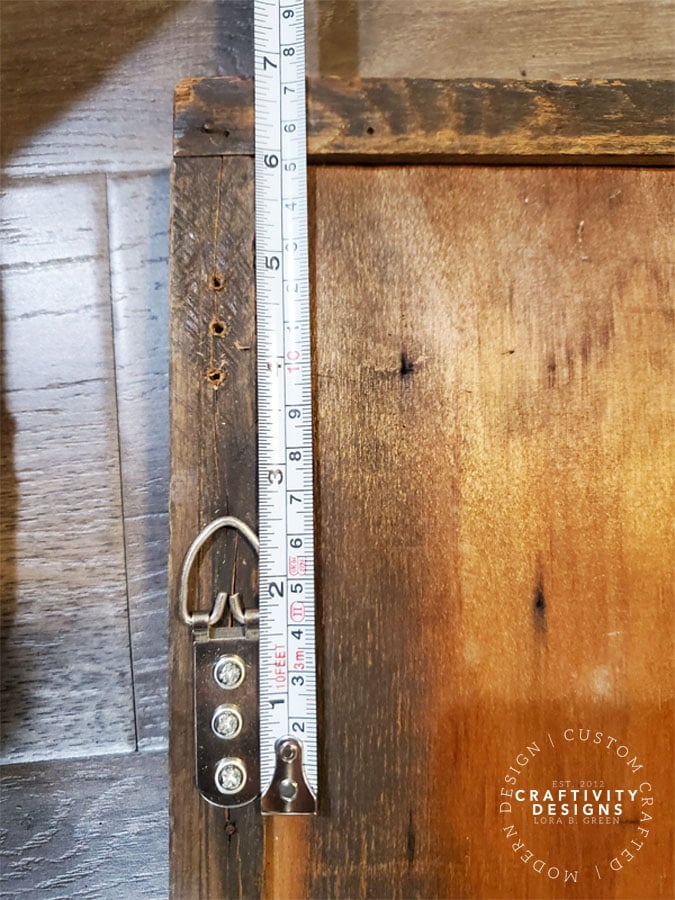
1. Measure for Hanging Kit
Letterpress drawers are heavy. After all, they are solid wood, the frame is typically thick, and they were designed to hold as many as 75-100 wood letter blocks. Plus, the figurines that are being displayed will add weight, too.
Therefore, it’s important to choose a strong hanging kit (and, yes, I learned that through experience… oops!). I suggest a wire hanging kit similar to what you would find on the back of a large mirror or piece of artwork.
To measure for the hanging kit, drop down a minimum of 3 inches from the top edge and place the hanger.
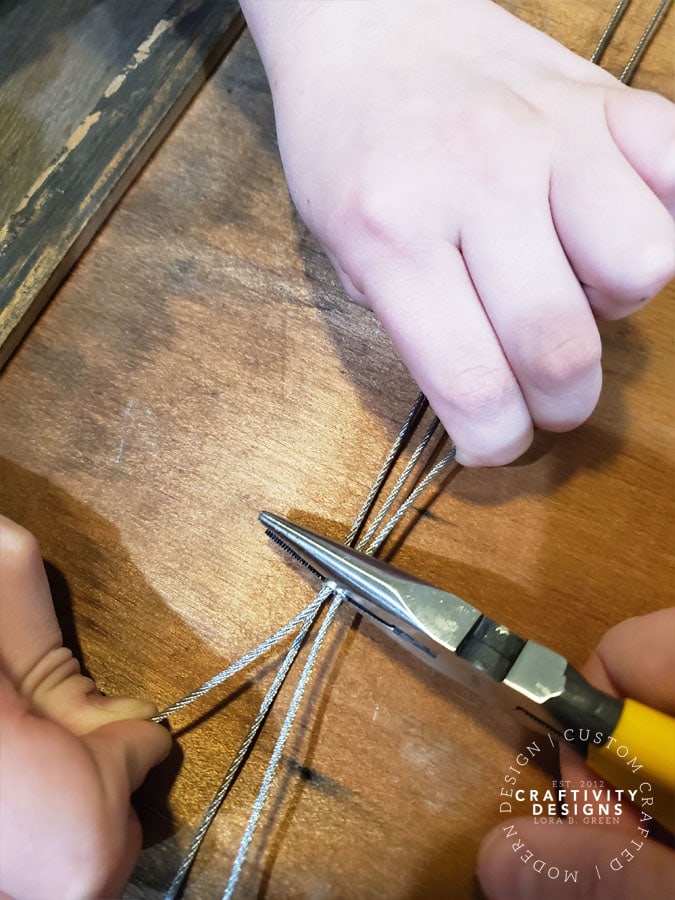
2. attach the hanging kit
Once measured, attach the hangers to the back of the letterpress drawer (one on each side). Then, thread the picture hanging wire through the hangers. Depending on the kit, the wire may need to be:
- twisted and tighten around the hangers or
- secured with a crimper.
Though I’ve used both, I prefer the crimp method and recommend it as the strongest solution. Use pliers to tighten the crimper and secure the wire in place.
3. Stabilize the Drawer
Since this is a display for collections – and especially if a child will be using it – it’s important to keep the letterpress drawer stabilized on the wall. Unlike picture frames which inevitably shift and get off-kilter, a figurine display can’t move easily.
In order to prevent movement, attach furniture-style rubber grip pads to the backside of the letterpress drawer. The rubber grips will help hold the figurine display steady – even when little hands are decorating it!
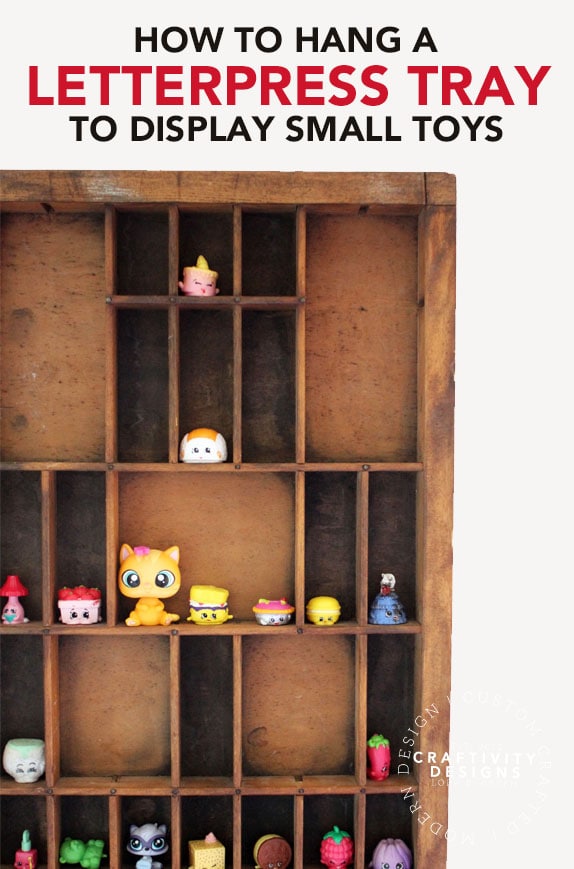
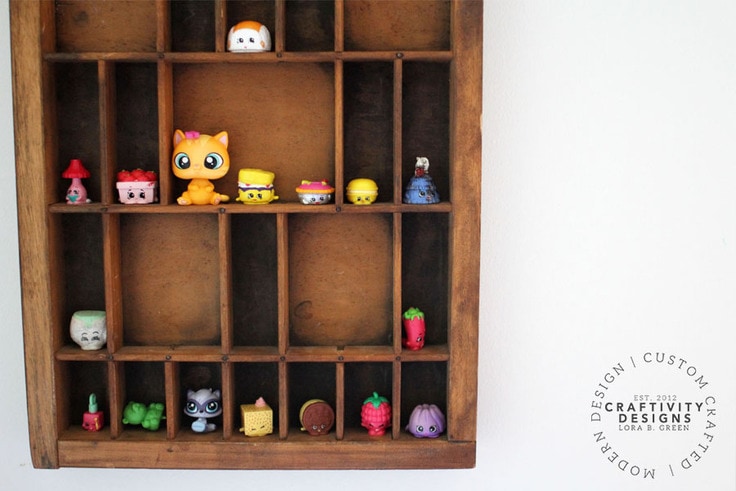
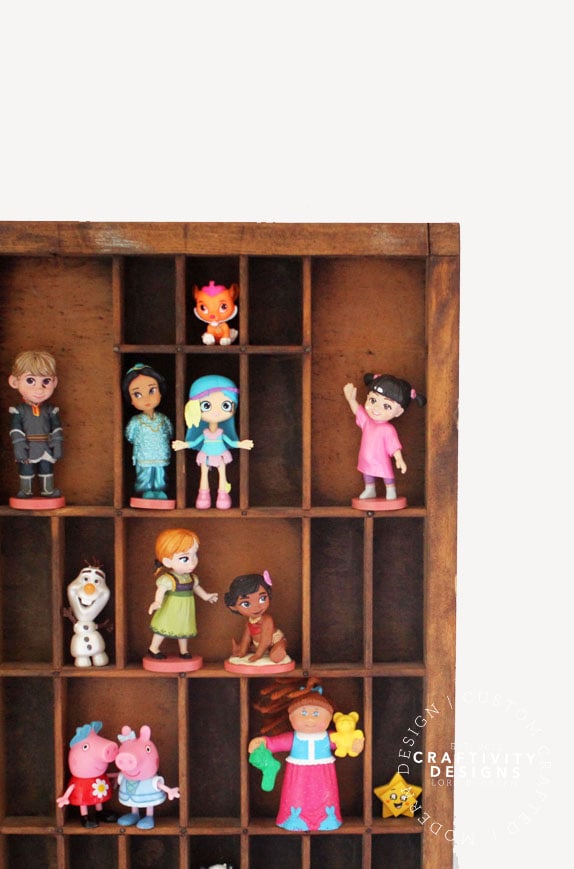
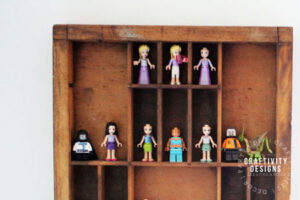
4. display the figurines in cubbies
Finally, it’s time to decorate the letterpress drawers (aka… my daughter’s favorite part!). She had a blast filling the cubbies with Shopkins, minifigs, small dolls, and more!
Display Figurines and Collections in a Letterpress Drawer
Don’t limit the letterpress drawer to figurines… many different collections can be displayed in the cubbies. Here are a few ideas:
- seashells
- spools of thread
- essential oils
P.S. Check out my son’s rock collection display, too!
Love the ideas you see here on Ideas for the Home by Kenarry®? Subscribe today to get our FREE DIY & Craft Planning Calendar, plus our weekly Ideas in Your Inbox newsletter filled with creative tips and exclusive offers!
What’s Next?
If you enjoyed this DIY organization project, then you’ll love these clever storage solutions, too.
How to Display LEGO Minifigures
How to Make a DIY Jewelry Organizer
How to Make a Family Command Center
You may also enjoy these organizing ideas on Ideas for the Home by Kenarry® –