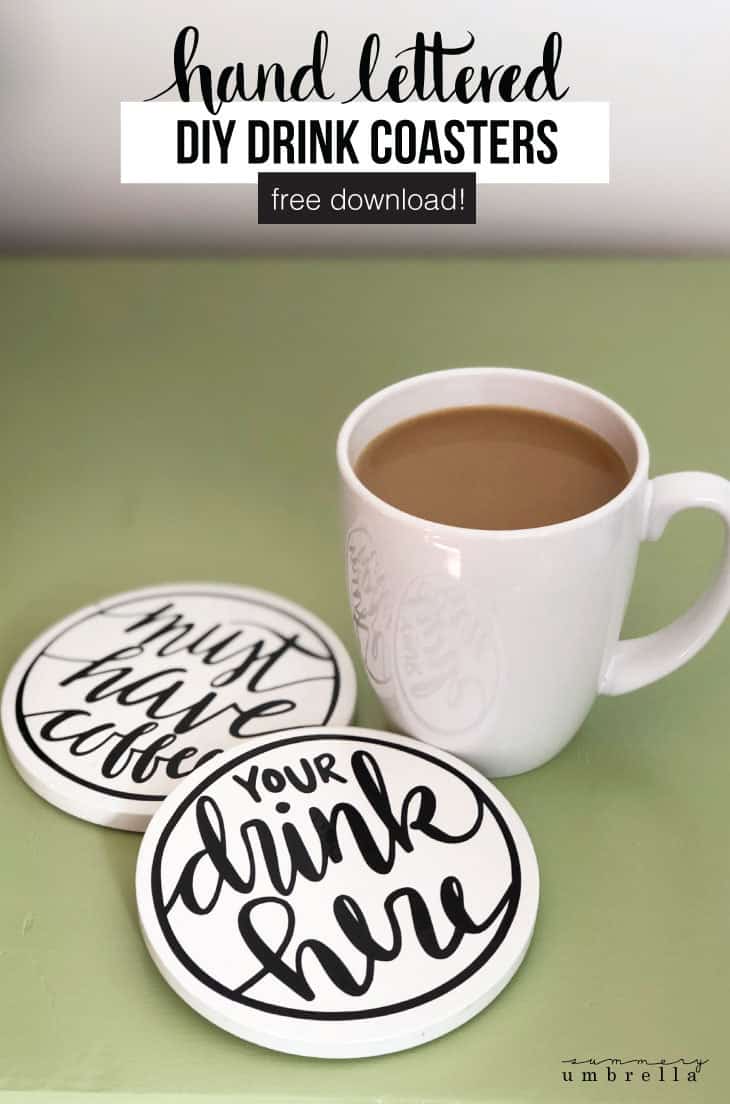
Quick And Easy Hand Lettered Drink Coasters (FREE DOWNLOAD)
THIS POST MAY CONTAIN AFFILIATE LINKS. PLEASE SEE OUR FULL DISCLOSURE POLICY FOR DETAILS.
Create your own hand lettered drink coasters with this super simple tutorial. It includes step-by-step instructions plus the free download!
Hello, Kenarry readers! It’s LZ Cathcart from The Summery Umbrella, and I am bringing you another super easy DIY project that could even double as an amazing gift. With the holiday season just around the corner this project will definitely be one of those that you’ll want to add to your list of “must do’s”.
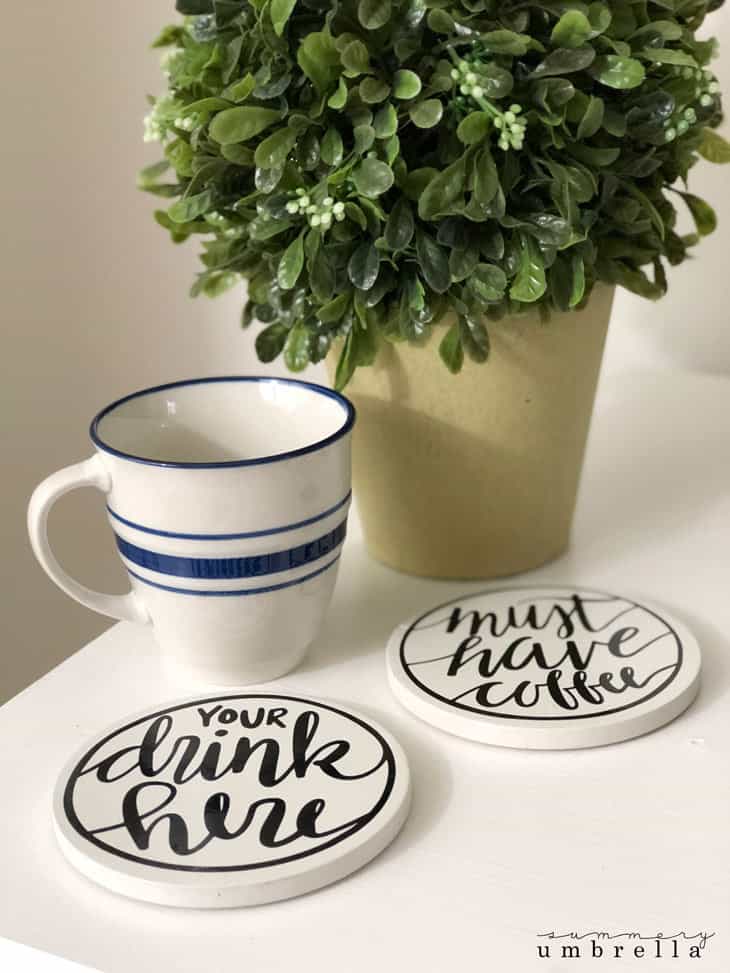
For instance, add a few of these hand lettered drink coasters to a basket, a couple of mugs, a yummy blend of your favorite gourmet coffee, and you have the perfect gift for one of your co-workers, neighbors, or friends that enjoy a good cup of joe!
Now, just in case you’ve never stopped by my neck of the woods (aka. my blog) I love to share my three favorite things: DIY, Design, and Decor projects. You’ll find everything from How to Use Vinyl Stencils to Create Your Own Signs (Video Tutorial) to my DIY coffee station as well as my hand drawn vectors for all of your crafting needs.
Not to mention, you’ll definitely want to check out my DIY Spring Flowers Sign tutorial and Custom Tumbler Template that I’ve shared with Kenarry readers in the past. They’re another couple of gift ideas just waiting on you!
Quick and Easy Hand Lettered Drink Coasters (FREE DOWNLOAD)
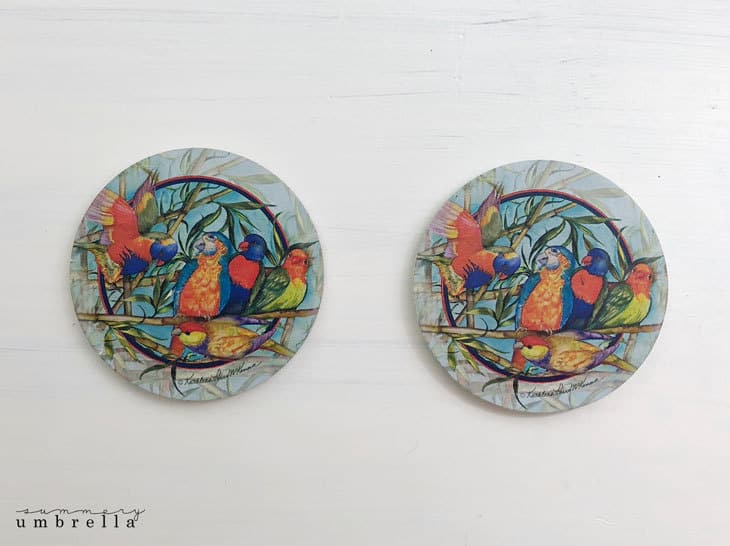
My husband and I just recently moved into a new house, and with any new house you find neat, little “treasures” from the previous owners. For example, a few weeks back as I was cleaning and decorating above my kitchen cabinets I found these tropical drink coasters.
While the graphic and coloring isn’t my style I just knew that they would come in handy for a DIY project! However, if you don’t have any coasters on hand you can just as easily use wood squares as well.
What You’ll Need:
- drink coasters (try to stay away from cardboard versions)
- white interior paint in satin
- clear top coat/protectant
- paint brushes
- Silhouette CAMEO and Mat
- Vinyl
- Transfer Tape
- Squeegee (or a Credit Card)
- drink coaster template downloads
Exclusive for Kenarry subscribers, receive the FREE drink coaster templates by signing up below. You’ll get the download link sent directly to your inbox.
Your privacy is important to us. We promise not to spam you or share your information. You can opt-out at any time. See our privacy policy for more information.
All printables from Ideas for the Home by Kenarry® are for your own PERSONAL USE ONLY.
After you’ve signed up, watch for an e-mail to confirm your e-mail address and download the free digital printable. Plus you’ll have the opportunity to get the weekly Kenarry Ideas In Your Inbox newsletter, as well as product discounts, special offers and other content that is EXCLUSIVE for Kenarry subscribers only.
You can also join our Idea Insider VIP Club to get unlimited access to the full vault of unique and beautiful printables we offer to make gift giving, holidays and everyday life more special. A lifetime membership in our Idea Insider VIP Club is a great way to save time and money with easy access to hundreds of printable cards, tags, wall art and more right at your fingertips.
Instructions:
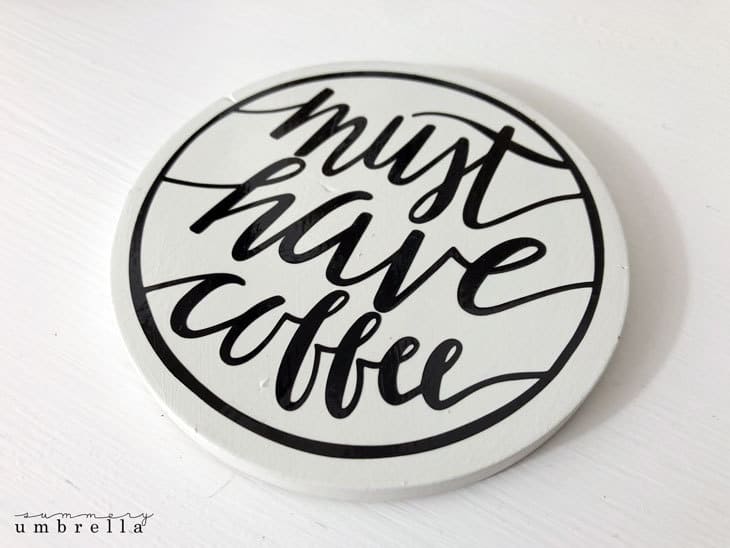
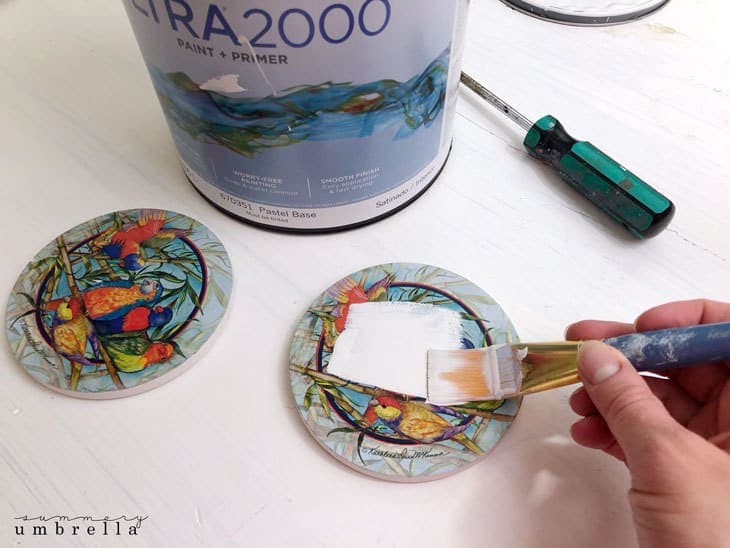
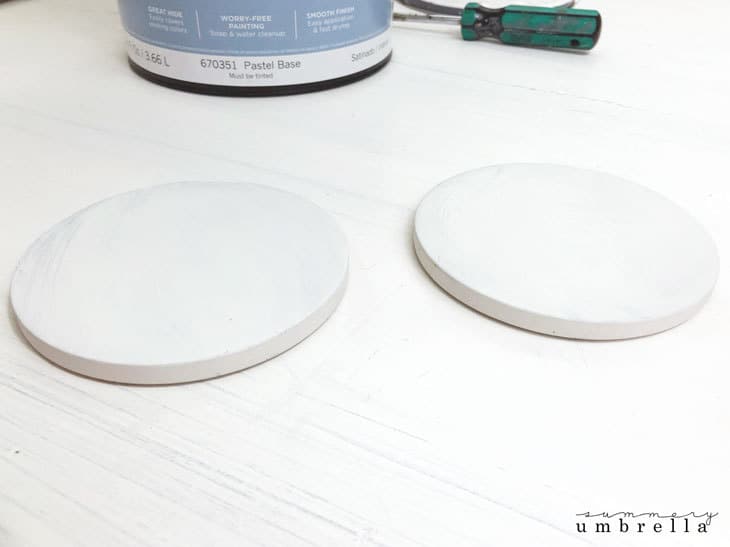
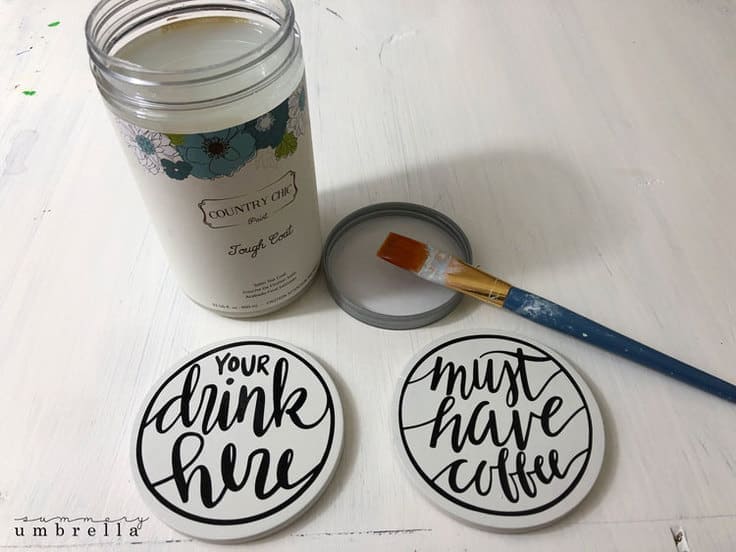
1. Clean and paint your drink coasters
Just like with any DIY project you’ll want to clean off your drink coasters with soap and water to ensure that the paint will adhere to it.
Then, add one coat of your white paint to each coaster. You’ll probably need a few coats to evenly cover your old background, but it’ll ultimately depend on the prior graphic that is on it.
2. Download the drink coaster template
After your coasters have completely dried (at least a few hours!) it is now time to cut out the template and add it to your coaster.
If you haven’t already go ahead and download the drink coaster template from the supply list above and save it to your computer.
3. Cut out the drink coaster templates
Using your Silhouette CAMEO cut out the drink coaster template with the vinyl on your mat.
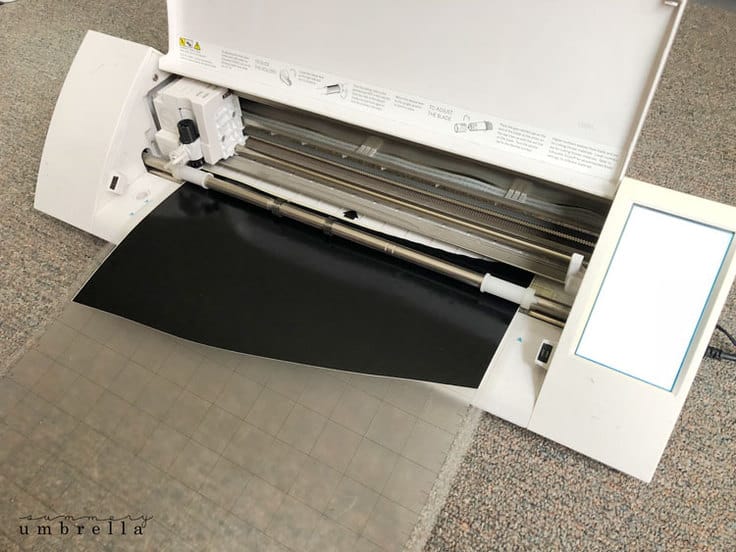
Need help cutting out the template? Watch this video for step-by-step instructions!
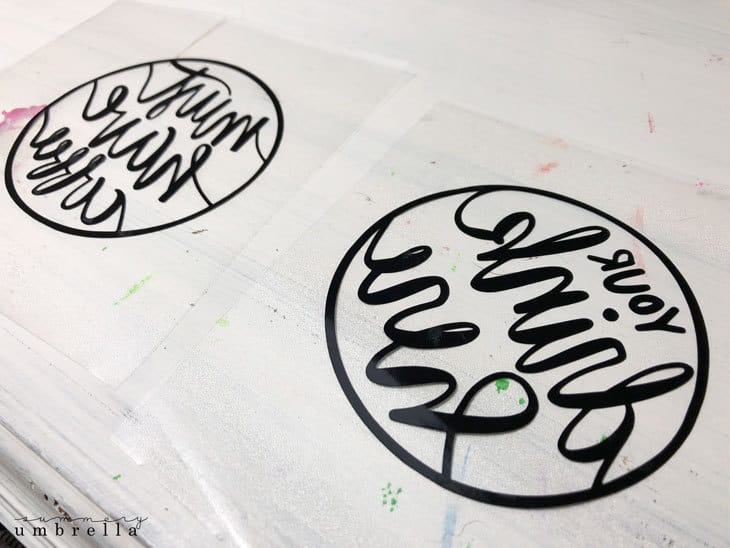
4. Remove your vinyl from your mat
After your design has been cut out remove the vinyl from your mat, and apply your transfer tape to the vinyl side.
Next, remove the backing from your vinyl, and carefully remove the vinyl pieces around the design.
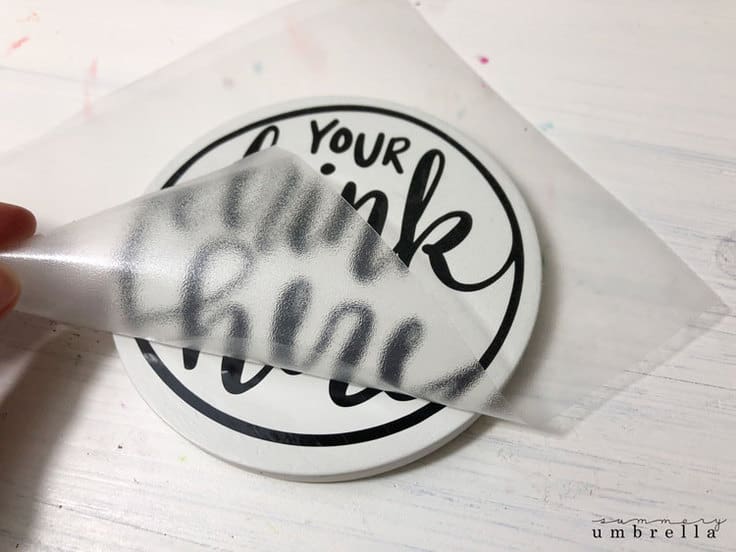
5. Apply the design to your coaster
Carefully line up your vinyl with your coaster so it will be applied evenly, and then firmly push it down with your squeegee.
6. Remove your transfer tape
Next, slowly remove your transfer tape so that only your vinyl is left on your coaster.
7. Apply your top coat
For this step you can use just about any top coat or protectant, but just make sure that it is clear. Personally, I used a favorite that I had on hand that I recently used for my kitchen cabinet update.
After the first coat has dried go ahead and add one more coat and let it dry.
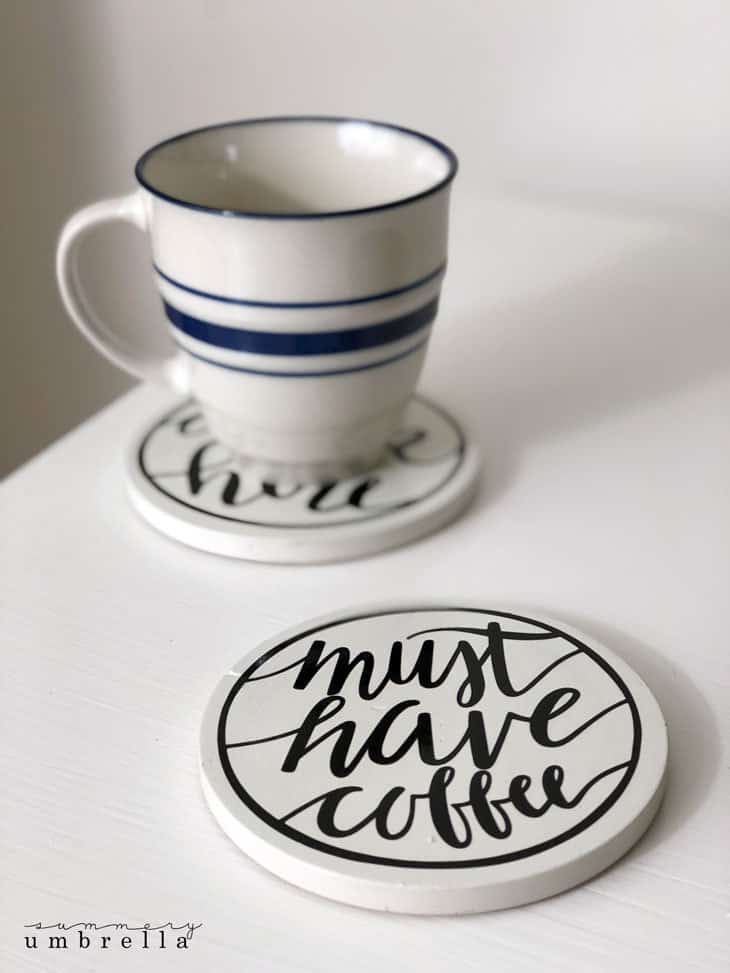
And that my friends… is all it takes! Wasn’t that easy? Not too much painting, or even a crazy amount of steps. This project could definitely be done in less than a day!
It was so nice to “meet” you again, and I’ll see you again next month about this time 🙂

Love the ideas you see here on Ideas for the Home by Kenarry®? Subscribe today to get our FREE DIY & Craft Planning Calendar, plus our weekly Ideas in Your Inbox newsletter filled with creative tips and exclusive offers!
Looking for more crafty projects?
How to Create a DIY Gather Fall Sign
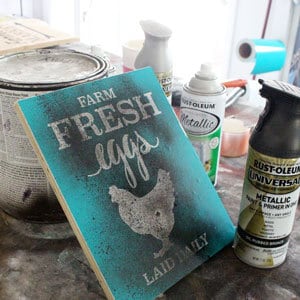
Create Your Own DIY Farm Fresh Eggs Signs
Feast Your Eyes on this NEW Grateful Thankful Blessed SVG and Printable

You may also enjoy these creative projects on Ideas for the Home by Kenarry® –