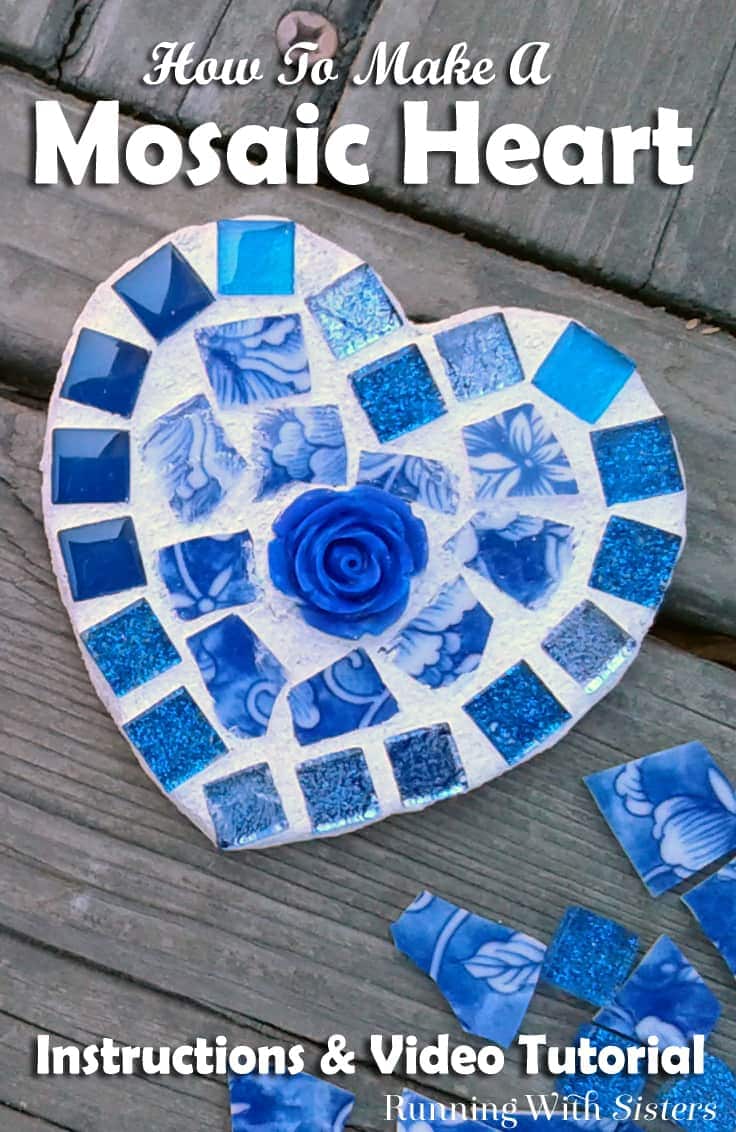
Easy Mosaic Project: How To Make A Mosaic Heart
THIS POST MAY CONTAIN AFFILIATE LINKS. PLEASE SEE OUR FULL DISCLOSURE POLICY FOR DETAILS.
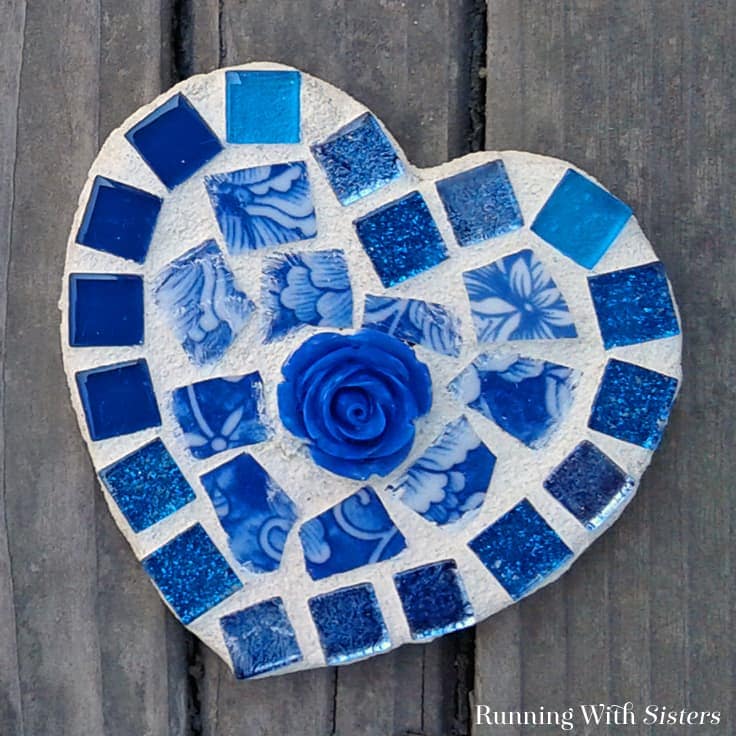
Make a Mosaic Heart with broken china tiles. In this video tutorial, learn how to glue tiles and how to mix the grout. It’s an easy mosaic project for beginners!
Hi Kenarry readers! It’s Jennifer and Kitty (the O’Neil Sisters, from RunningWithSisters.com) here to share one of our favorite mosaic projects: How To Make A Mosaic Heart. Three things we love love love about this mosaic heart: it’s fast, it’s super cute, and it’s great for beginners!
Never made a mosaic before? Then this project is for you! We’ll show you how to make this Mosaic Heart every step of the way. We’ll show you how to arrange and glue down the tiles. We’ll show you how to mix up the grout and how to apply it. Then we’ll show you how to buff your mosaic heart clean. (And seal it!)
We’ve even included a video showing the complete Mosaic Heart project. Watch as we make the Mosaic Heart, and you’ll see just how fast and easy it is. Then follow the written steps below to make your own darling mosaic heart. So cute!
How To Make A Mosaic Heart
Disclosure: This blog post contains affiliate links for products or services we think you’ll like. This means if you make a purchase from one of these links, Ideas for the Home by Kenarry® will make a small commission at no additional cost to you so we can keep the great ideas for the home coming your way. All opinions expressed are derived from personal experience.
Materials For One Mosaic Heart
- Wooden heart, 3¼”
- 18 Mini mosaic tiles, 3/8”
- 10 Broken china tiles
- ¾” Resin rose
- Powdered grout, white
- Clear silicone adhesive
- Mosaic grout sealer
Supplies
- White spray paint primer
- Putty knife
- Gloves
- Sponge
- Measuring spoon
- Disposable mixing container (like a sour cream container)
- Bucket to rinse sponges in
- Foam paintbrush
Steps To Make The Mosaic Heart
1. Prime the wooden heart with the white spray paint primer. Let dry. (We chose a 3¼” wooden heart to make this mosaic, but you can easily scale this project up. We’ve seen wooden hearts 4″ across and even 9″ across. Of course, you’ll need more tiles! You can even make a mosaic heart with seashells.)
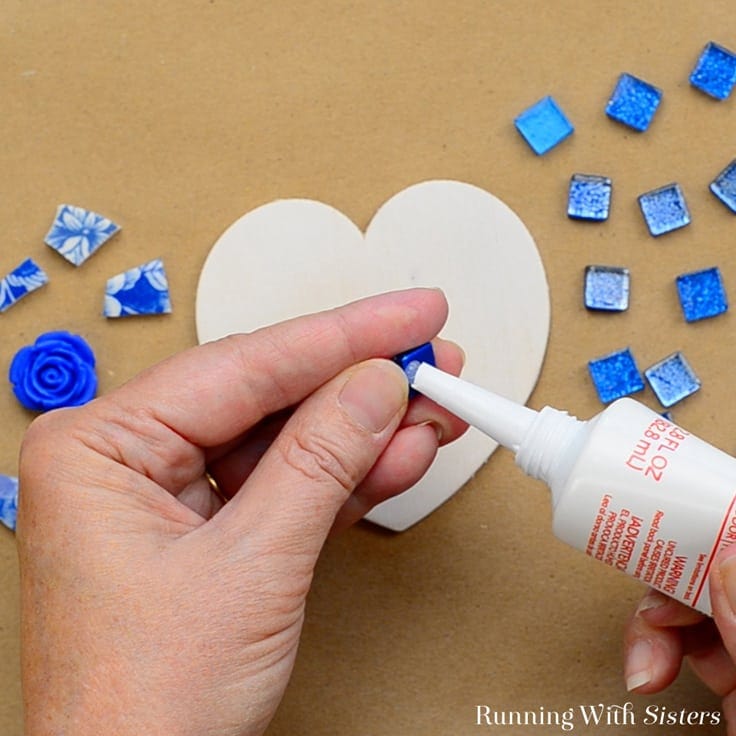
2. Arrange the tiles to cover the heart. To glue the tiles down, place a dab of silicone on the back of each tile and press the tile into place. Don’t worry if some glue squishes out from under the tile, the grout will cover it up.
If you don’t know how to cut thrift store china into tiles and you’d like to learn, we have a how-to that includes that. Click here to see how easy it is to cut china into mosaic tiles. If you don’t want to cut your own tiles from china, you can buy them online!
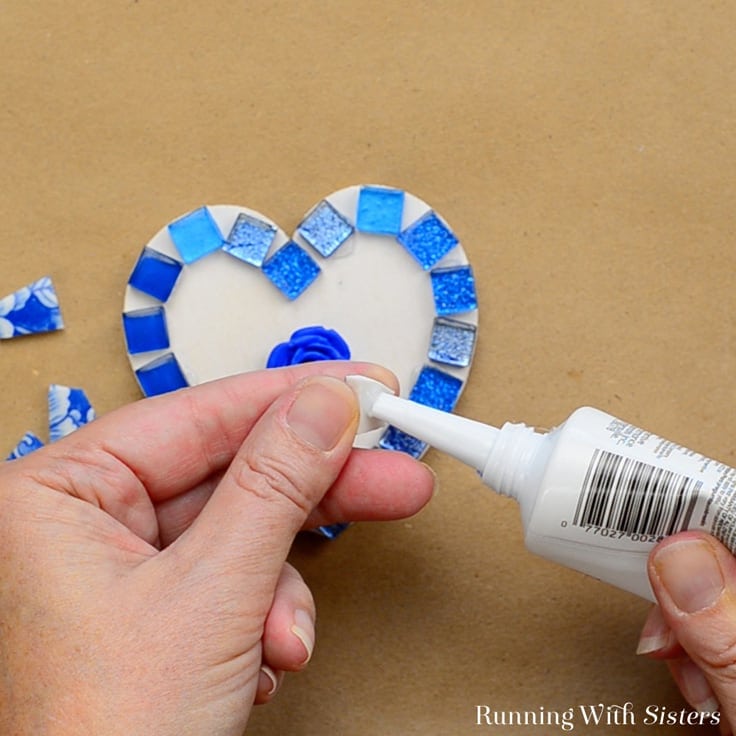
We like to make a border first using the mini tiles. Then fill in the center with broken china tiles. We added a sweet resin rose to our mosaic and placed it in the center of the heart. Let the glue dry completely before you move on to grouting. It should take about 30 minutes to dry.
3. Put on your gloves, it’s time to mix the grout! To do this, place about a tablespoon of water in the mixing cup. Dry off the measuring spoon and use it to add 3 tablespoons of dry grout to the mixing cup. (Of course, read the directions on the grout you buy. It may require a different ratio of water to grout.) Mix the grout with the putty knife. The goal is to make the grout the texture of natural peanut butter––not dry and crumby and not runny. Add water as needed to get the right consistency.
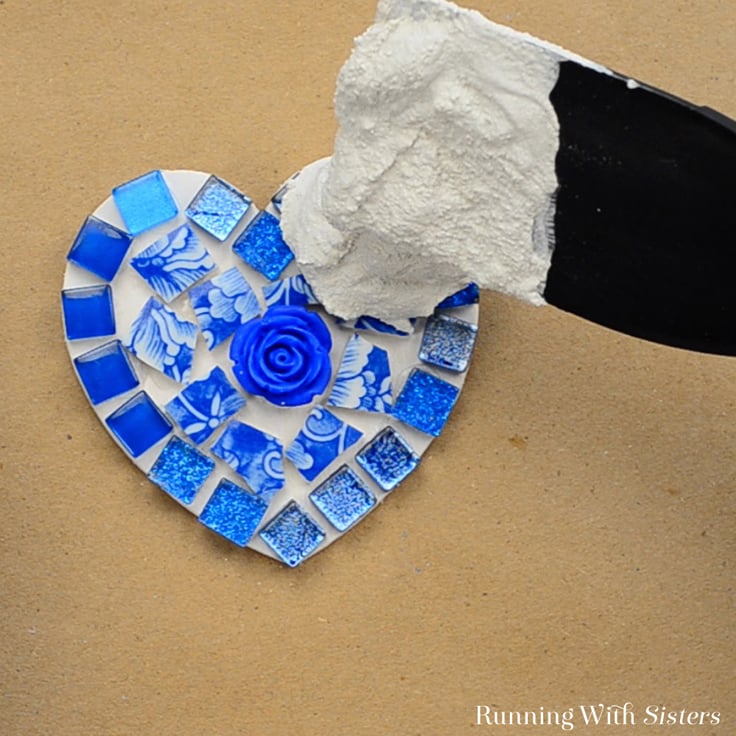
4. Once the grout is mixed, you have about 15 minutes to use it. Smear the grout over the mosaic with the putty knife.
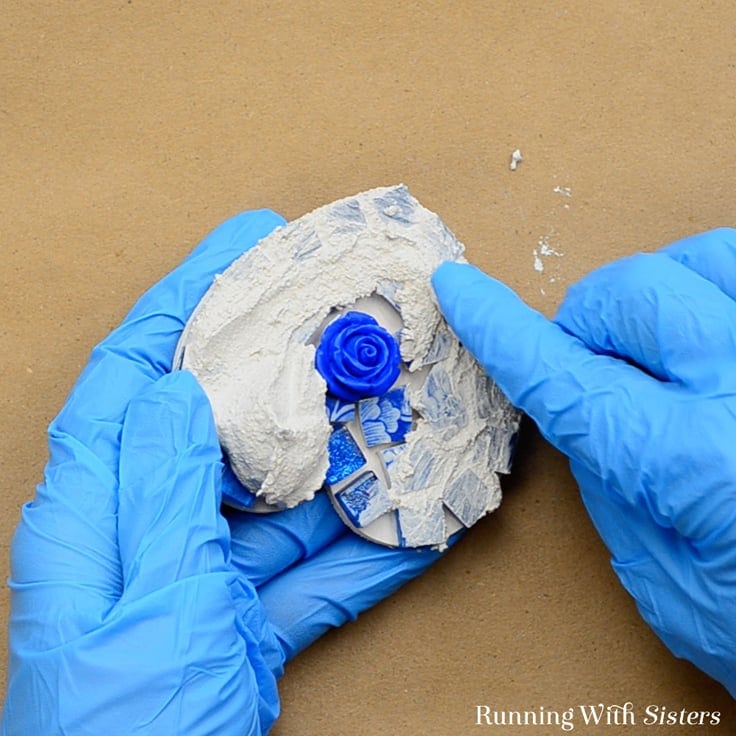
Use your gloved finger to make sure grout gets in between and around every tile. Use the edge of the putty knife or a craft stick to push the grout under the edges of the rose, but avoid getting any grout in the rose petals.

5. Remove the excess grout from on top of the tiles with a damp sponge. Be careful not to remove the grout from between the tiles. Rinse the sponge in the bucket to clean it as needed.
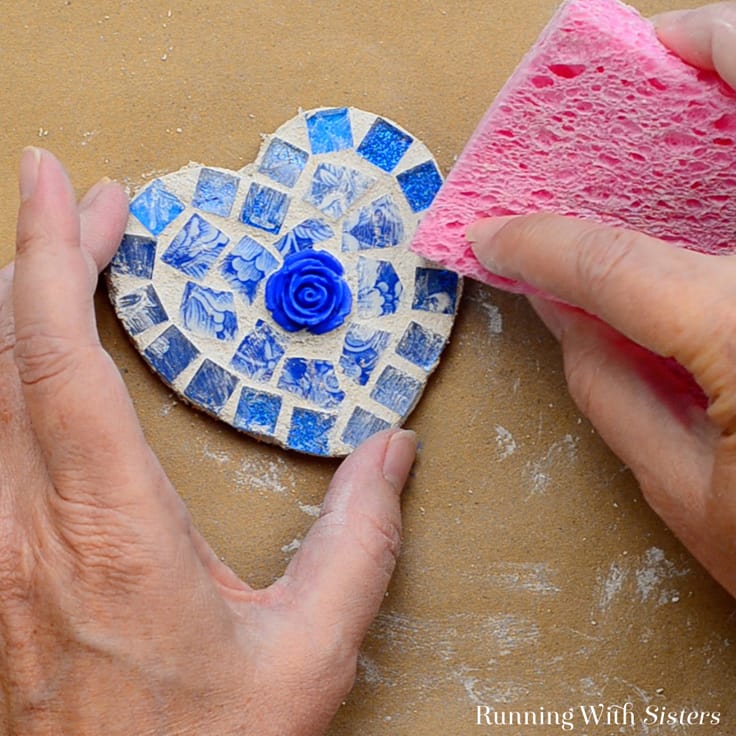
6. Let the grout set up for 15-20 minutes then buff the surface of the tiles to remove any grout haze. You can use the damp sponge to buff or use a dry paper towel.
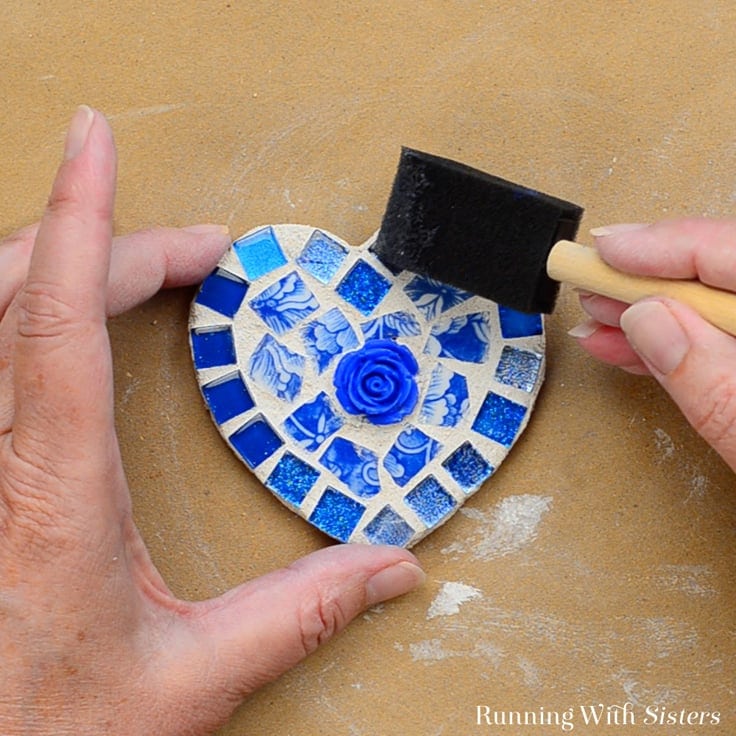
7. Let the mosaic dry overnight, then use the sponge paintbrush to paint the mosaic with a coat of grout sealer. Let dry and admire your work!
How fun is that?! It’s a great project for a craft party, too. Set out all kinds of mini tiles, resin roses, and broken china pieces. Or get a pair of tile cutters at your local hardware store and take turns cutting china plates into tiles for the hearts. It’s easier than you think!
If you have any questions about doing this or any other mosaic project, leave us a comment and we’ll reply. We love helping with mosaics!
Happy Crafting!
Jennifer & Kitty
Here are a few more mosaic projects from The O’Neil Sisters:


Love the ideas you see here on Ideas for the Home by Kenarry®? Subscribe today to get our FREE DIY & Craft Planning Calendar, plus our weekly Ideas in Your Inbox newsletter filled with creative tips and exclusive offers!
What’s Next?
While you’re here, be sure to check out other craft projects on Ideas for the Home by Kenarry® –