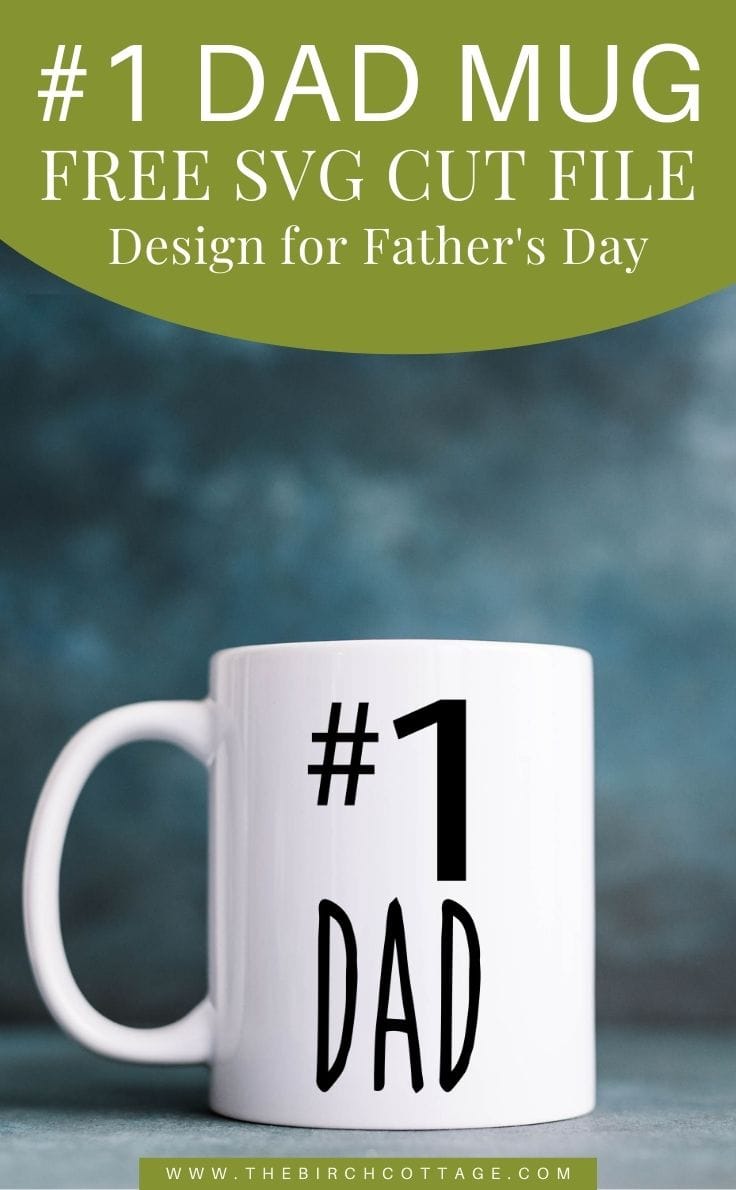
#1 Dad – DIY Father’s Day Mug With Free SVG Cut File
THIS POST MAY CONTAIN AFFILIATE LINKS. PLEASE SEE OUR FULL DISCLOSURE POLICY FOR DETAILS.
Learn how easy it is to create a custom #1 Dad DIY Father’s Day Mug with this free SVG cut file and your Cricut Mug Press!
Hello, Kenarry readers! I’m Pam from The Birch Cottage, and I’m back again this month sharing with you another Cricut project idea. Only this time we’re celebrating Father’s Day with this #1 Dad Father’s Day Mug and free SVG Cut File!
Want more ideas like this? Subscribe today to get our weekly Ideas in Your Inbox newsletter plus other exclusive gifts and offers — all for FREE!
I realize it’s only May, but Father’s Day is coming and there’s no time like the present to learn how easy it is to make custom-designed mugs. There are four things that make this a really easy project. One is the use of your Cricut cutting machine to cut out your design. Second, is the use of the Cricut Mug Press for amazing results! The third is the use of the Mug Design project file in Cricut Design Space. And, the fourth is this set of free SVG Cut Files!
How to use the #1 Dad sVG cut files for father’s day mugs
Before we talk about all the ways to use this collection of #1 Dad SVG cut files to make mugs for Father’s Day, let’s talk a little bit about SVG files.
What is an SVG File?
I sometimes forget that not everyone knows what an SVG file is. SVG stands for Scalable Vector Graphic. An SVG is a type of image file, just like JPG, PNG, and GIF are also types of image files.
The really great thing about SVG files, as their name implies, is that they are scalable. So, if you want to make the image larger, for example, you can! And all without the loss of image quality.
Why Use an SVG File?
SVG files are used in cutting machines, like the Cricut and Silhouette brands of cutting machines. People use programs like Adobe Illustrator to create SVG files. In fact, the default file type with Cricut is an SVG. (Although it can use other file types, too, like PNG.) Because you can easily resize the SVG images, they are perfect for use in creating designs for use with cutting machines.
Project ideas
Really, the only limitation is your imagination when it comes to using SVG cut files with our cutting machine. Here are a few ideas:
- Create custom vinyl mugs
- Mugs with iron-on vinyl (HTV)
- Infusible Ink Transfer mugs with the Cricut Mug Press
- T-Shirts for Dad
That should be enough project ideas to get you thinking about just how to use these SVG cut files. What WILL you make with them?
What’s Included in the #1 Dad Father’s Day Mug Designs?
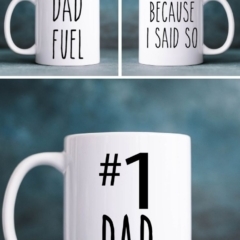
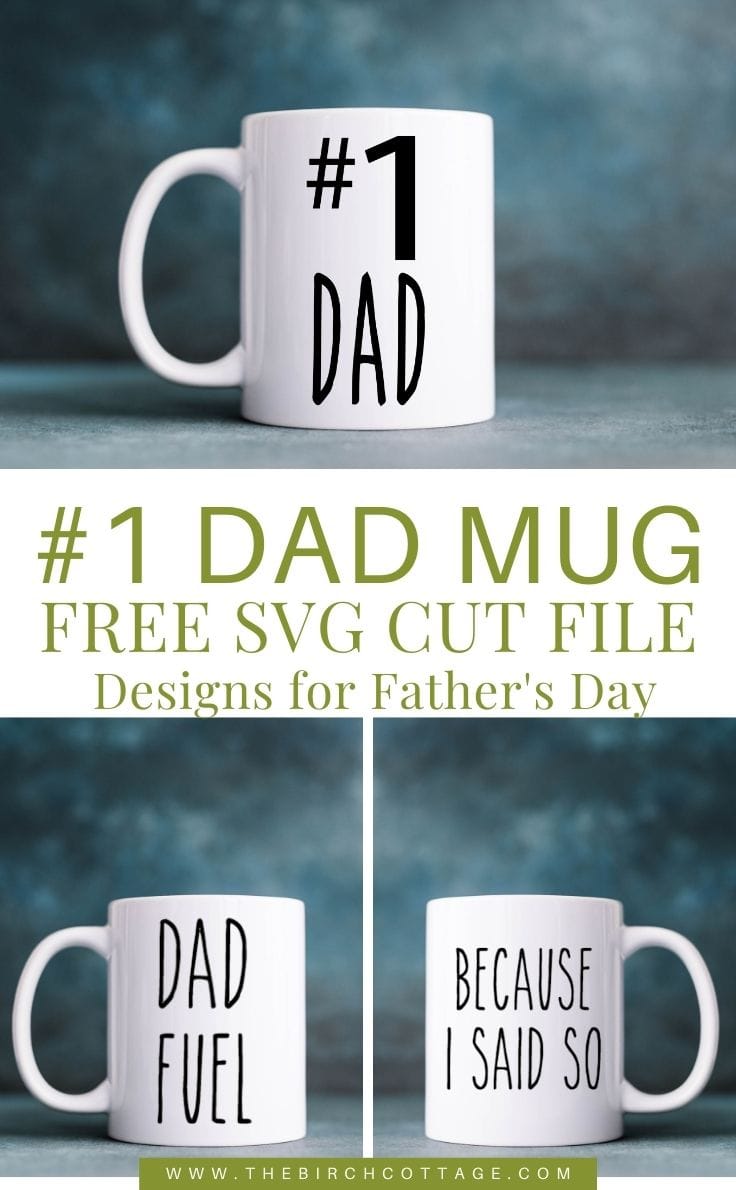
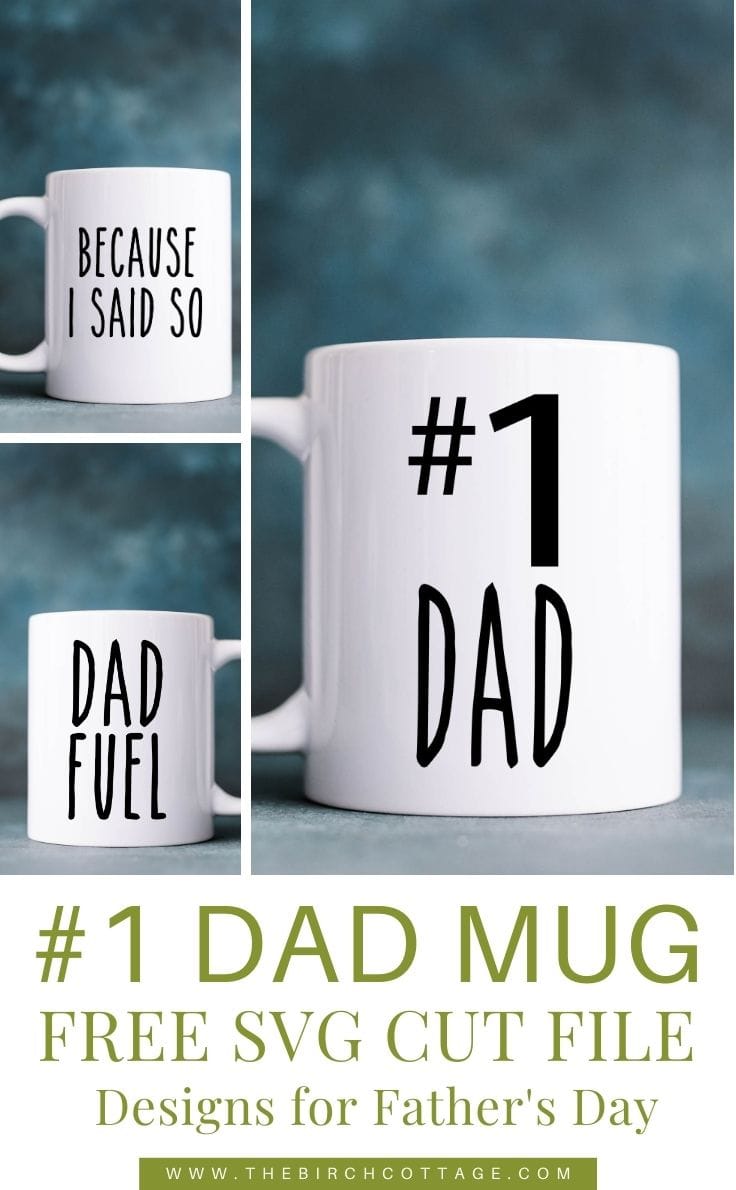
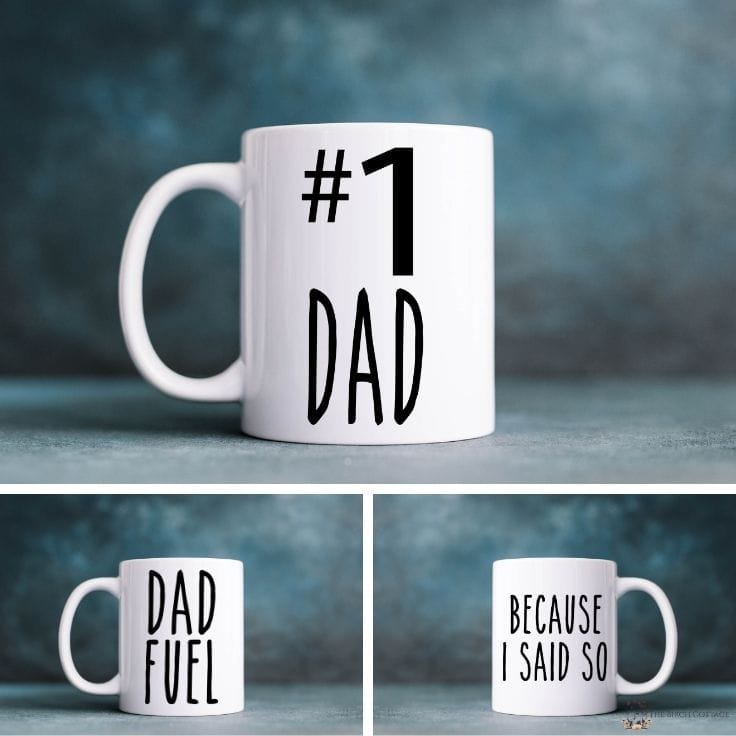
Were you surprised to see two other mug designs in the images featuring the #1 Dad mug? Well, there’s a little reason for that. There are three, not one, SVG cut files included. So you can choose from: #1 Dad, Dad Fuel, and Because I Said So.
Aren’t these fun sayings and just perfect for Father’s Day gift giving? The #1 Dad Mug Design Father’s Day SVG Cut Files use “The Skinny” font. You can download this font for personal use from www.dafont.com. This is what I call my “Rae Dunn inspiration font.” And the very same font I used in my Spring SVG Files and Christmas SVG Files that you’ll find right here on Ideas for the Home by Kenarry.
What you need:
Craft Tools Needed:
Like I said, you can use these SVG cut files with any cutting machine that accepts SVG files. But, here are my recommendations:
- Cricut Explore Air 2
- Cricut Maker
- weeding tool
- brayer
- cutting mat
- Cricut Easy Press Mini or Iron
- Cricut Mug Press
Supplies Needed:
These are the ingredients you’ll need. All the exact amounts are in the printable card at the bottom of this post.
How To Get The DIY father’s day mug SVG designs
Step One: Subscribe
This collection of Father’s Day SVG Cut Files is exclusive for Kenarry subscribers. Receive the FREE collection of SVG files by signing up below. You’ll get the download link sent directly to your inbox.
Your privacy is important to us. We promise not to spam you or share your information. You can opt-out at any time. See our privacy policy for more information.
All printables from Ideas for the Home by Kenarry® are for your own PERSONAL USE ONLY.
After you’ve signed up, watch for an e-mail to confirm your e-mail address and download the free digital printable. Plus you’ll have the opportunity to get the weekly Kenarry Ideas In Your Inbox newsletter, as well as product discounts, special offers and other content that is EXCLUSIVE for Kenarry subscribers only.
You can also join our Idea Insider VIP Club to get unlimited access to the full vault of unique and beautiful printables we offer to make gift giving, holidays and everyday life more special. A lifetime membership in our Idea Insider VIP Club is a great way to save time and money with easy access to hundreds of printable cards, tags, wall art and more right at your fingertips.
Step Two : Download & Unzip
After you subscribe, you’ll want to download the SVG files, which will be contained in one ZIP file. Once downloaded, you’ll need to unzip the files (usually by double-clicking on the file and selecting Extract All). If you don’t have a zip utility on your computer, you can download a free one like 7-Zip (please use at your own discretion).
Step Three: Upload
Then once you have subscribed, downloaded, and unzipped the ZIP file that contains the SVG files, you’ll want to upload the designs to Cricut Design Space or into your preferred software. Then you are ready to customize your designs to fit your project.
If you are using this design with the new Cricut Mug Press, I highly recommend using the Mug Design Setup project file that you’ll find in Design Space. Then after uploading your SVG file, you can insert it into your project file. Please see the card below for more specific instructions.
How to Create a DIY father’s day mug
Video Instruction
I’ve created a video that shows how to use the Cricut Mug Press project, how to upload the SVG file to use with this project file and how to resize and layout the design for use with Cricut Design Space.

DIY Father’s Day Mug – #1 Dad
Equipment
- Cricut Joy
- Cricut Explore Air 2
- Cricut Maker
- EasyGrip Mat
- Weeding Tool
- Cricut Mug Press™
- Heat Resistant Mat
Supplies
- 1 Cricut Mug (or a sublimation mug)
- 1 lint roller
- 1 infusible ink transfer sheet
- 1 heat resistant tape
- 1 #1 Dad SVG Cut File (or design of your choice)
Instructions
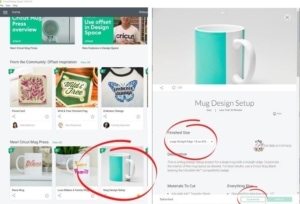
Step One: Open Mug Design Setup Project
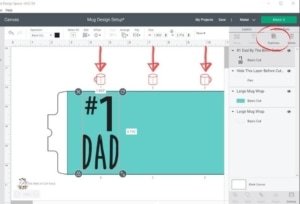
- From Design Space, click on the Mug Design Setup project. The project details page will pop up. From here, select the Finished Size from the drop-down menu. There's a straight, ripped, scallop, wavy and zig zag edge to choose from, as well as 12 oz (small) and 15 oz (large) mug blanks for each. Then click on Customize. The mug design setup project that you selected will open in Design Space.

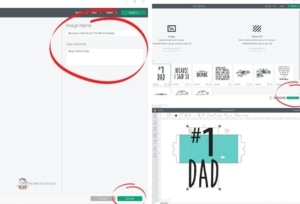
Step Two: Upload SVG Cut Files
- Click on the Upload icon in the menu bar on the left-hand side of Design Space. Then select Upload Image, then Browse. Locate the SVG cut file that you want to upload, then click on Open.
- At this point you can change the name of your image and add any applicable tags. Then click on Upload. Select the image you just uploaded by clicking on it and then click on Insert Images.
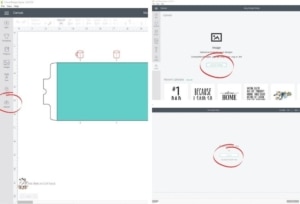
Step Three: Edit/Resize Your Design
- Use the red mug guides from the mug design setup project to line up your design elements on the canvas. Please note that your design must be inside the green/blue rectangle. Anything outside of the rectangle will not transfer to your mug.
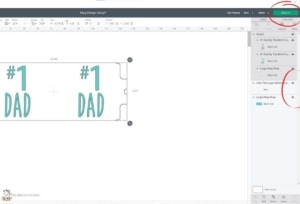
- If you want the same design on the front and back of your mug, just duplicate the image. Again, use the red mug guides to help you get everything lined up perfectly.
- Be sure to hide the guide and maybe the green rectangle if you're not using it with your design. For my #1 Dad mug, I did not use the green rectangle. However, if you want to have solid color or design to wrap around your mug and have the lettering for "#1 Dad" to be white, then you will want to use the green rectangle.
- Click on "Make It" when you're ready to continue.
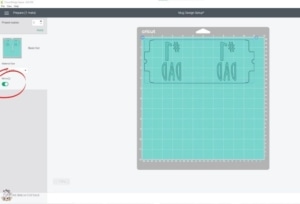
Step Four: Cut Out Your Design
- Next you're ready to cut out your design. Load the infusible ink transfer sheet on the light grip mat and load in your cutting machine.
- Be sure to mirror your image. Then follow the prompts in Design Space. When the design is finished cutting, remove from the cutting mat.
Step Five: Press the Mug
- Heat up the Mug Press.
- Use the lint roller brush to remove any debris from your clean sublimation mug.
- Line up the design against the mug and use the heat resistant tape to secure in place.
- Load the mug into the Mug Press with the handle in the slot and press the lever to secure in place.
- When the mug is finished, release the lever and remove the mug carefully by the handle to a heat resistant surface. Allow the mug to completely cool before revealing your beautiful new design!

Notes
What’s Next?
If you enjoy crafting with SVG cut files like the #1 Dad Father’s Day Mug design, or should I say “designs”, then you might also like these ideas from The Birch Cottage:
Baby Onesie Cricut Project File with 5 Adorable Animals

Using the Cricut Offset Feature in Cricut Design Space
Blueberry Cupcakes with Cream Cheese Frosting

You may also enjoy these Father’s Day ideas on Ideas for the Home by Kenarry® –
- How to Make a Hand Stamped Washer Keychain
- 7 Coffee Craft Repeat SVG Cut Files
- How to Personalize a Wood Bottle Caddy
Love the ideas you see here on Ideas for the Home by Kenarry®? Subscribe today to get our weekly Ideas in Your Inbox newsletter plus other exclusive gifts and offers — all for FREE!